Here’s our comprehensive guide on how to complete every encounter in the new Desert Perpetual raid in Destiny 2.
Desert Perpetual is the newest raid added to Destiny 2 as part of the Edge of Fate expansion. The Contest Mode version of the raid launched today (July 19, 2025), available for the first 48 hours, with Normal Mode unlocking as soon as the first team clears the final encounter.
This raid takes place inside the Singularity on Kepler, set in the mysterious Unknown Space of the Nine. Your main enemy throughout the raid will be Maya Sundaresh’s Choral Vex. In this article, we’ll talk about everything you need to know in order to complete this raid, from the opening encounter to the final boss fight.
Opening Encounter
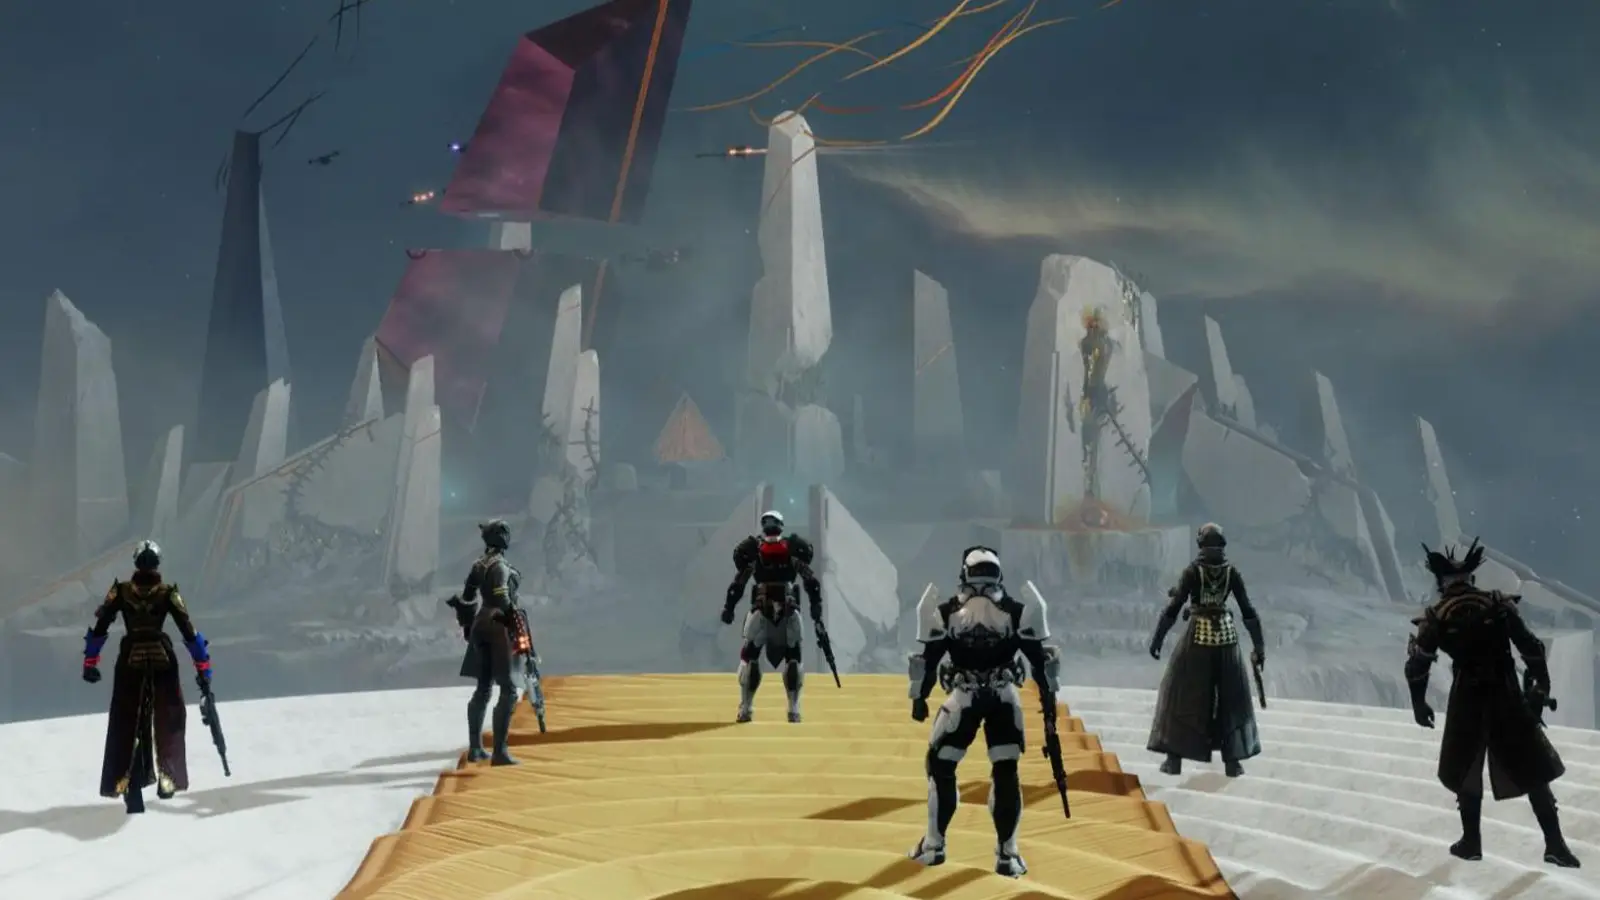
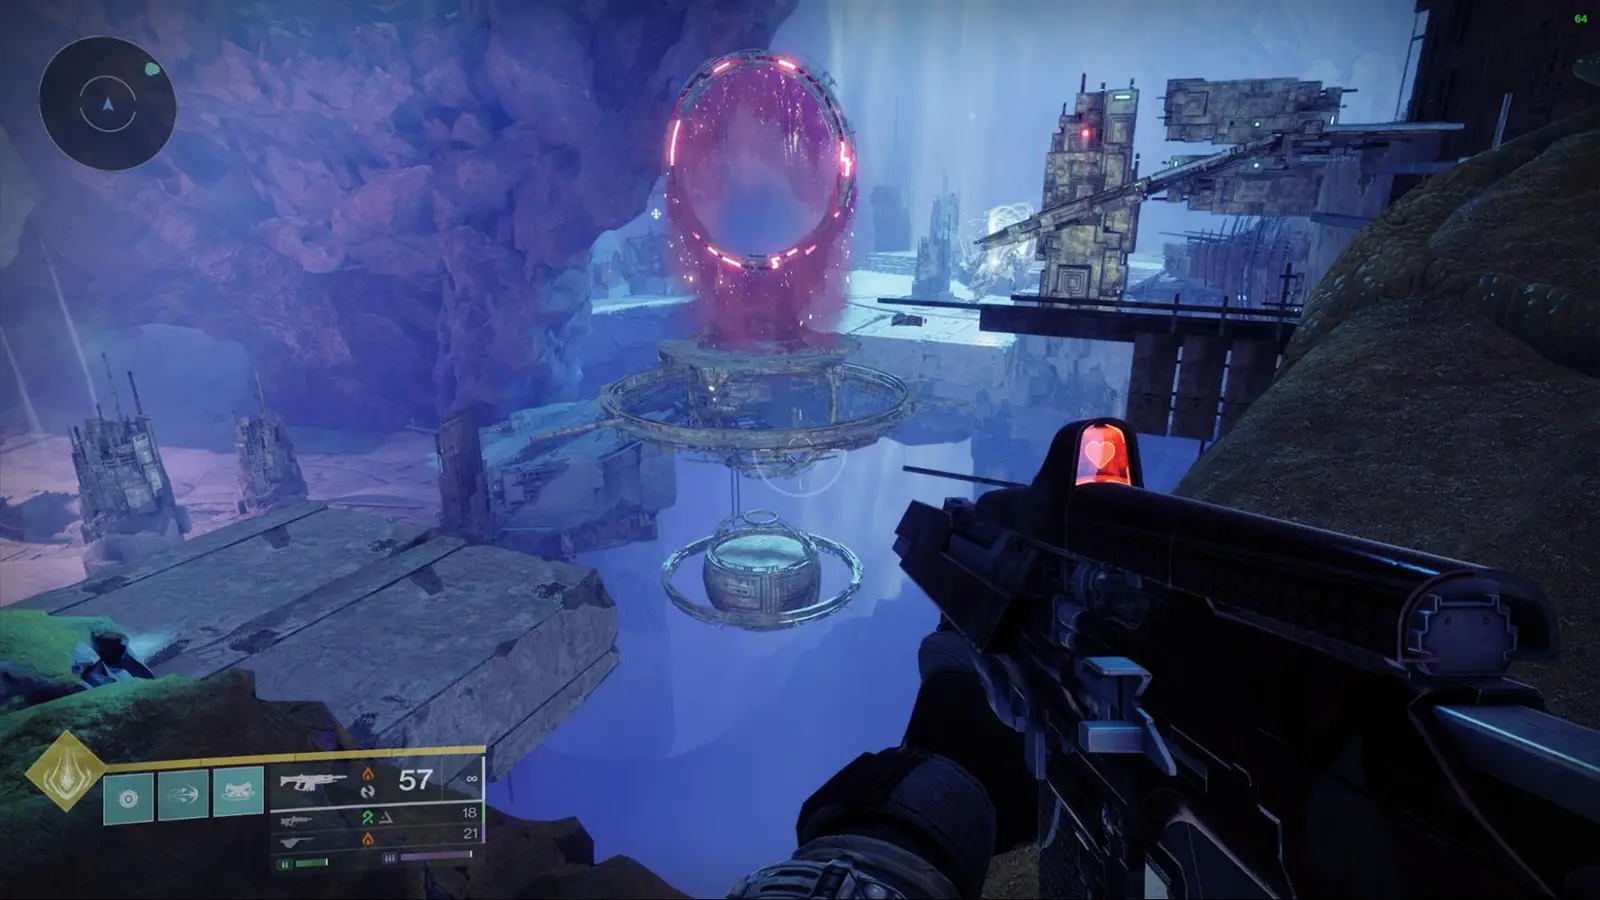
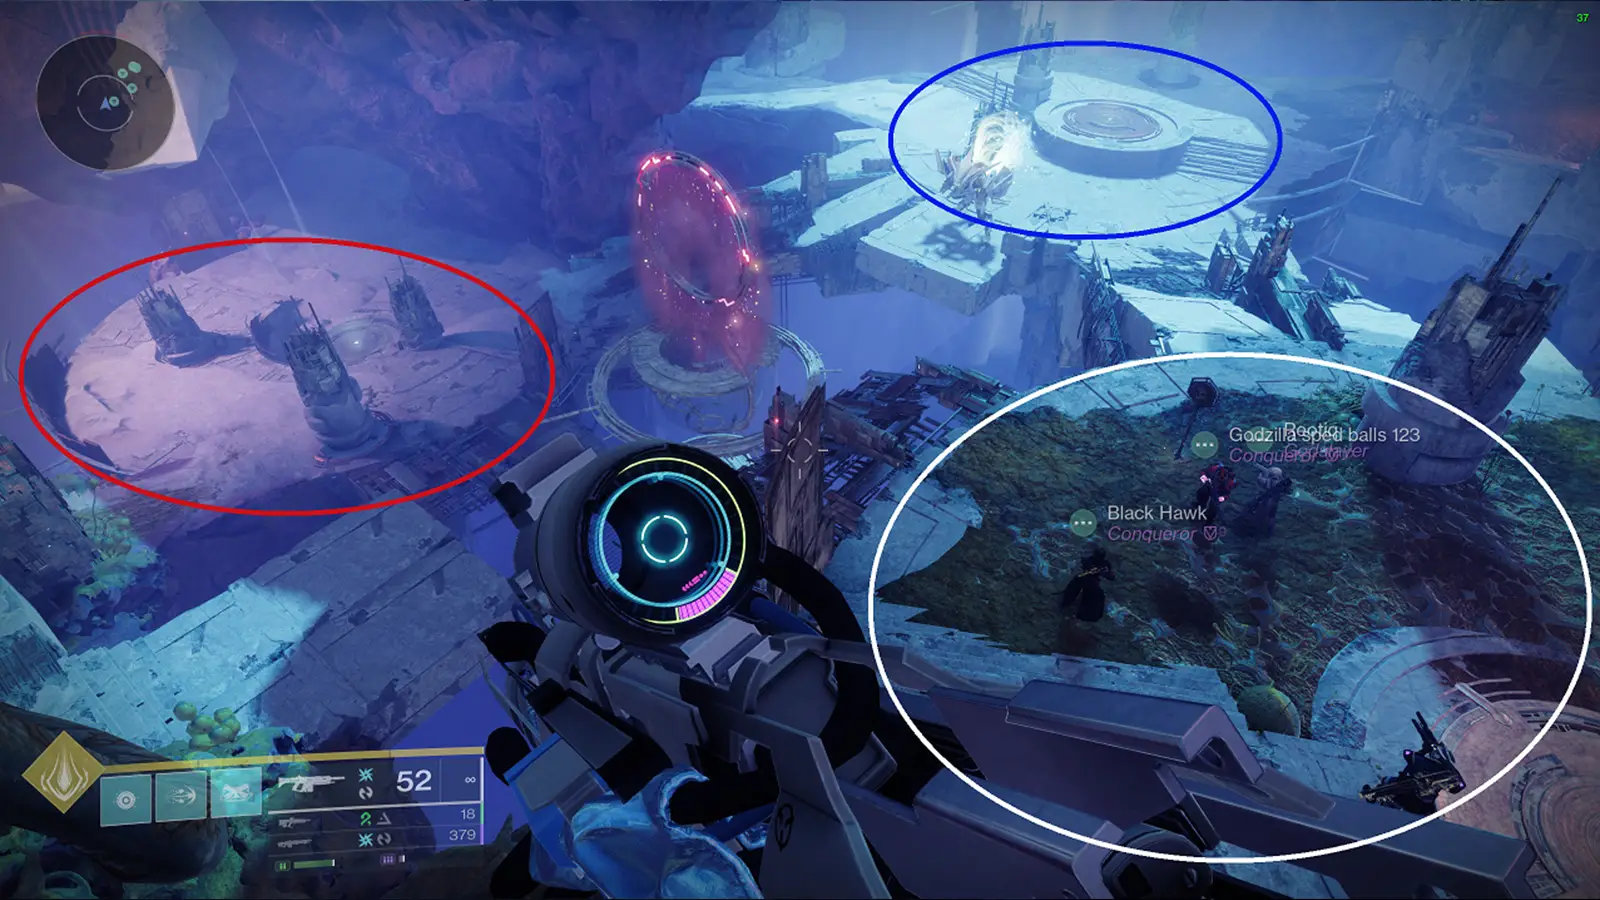
When you load into the raid, you’ll watch an intro cutscene showing the middle platform. This is where you’ll pick which encounter to complete first, second, and third.
You’ll spot a Purple Crystal Tower in the middle, which lets you choose between the available encounters. Just head to this crystal, use the elevator in the center, and interact with the platform that corresponds to your chosen encounter. The path you need to take will open up in the direction of the encounter you selected.
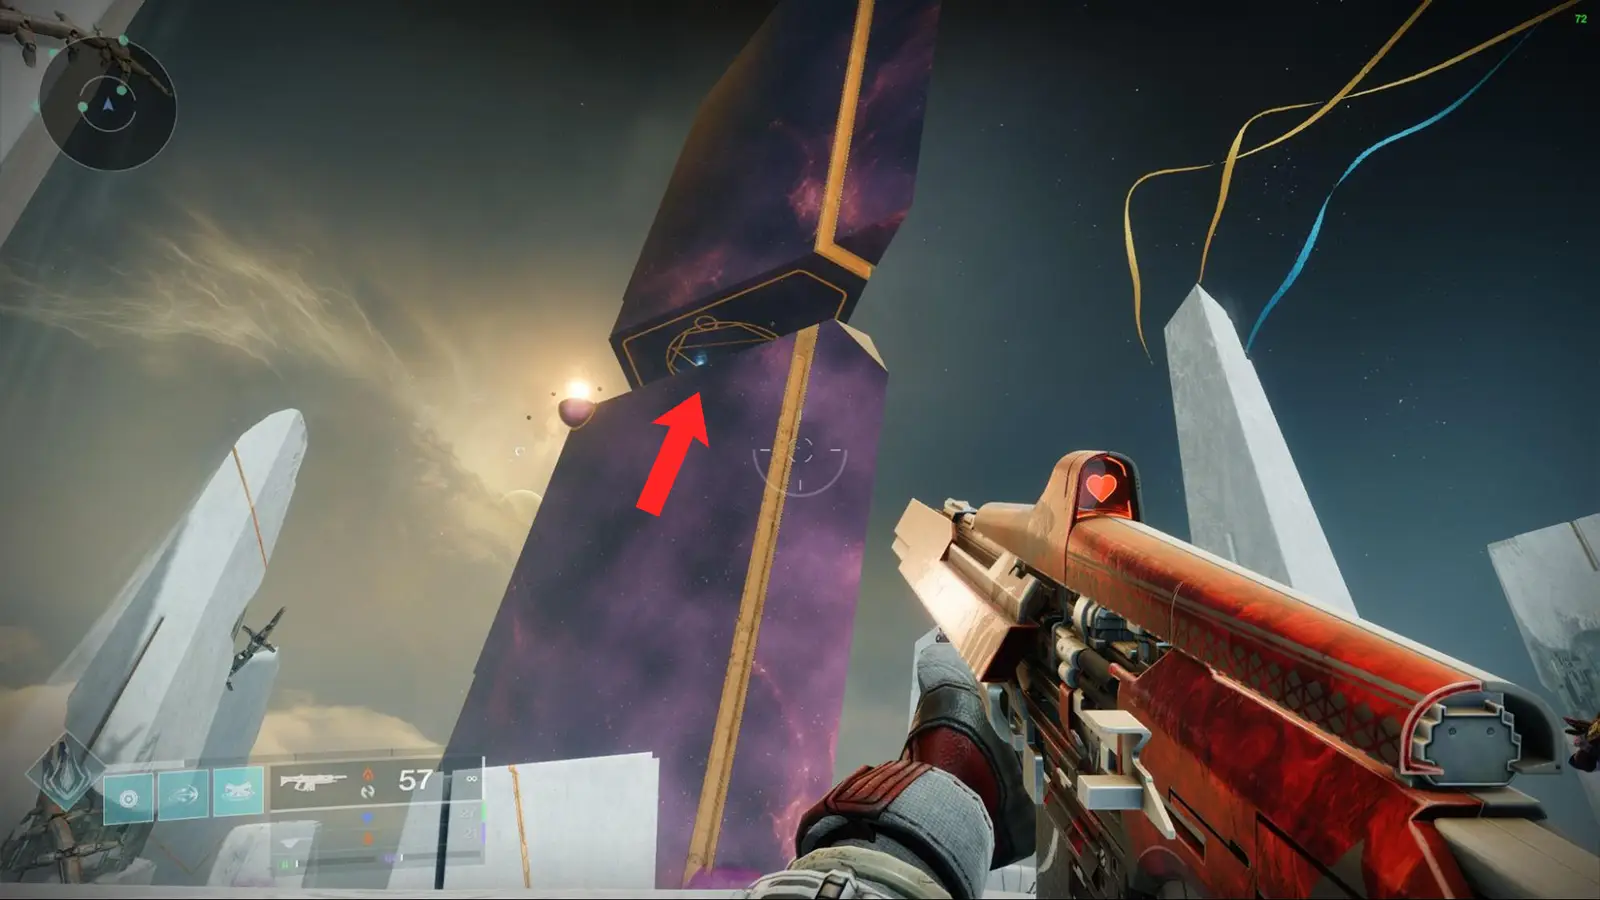
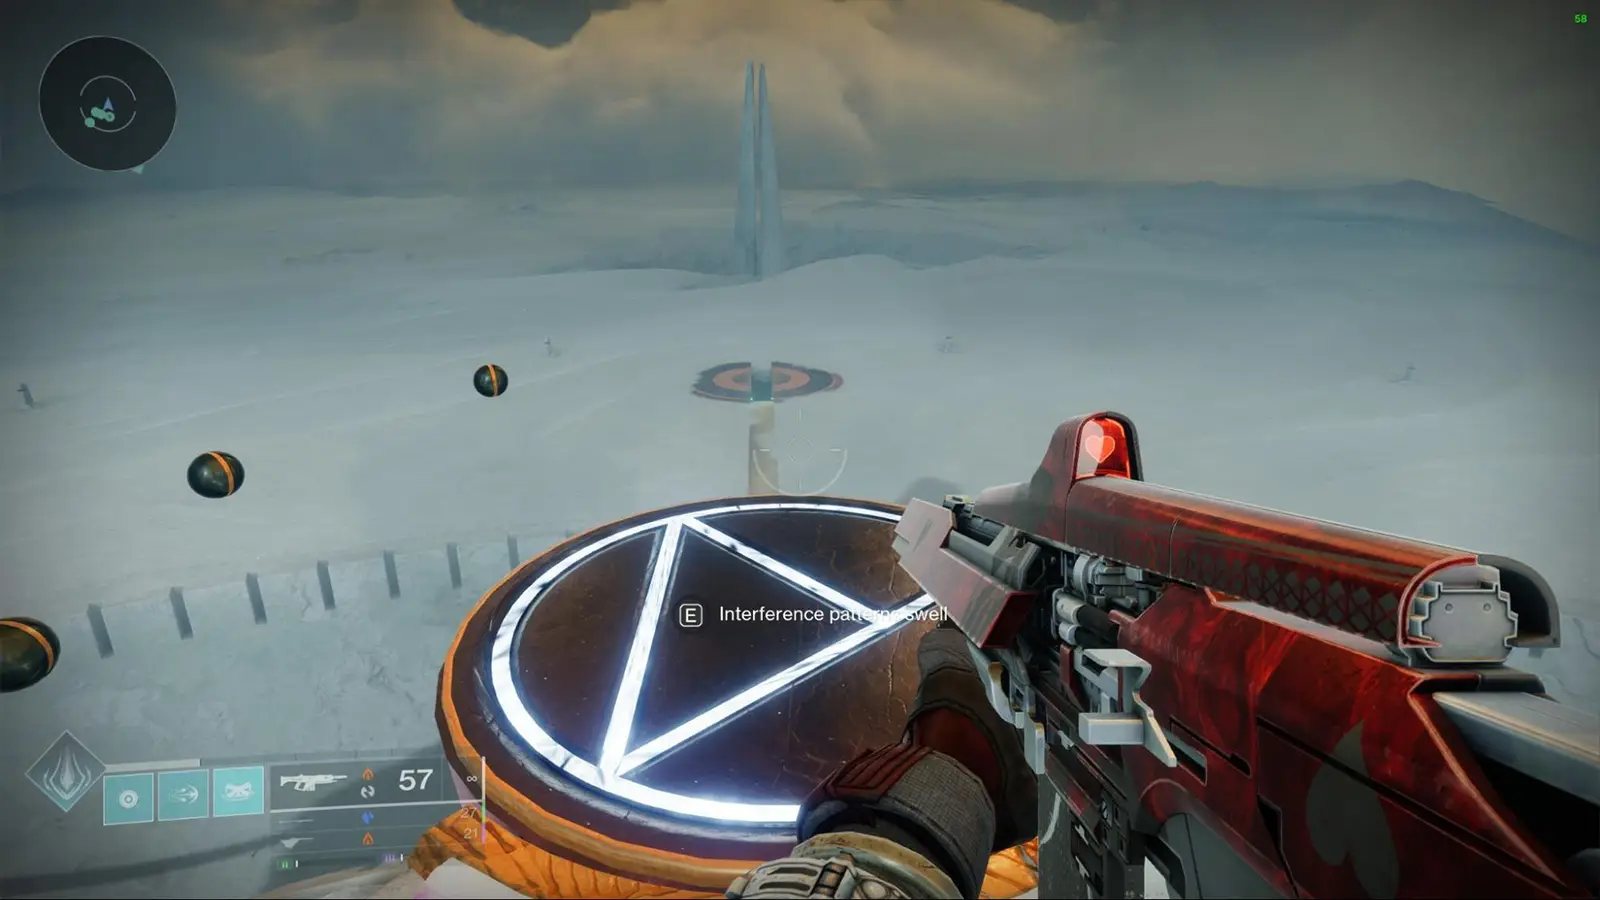
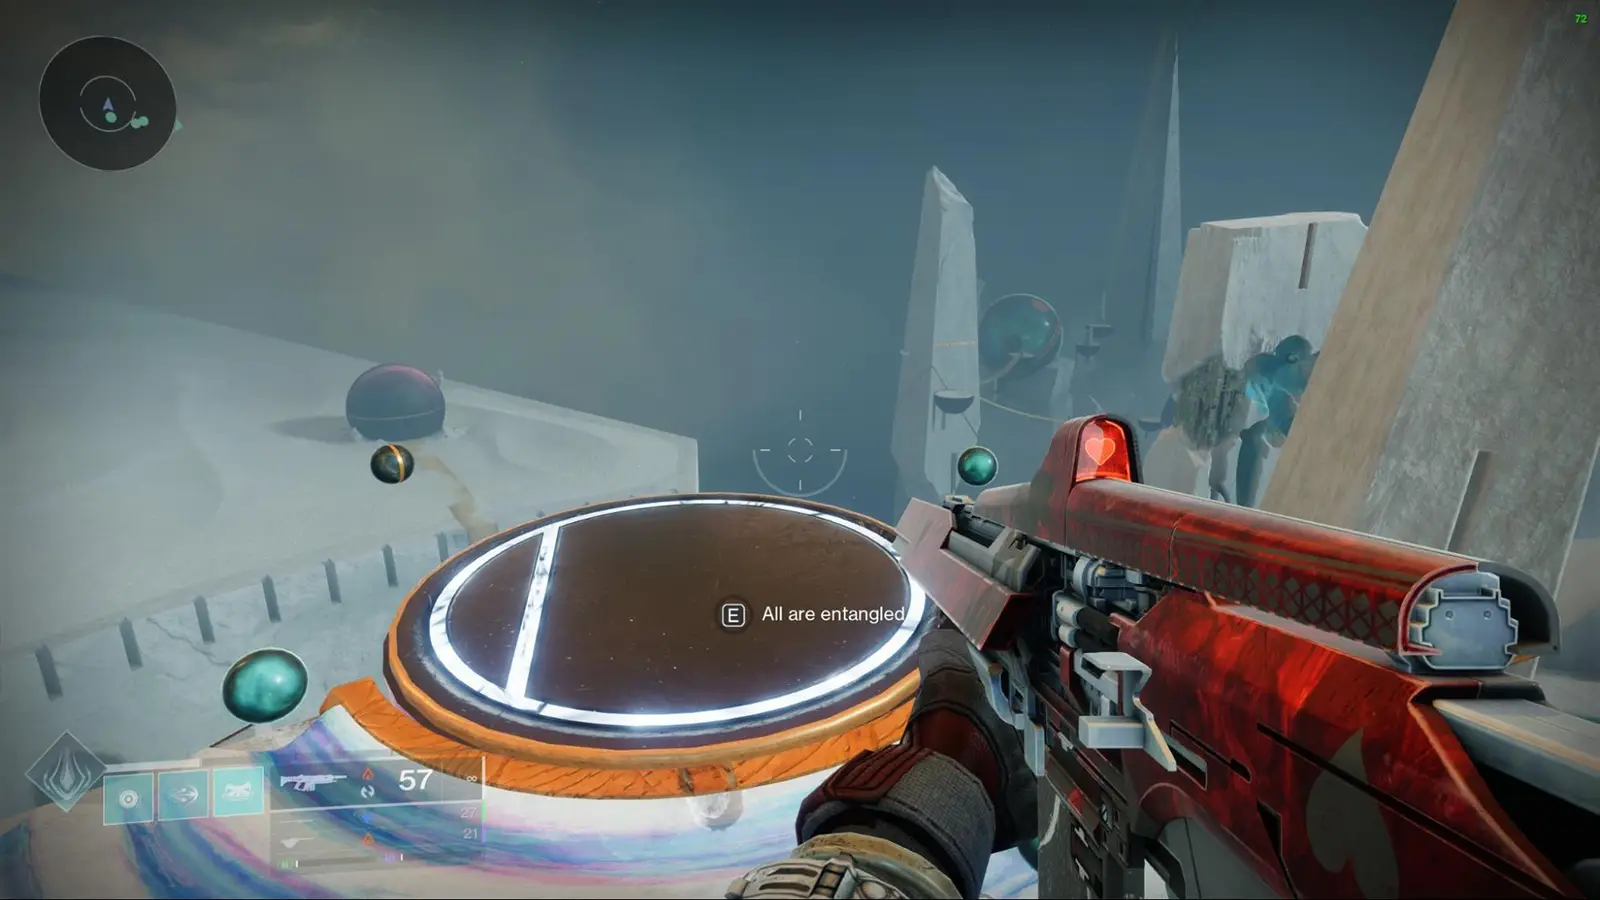
This raid is non-linear, so you can pick the order you want to tackle the first three encounters. Here’s a quick look at three platforms, the text you see when you interact, and the respective boss fights:
- “Axion is axiom” – The Living Rhythm Encounter (Wyvern boss)
- “Interference patterns swell” – The Inverse Function Encounter (Hobgoblin boss)
- “All are entangled” – The Clear Sight Encounter (Hydra boss)

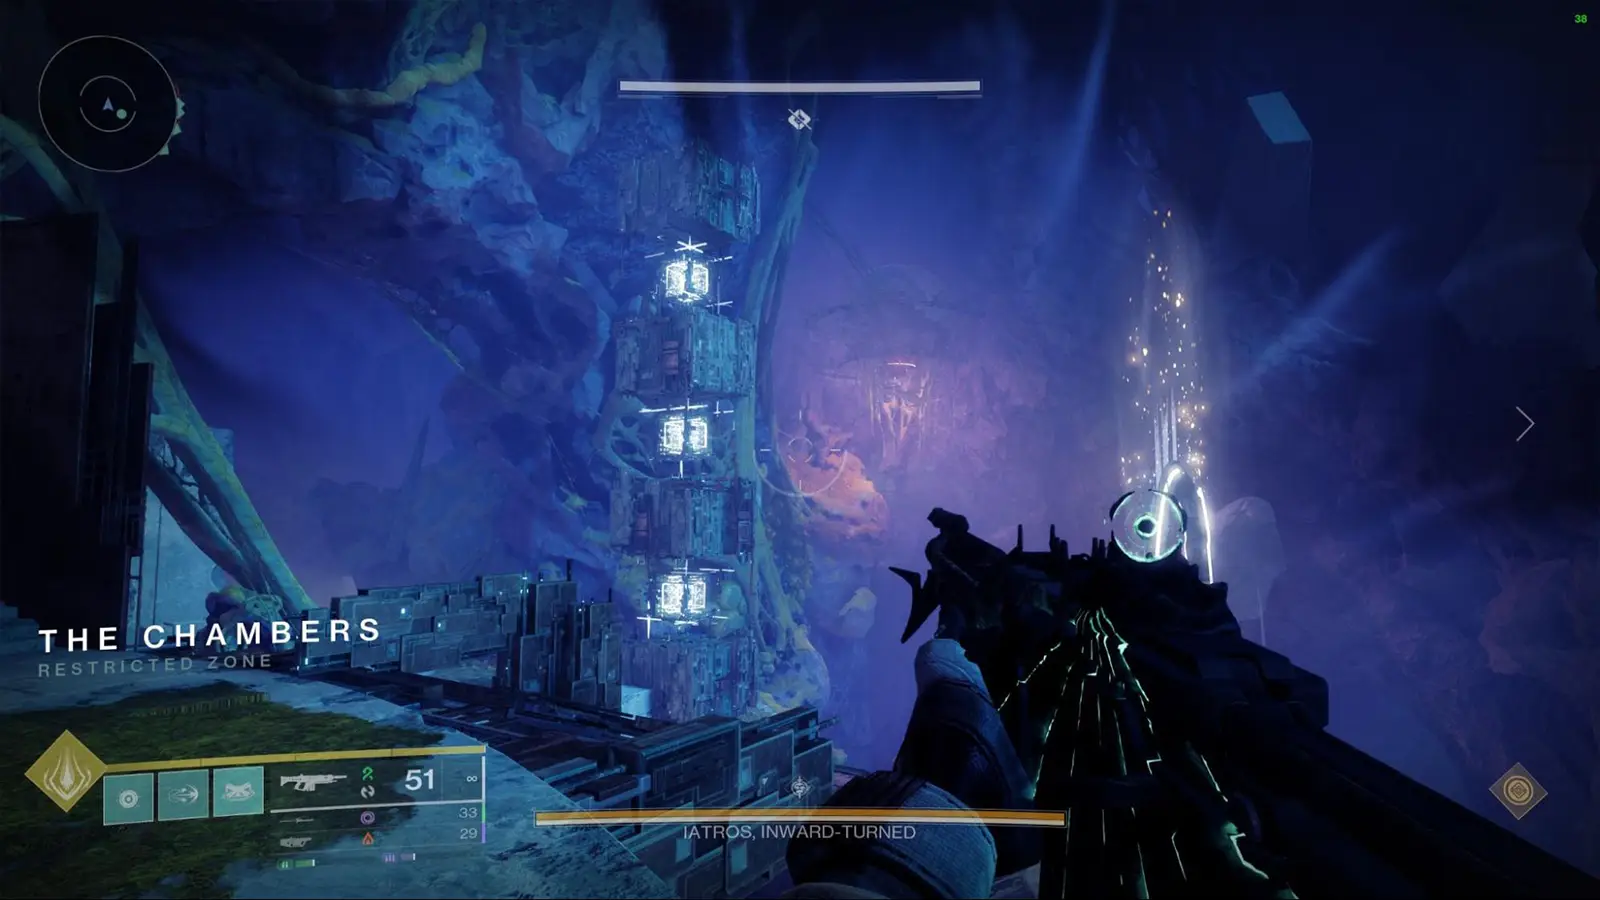
The Living Rhythm Encounter
In the Living Rhythm encounter, your main goal is to take down Iatros, Inward-Turned. The room has three pillars, each with three big Vex boxes on them.
At the start, six Vex Minotaurs will spawn. When you defeat them, they’ll drop Chronos, which can be blue, white, or red. Depositing these Chronos into the Hourglass in the center of the room buys your team more time and prevents the wipe timer from ending your run. Each deposit also progresses the encounter to the next stage.
After enough Chronos have been deposited, every player starts to gain stacks of a buff called Diastole. When you reach 4 stacks, you’ll be launched up into the air. At the same time, one of the three plates in the room will start glowing with a “white” particle effect above it. Stepping on this plate gives you a debuff called Absolute Temporality.
Here’s the goal: Your team needs to build three sets of three platforms for the person holding the debuff (Team C) to climb. At the top of each set of platforms, there will be a small white Vex cube to interact with. Grabbing all three cubes starts the damage (DPS) phase, but keep in mind, the boss will go to the middle and keep on moving.
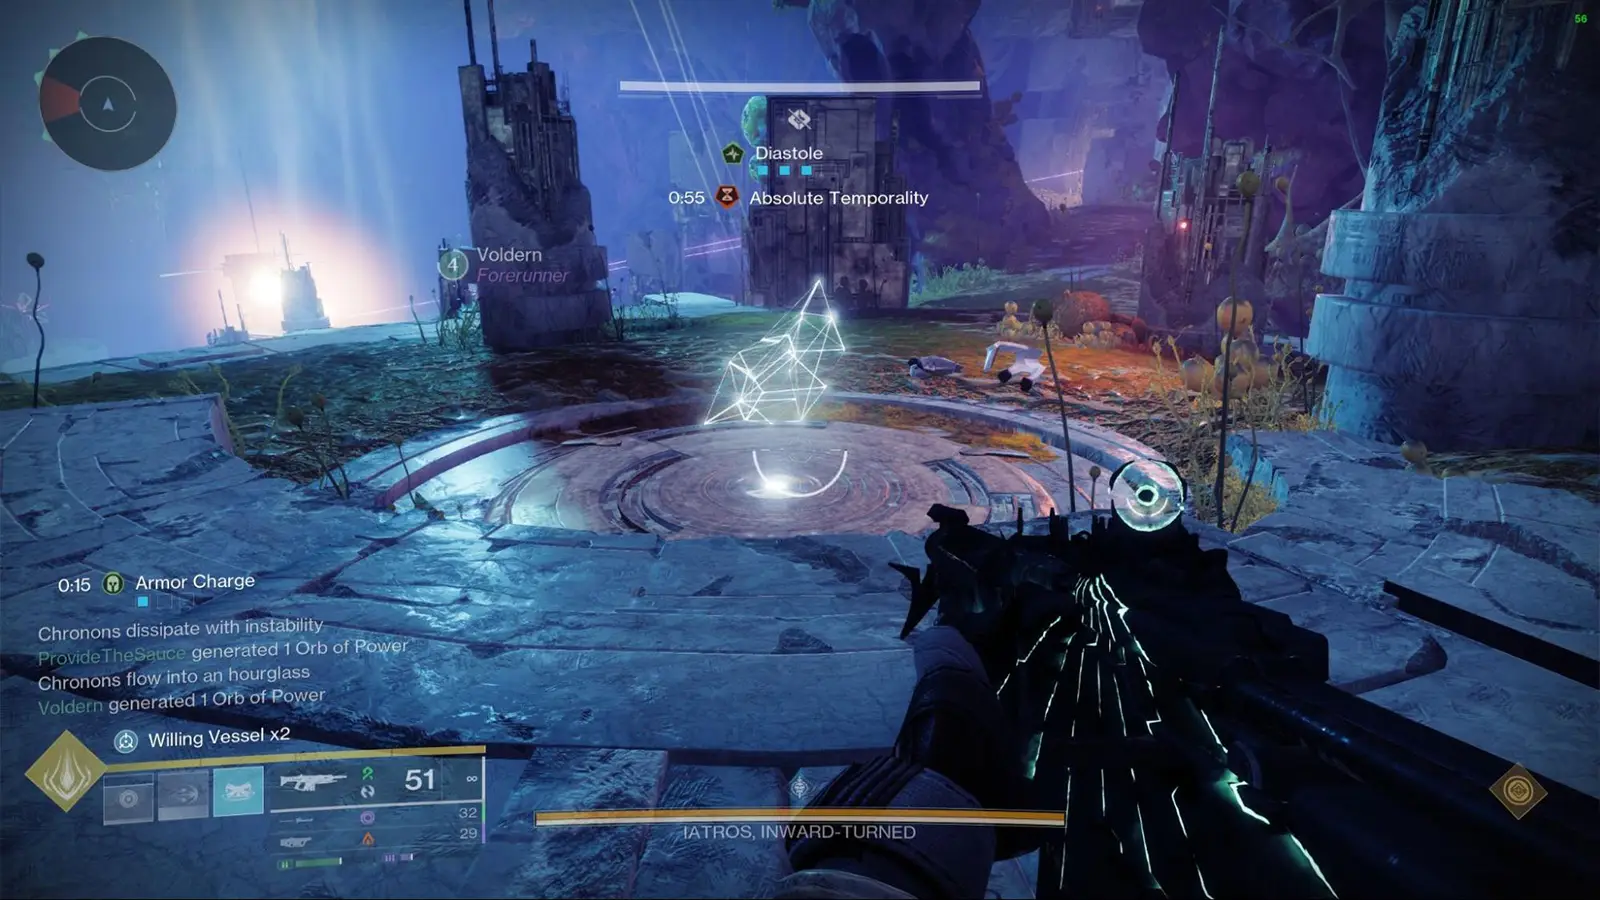
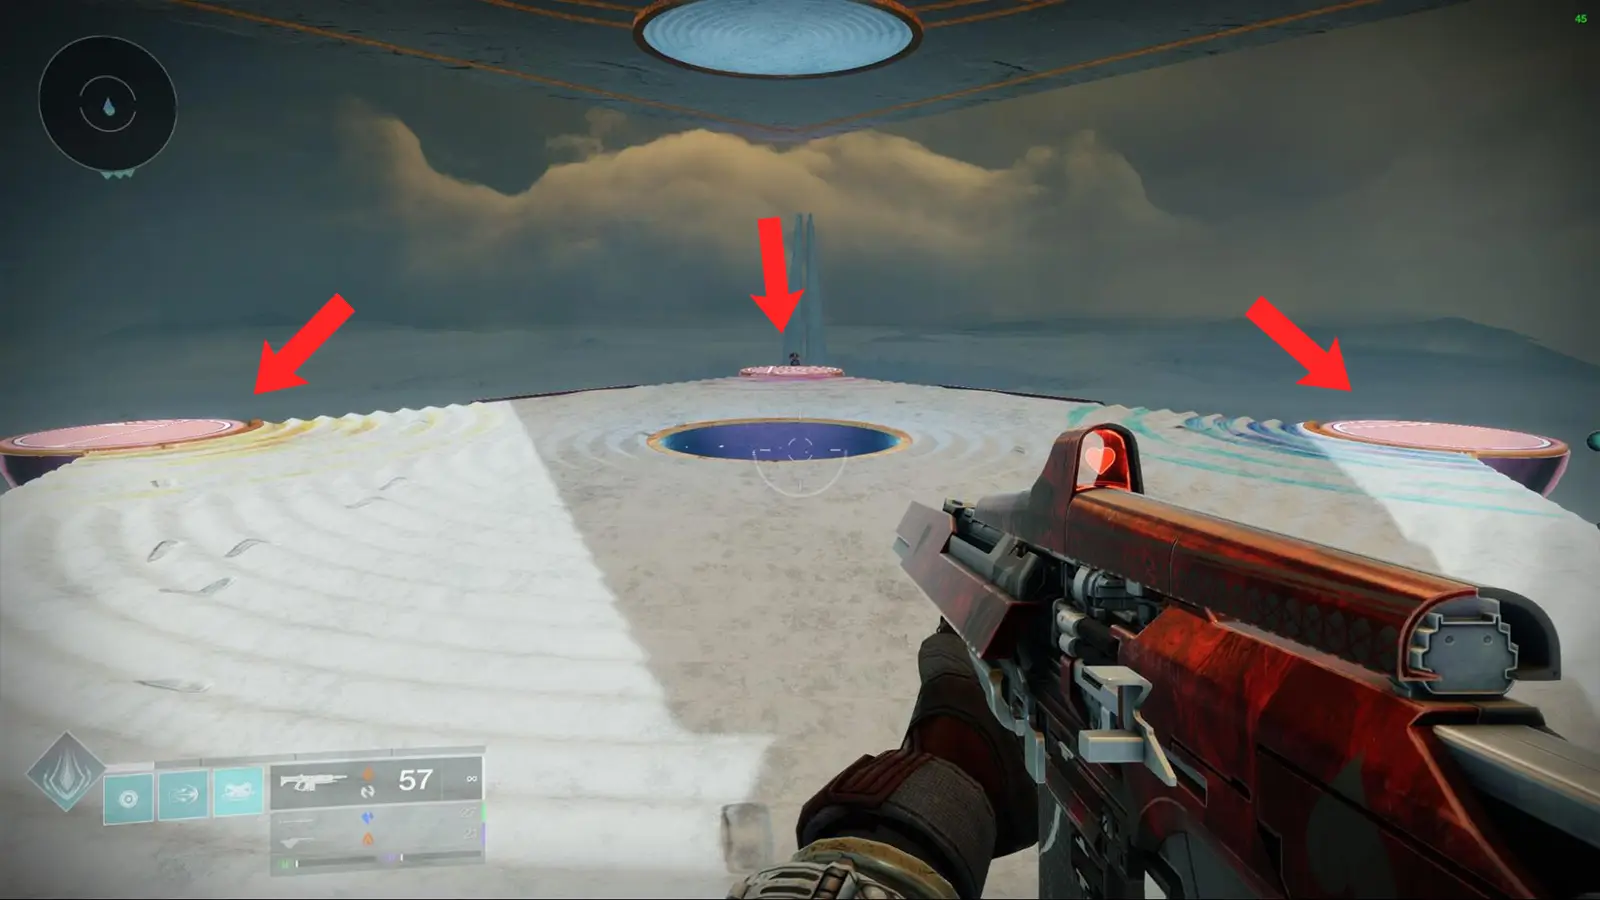
The color of the Chronos pickups from the Minotaurs tells you where the boss will spawn. (see the attached image for reference)
- Red Chronos: The boss spawns on the Red platform and then moves to the Blue platform.
- Blue Chronos: The boss spawns on the Blue platform and then moves to the White platform.
- White Chronos: The boss spawns on the White platform and then moves to the Blue platform.
Here are the roles you need to set up for each of your members to do:
- Team A: Two players focus on finding and defeating the Minotaurs. Pick up the Chronos they drop and deliver them to the Hourglass in the center. Keep doing this as the encounter progresses.
- Team B: Three players should stand by the pillars at the bottom, right where the Vex boxes are. Their job is to shoot the boxes to build platforms for the next step.
- Team C: One player is responsible for climbing the platforms as they appear. This player should look for the plate with the white energy effect to pick up the debuff.
Note: During the damage phase, a person will have to kill a Minotaur and dunk its Chronos to prevent the wipe mechanic.
Order of Operations
- Team A deals with the 6 spawned Minotaurs and delivers their Chronos (they do that throughout the encounter until you reach the DPS Phase)
- Team B and C help with clearing ads until all six Chronos are deposited.
- As soon as the 6 Chronos have been delivered to the Hourglass, Team B gets in position by their assigned pillars, and Team C looks for a vex plate with white energy.
- Team C steps on the plate to get the Absolute Temporality debuff. As soon as Team C’s Diastole buff hits four stacks, Team B shoots the bottom Vex box on their pillar to create a set of platforms.
- Team C climbs the first set of three platforms to interact with the small white Vex cube.
- After calling it out and grabbing the first cube, Team B and Team C repeat the process, this time, shooting the middle Vex box, then the top Vex box for the next two climbs and cubes.
- After Team C interacts with the third and final small vex cube, the Damage phase will begin.
- Your team will have around 15-20 seconds to damage the boss.
- After the damage phase, repeat the entire process until you defeat the boss.
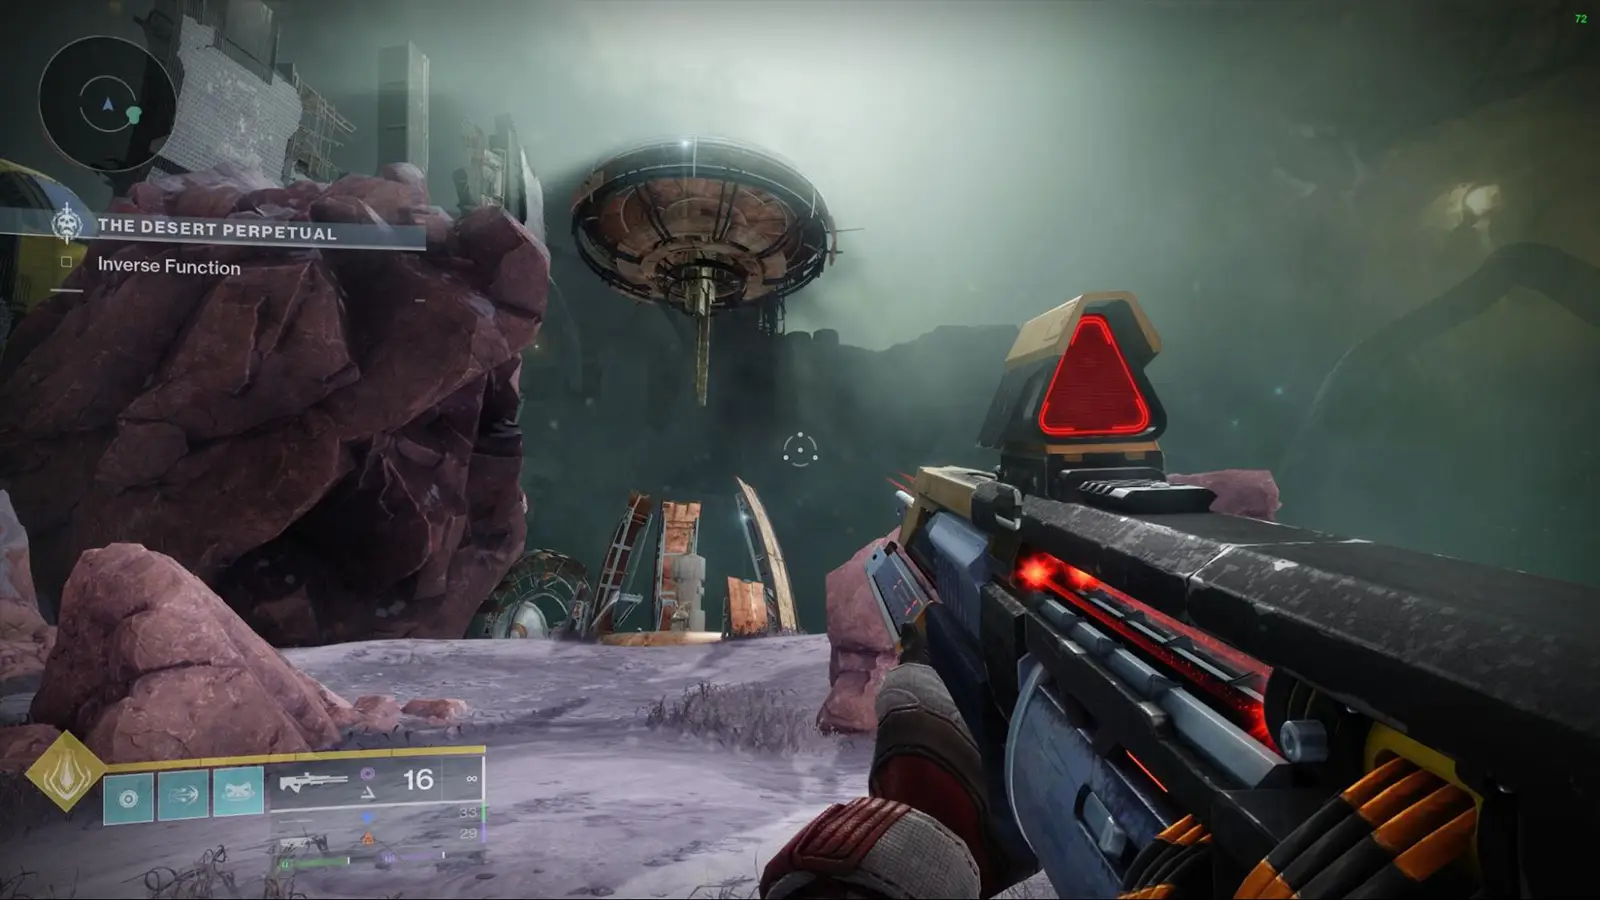
The Inverse Function Encounter
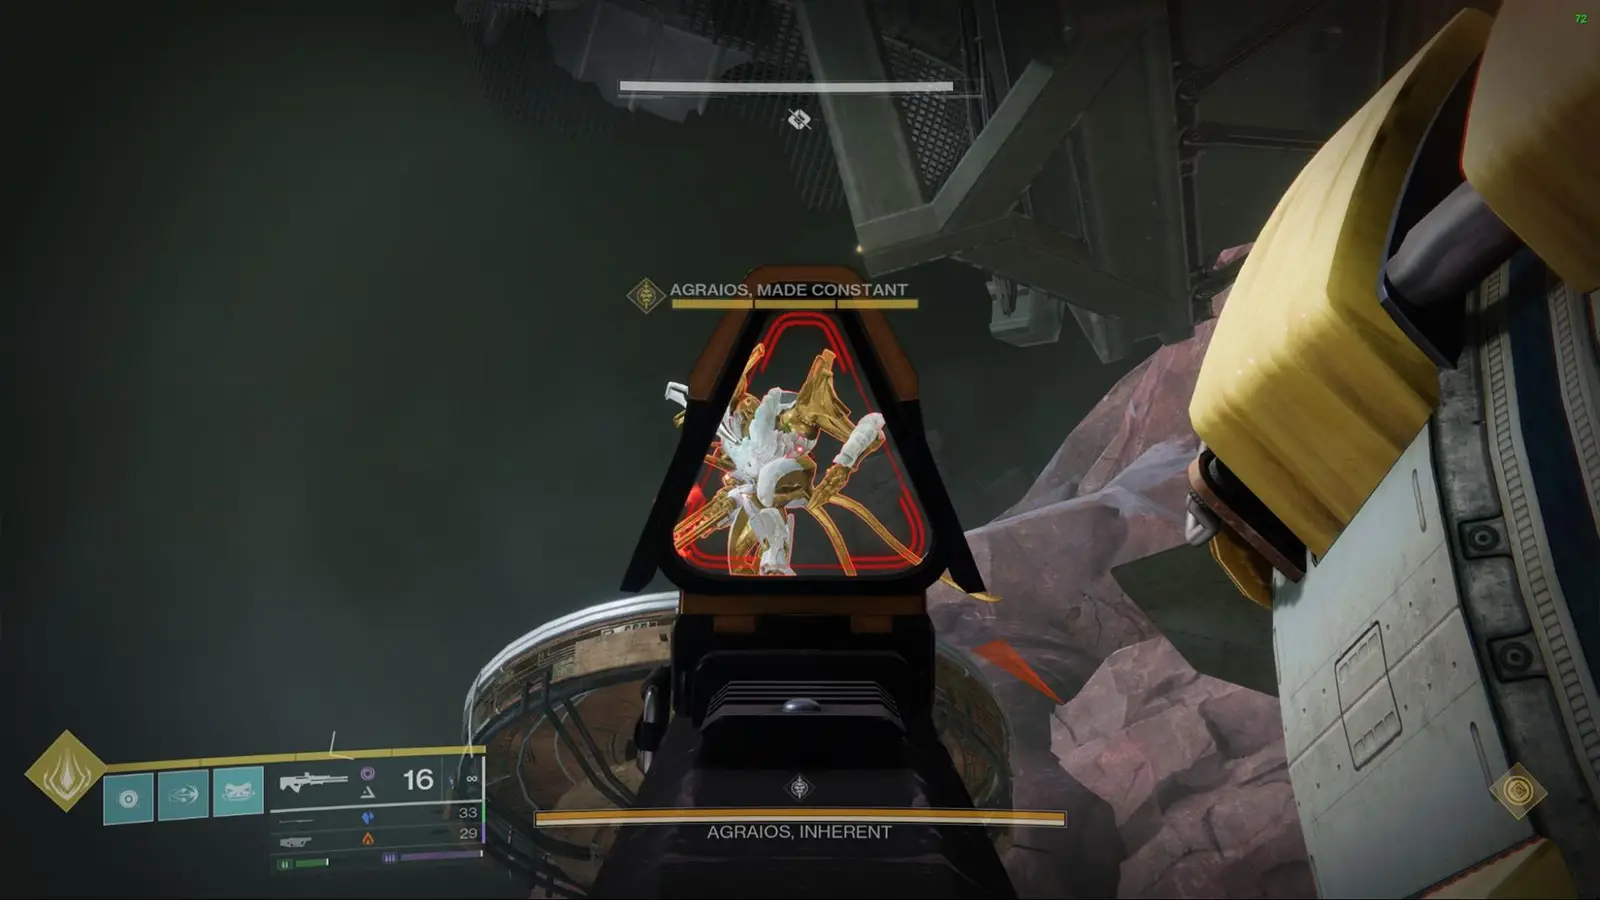
The Inverse Function is one of the three main encounters you can choose in the new Desert Perpetual raid. Your goal here is to take down Agraios, Inherent.. As soon as the encounter starts, Agraios splits into three bosses: Agraios made Cyclical, made Absolute, and made Constant.

Each of these bosses is tied to a unique buff that your team can pick up. Here’s how the setup looks:
- Left: Cyclical
- Middle: Absolute
- Right: Constant
A giant Vex Hydra will spawn in the arena. Take it down first, and you’ll see five Minotaurs appear. When you kill these Minotaurs, they drop Cobalt Chronons, which you’ll need to pick up and use to charge the five Accelerator rings in the center of the room. (killing all five Minotaurs causes another Hydra to spawn)
Once all five are charged, three Wyverns will show up, one for each floating platform where the bosses are located. You’ll also notice a bunch of black and orange Vex-like particles at each pylon’s deposit spot.
Keep in mind, if you take too long, the boss starts aiming lasers at visible players (similar to those emitted by Seraph Towers in Operation: Seraph Shield). If the timer hits zero, you’ll get hit with an insta-kill bolt, so you need to keep moving to hide.
Once the three debuff holders are in place, the first player (A) deposits their buff under the boss that matches their debuff, which gives them a new buff called Temporal Alignment with five stages. While this is happening, the other two buff holders, B and C, need to look at the Accelerators in the middle of the room and call out which ones aren’t glowing red.
Team 2 then needs to grab Blue Chronons and use them to charge up those specific Accelerators. When those are all powered up, player A should run through all five Accelerators to fully charge their Temporal Alignment buff. This action will turn A’s grenade into a Detention Cage, which is key for blocking the laser fired by the boss at one of their teammates.
Roles and Team Setup
Here is what roles you need to set up for each of your members to do:
- Team 1: 3 people that go on one plate in the middle each: First on the left plate to get Cyclical debuff (A), second on the middle-top plate to get Absolute debuff (B), and third on the right plate to get Constant debuff (C)
- Team 2: 3 people that will focus on ad clear and delivering Chronos in phase 2 (after callouts from the debuff holders)
Order of Operations
Here is the order of operations to get to the DPS Phase:
Phase 1:
- Everyone ad clears and defeats the big Vex Hydra enemy.
- Everyone looks for and kills the five Minotaurs to get their Chronons (they appear underneath or near each platform boss can appear at)
- People who pick up the Chronons, deliver them to the Accelerator rings, by passing through their hole
- Team 1 goes under their respective boss to kill the Wyvern there. In the meantime, Team 2 looks for and defeats the Big Hydra to spawn more minotaurs.
Phase 2:
- As soon as Team 1 deals with their Wyverns, they need to go to the middle to pick up their debuffs: Left Cyclical (A), Middle Absolute (B) & Right Constant (C)
- If you are fast enough, quickly, or before the encounter begins, decide who will be the first among you three to interact with their Vex Pillar under the Boss corresponding to your debuff. In this guide, the person (A) will do it. This will make that specific boss activate the targeting laser and give person (A) the Temporal Alignment buff with 5 stages. (Important: This person should not die)
- If you are not fast enough, the Boss will grow tired and will activate the targeting laser at random among the three bosses. The person with the debuff corresponding to the boss needs to interact with the Vex Pillar under the boss. (Let’s also imagine it was the person (A) for purposes of this guide.)
- The Rings begin to glow with Arc energy, and their coils begin to glow red. Debuff holders who did not interact with the Vex Pillar will notice two that are not glowing red each. They need to call them out in chat with the numbers mentioned earlier in the article.
- Team 2 needs to deliver the Cronons to the Accelerator Rings based on Team 1’s callouts. After which, all Ring’s Arc energy will disappear, and their coils will stop glowing red.
- At this point, player A needs to go through all 5 Rings to charge their Temporal Alignment buff.
- After going through all 5 Rings, player A’s grenade will become a Detention Cage. They need to tell another player, eg, B, to be visible to the boss and count down their debuff timer (it will appear at the top of the screen. Player A should use their new grenade on the top of player B when their countdown is at around 2-3 seconds left.
Damage Phase:
- The DPS Phase will begin shortly after finishing phase 2, so quickly decide who will be extending it. Let’s use player A in this guide.
- The boss will spawn in the middle of the room and be able to be damaged. Shortly after doing some DPS, player A will have to pass through all 5 Rings to charge their Detention Cage grenade. In the meantime, the other 5 members of the fireteam should continue damaging the boss.
- After a bit of time, the boss will teleport away to one of the platforms and will begin targeting people with their laser again. During this time, other players should continue damaging it, while players A and B repeat what they did to begin the DPS Phase. (Step 7 of the Phase 2).
- After doing so, the Boss will reappear in the middle. Repeat steps 2 and 3 once more to extend the DPS Phase further.
- After two phase extensions or if none are made, the boss will disappear again. And the encounter mechanics will return to Phase 1; however, please note that player A’s corresponding boss will no longer appear on the platforms, meaning player B or C will have to interact with the Vex Pylon in Phase 2.
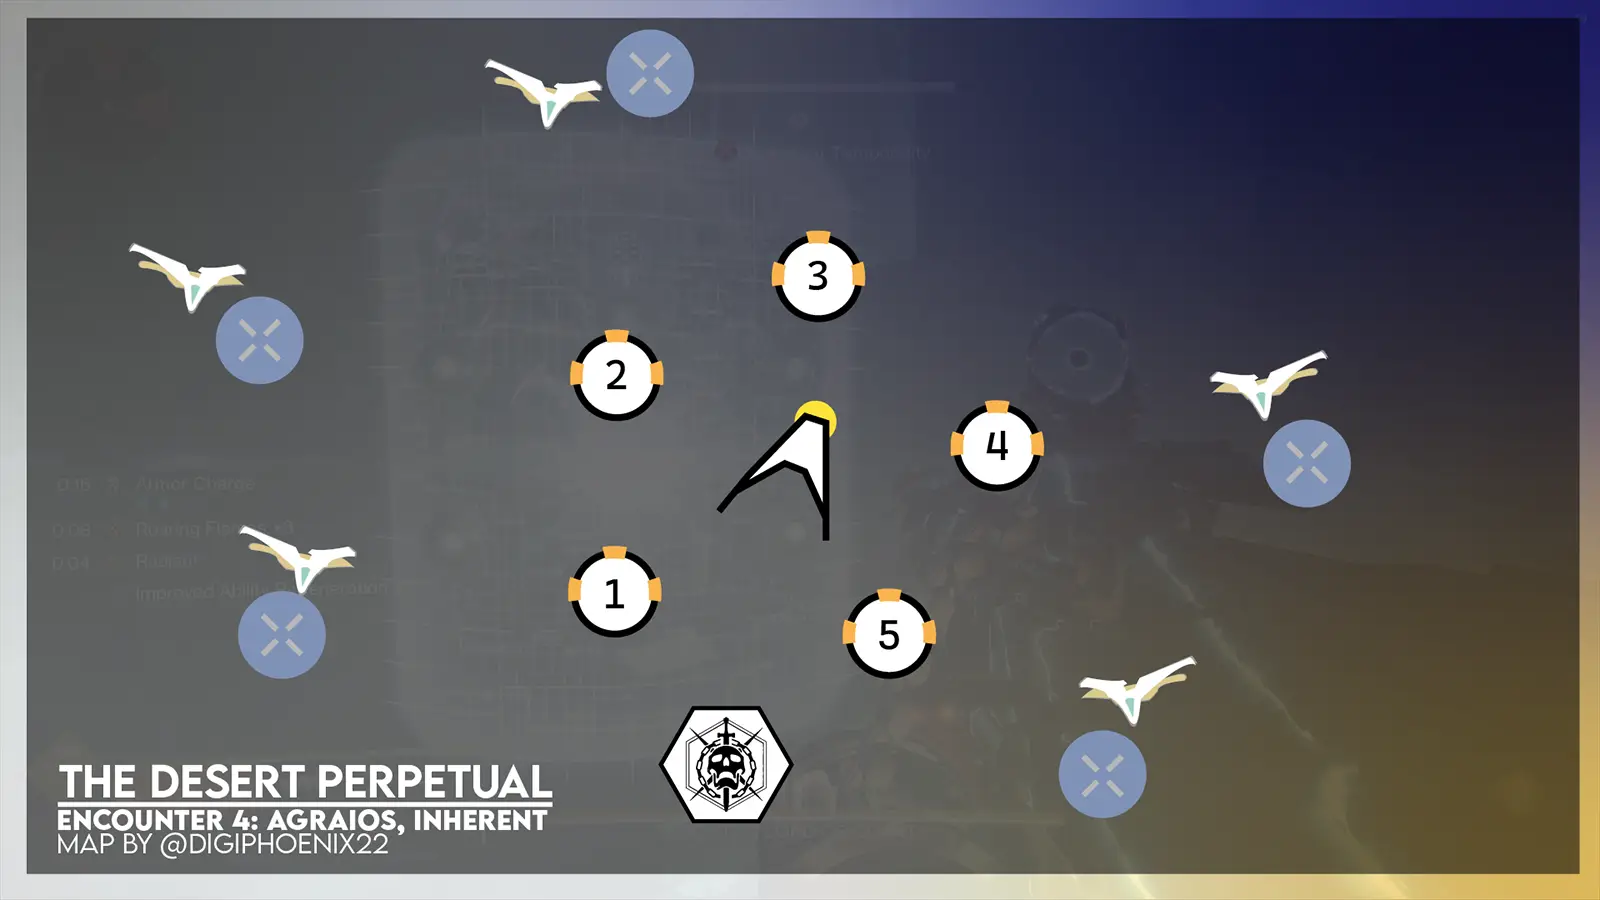
Repeat all the steps until you have defeated the boss. You can check out the encounter map below. (courtesy of Digiphoenix22)
The Clear Sight Encounter
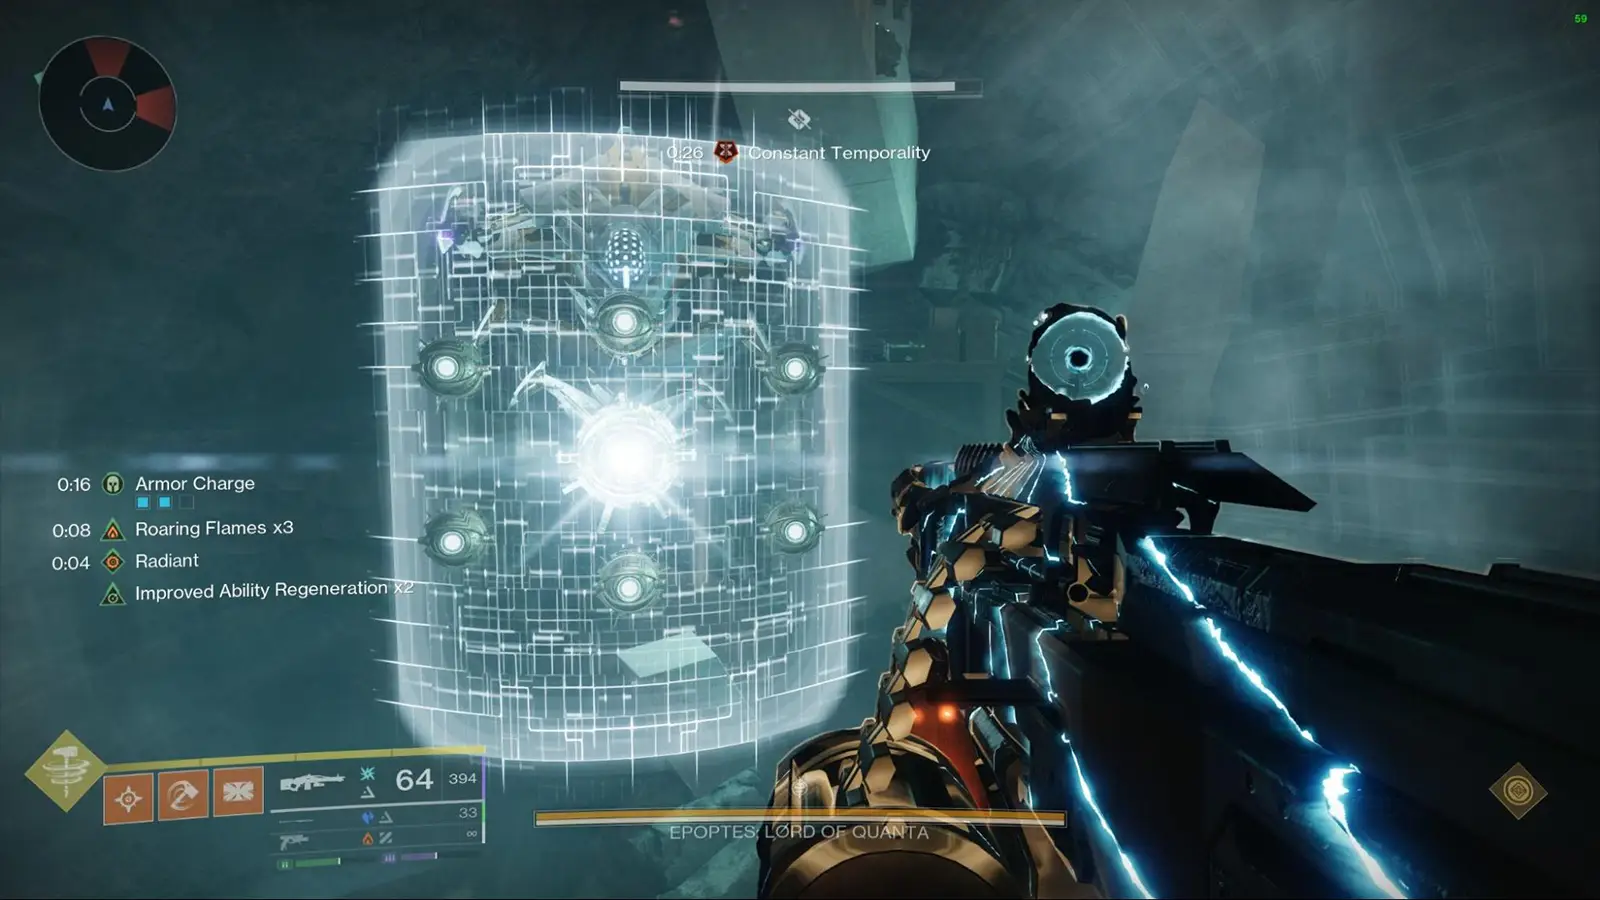
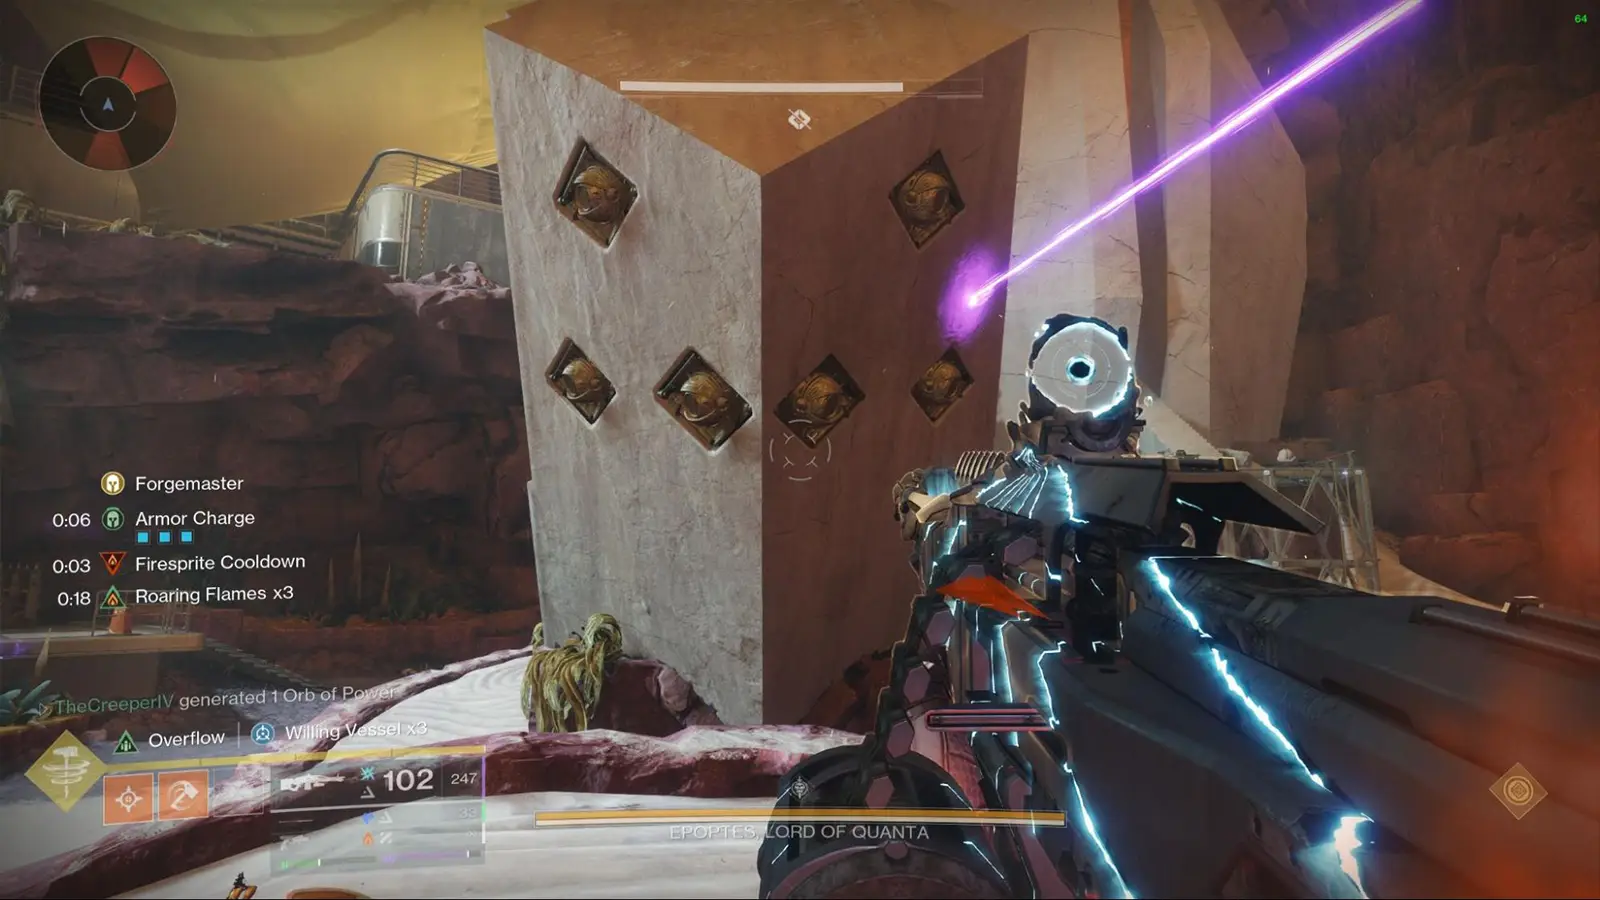
The goal in the Clear Sight encounter is to take down Epoptes, Lord of Quanta. At the start, you’ll notice the room quickly fills up with Goblins, Fanatics, and Minotaurs. Your fireteam should focus on clearing these adds until a pair of Time Magistrate Cyclops spawn, one on each side of the room. Take them out as soon as possible.

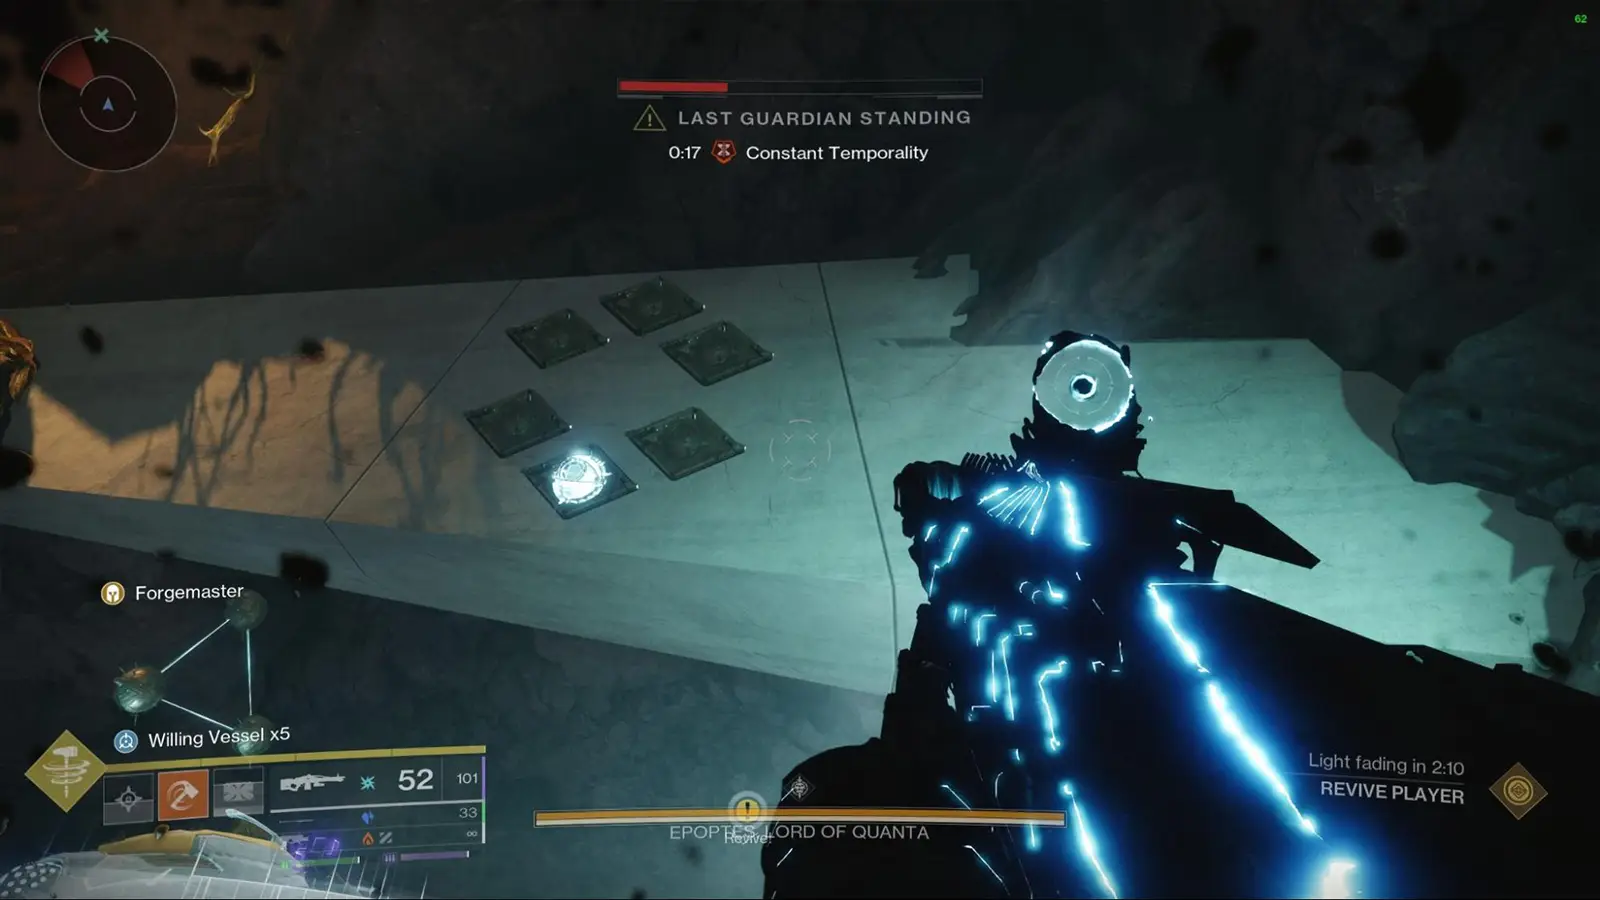
Once the Cyclopses are down, the plates on each side of the room become active. Two players need to step on these plates at the same time, which will grant them the Constant Temporality debuff. This buff lasts 30 seconds. It allows players to destroy the “Eyes” throughout the encounter.
When two players grab the Constant Temporality debuff, they should immediately head into their assigned side rooms, one on the left, one on the right. Once inside, stand in the light beam in front of the shield that’s marked by the glowing Flashlight eye.
Each room contains two pillars, and each pillar has six eyes on it. There’s also a boss inside with its own shield, which also has six eyes and a main flashlight eye. The players inside need to communicate with each other and call out which eyes to shoot by looking at the pillars in front of the shield with the Flashlight eye.
The goal is to shoot as many eyes as they can before time runs out. After a bit, another Cyclops will spawn on each side, and a triangle made of three eyes will show up above the boss. At this point, a new set of two players must grab the debuff and go to the middle of the main room. There, they’ll call out which of the eyes in the triangle isn’t glowing for their side. This helps tell the original players in the side rooms exactly which eyes they need to shoot next.
Once players inside the rooms hear the eye callout from their teammate, they shoot the specific eye that was called out. Doing this stops the wipe from starting too early, so your team can keep focusing on breaking all the shield eyes.
After all six shield eyes have been destroyed, you’re able to take out the flashlight eye as well, which will defeat the boss inside that room. When that’s done, exit the room and look for the Flashlight eye on both shields glowing in the main area. Shooting this eye officially starts the damage phase.
During this phase, two players will be randomly picked to go to the shield with the glowing flashlight eye. Their job is to break all six eyes on that shield, and then destroy the Flashlight eye at the end. If both players manage to break their assigned shields, the damage phase gets extended, and after a short moment, two new players will be chosen to repeat the shield-breaking mechanics. This cycle continues until the boss stops picking new players, which signals the end of the damage phase.
Roles and Team Setup
Here are what roles you need to set up for each of your members to do:
- Inside Readers: Two players to go inside the Left and Right rooms each.
- Outside Readers: Two people to do middle room mechanics, on the Left and Right sides of the room, each.
- Ad Clear: Two people on ad clear, who mainly help inside Rthe eaders on their corresponding side.
Order of Operations
Here is the order of operations to get to the DPS Phase:
- Everyone starts in the middle of the room, clearing out all the enemies that spawn.
- Eventually, two Cyclops will appear, one on each side. Take them both out.
- Two players (your Inside Readers) stand on the plates at the same time to pick up the Constant Temporality debuff, then head into their assigned rooms (left or right).
- Inside the rooms, each Inside Reader stands in the light and looks at the pillar with six eyes. The Inside Readers tell each other and call out which eyes they need to shoot.
- After a bit, a triangle of eyes will appear above the boss inside the room. At the same time, new Cyclopses spawn. The two Outside Readers defeat these Cyclopses, grab the debuff from the plates, and go to their shield by the boss.
- Each Outside Reader looks at the triangle of eyes and calls out which one isn’t glowing. For example, if the Left Outside Reader says “Top,” then the Right Outside Reader will need to shoot the “Left” and “Right” eyes on their pillar.
- Inside Readers shoot whichever eyes in the triangle were called out by their Outside Reader partner. Doing this removes their debuff, so they’ll need to pick it up again to keep working on the shield eyes.
- Once the Inside Readers have destroyed all six shield eyes in their rooms, they get the Probabilistic Lancet buff. This lets them finally break the big Flashlight eye and destroy the Hydra boss inside their room.
- After the inside bosses are down, the Inside Readers leave the rooms and shoot the big Flashlight eye outside. This starts the main DPS phase, where everyone can damage the main boss.
Damage Phase:
- Two players are randomly chosen. They each go to the shield that has a glowing Flashlight eye.
- Both players need to destroy all six eyes on their shield, then break the Flashlight eye as quickly as possible.
- Breaking both shields will extend the damage phase and remove the shield that can block the boss.
- This process will repeat about two or three times. If you don’t manage to break both shields in time, the damage phase will end sooner.
Repeat all the steps again until you clear the boss.
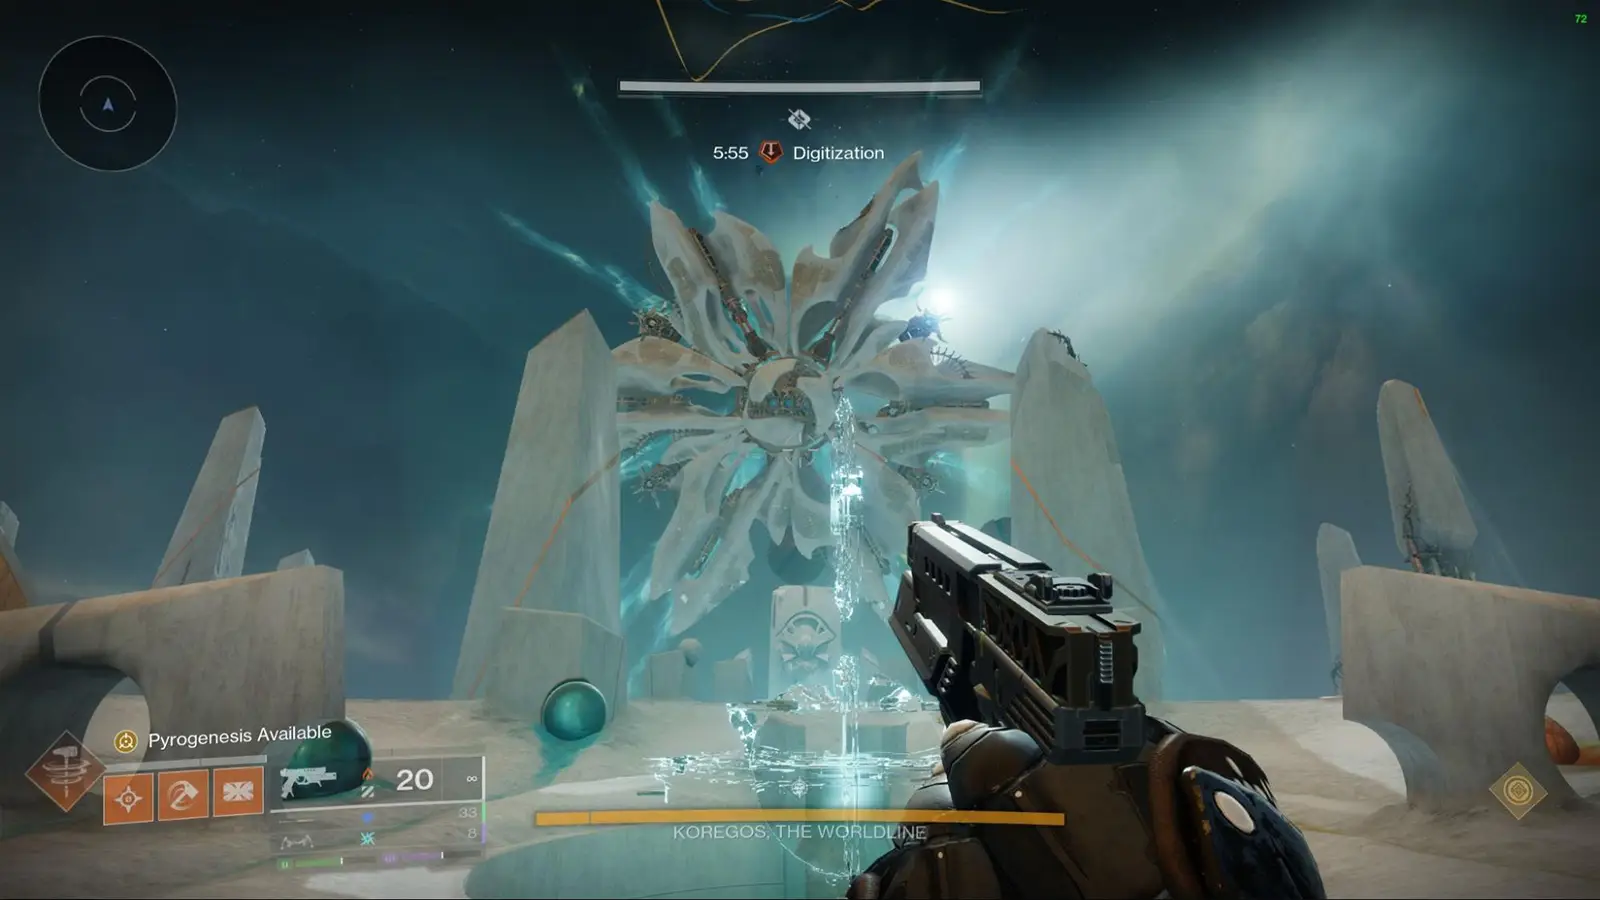
The End Times Encounter
The main goal in this encounter is to take down Koregos, The Wordline. To start, just interact with the Vex cube located in the center of the room. This triggers Phase 1, giving your team six minutes to work with. Right away, enemies will begin spawning in, and everyone should focus on clearing them out as fast as possible.
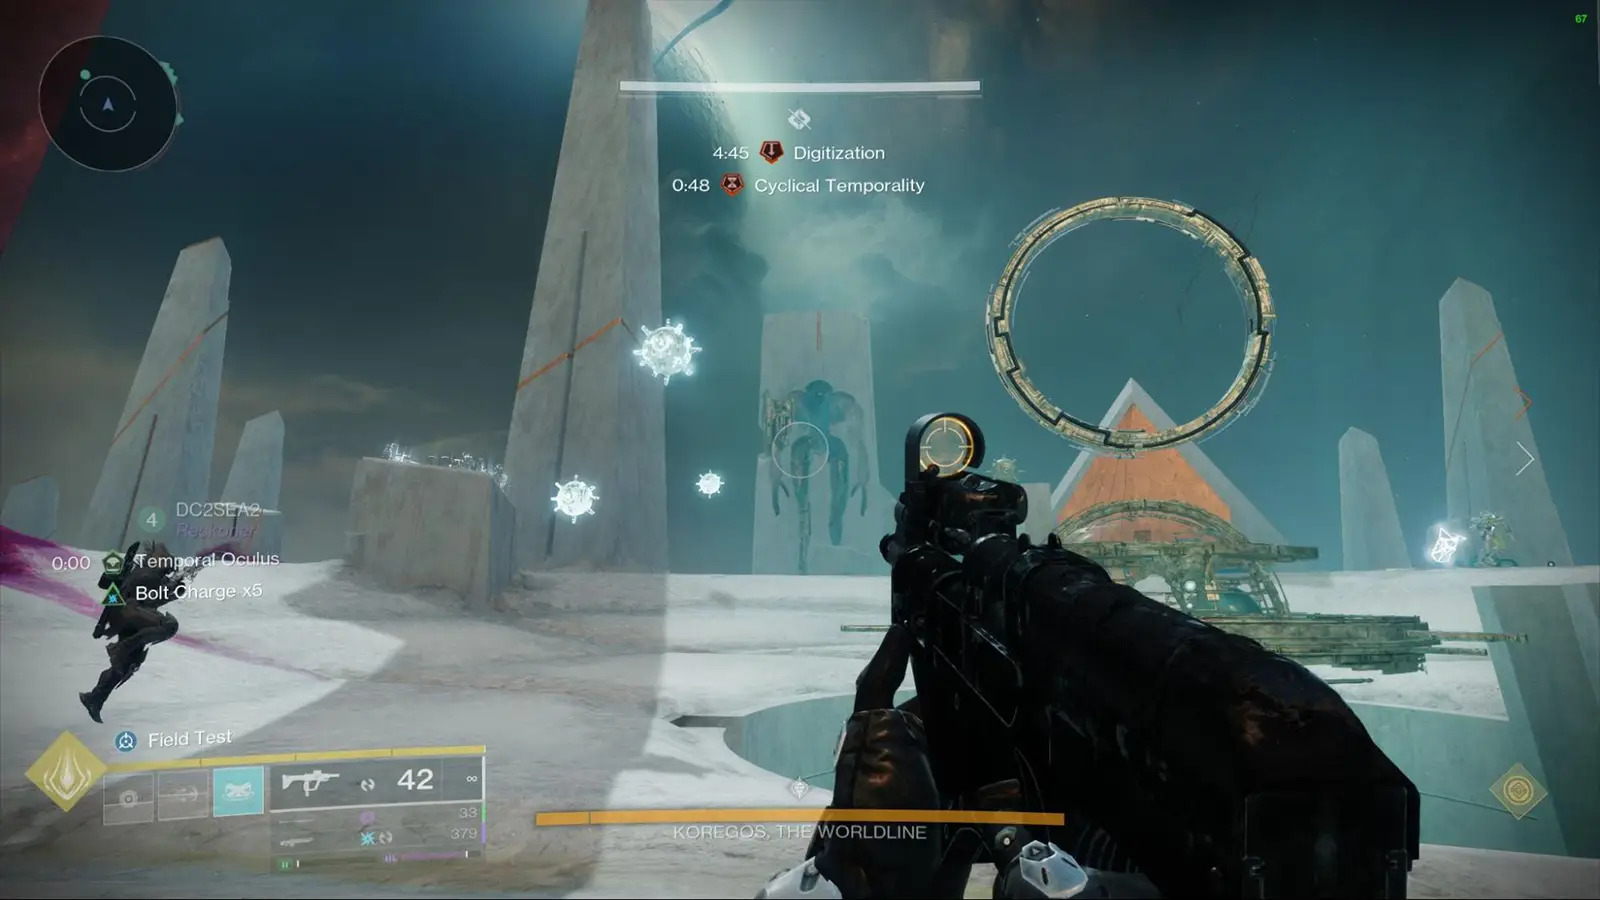
After a bit, three big Vex Hydras will spawn, one on each of the three plates in the middle of the room. While your team is clearing the room, the boss will randomly target someone with a laser attack; if you’re chosen, simply hide behind one of the big pillars to break the line of sight and stay safe.
Once you’ve defeated the Hydras, you’ll notice Vex Energy appearing on four small columns, and now the plates are active. Players should stand on these plates to pick up one of three debuffs:
- Cyclical (left plate)
- Absolute (middle plate)
- Constant (right plate)
Each buff gives the player a special ability. Cyclical allows you to destroy four of Koregos’ weapons, which refreshes your debuff timer, and also lets you see the color (Red, White, or Blue) of Chronons inside the floating mines when you step on Vex Energy.
Note
Defeating the Hydras lets players stand on the Plates to gain Debuffs: Left is Cyclical, Middle is Absolute and Right is Constant. Additionally, breaking all four of the bosses weapons spawns Vex energy on four short columns.
Absolute lets you break mines and extend their timer, plus you’ll see which color (Red, White, or Blue) Chronon is needed for the Hourglass when you’re on the Vex Energy. \
Constant allows you to pick up Chronons, extending their timer when you deposit them, and also shows you which mines (the ones glowing white) need to be destroyed by the Absolute buff holder. To move on to phase 2 of the encounter, your team needs to collect and deposit five Chronons into the Hourglass, then break the Vex diamond underneath it to progress.
During phase two, the boss transforms into a massive platform that your team needs to climb. Once you reach the top, you’ll see the boss’s weapons turn into totems. For the player with the Absolute debuff, there will be three small Vex cubes arranged in a triangle, but for the players with the Cyclical and Constant debuffs, only two of those cubes are visible.
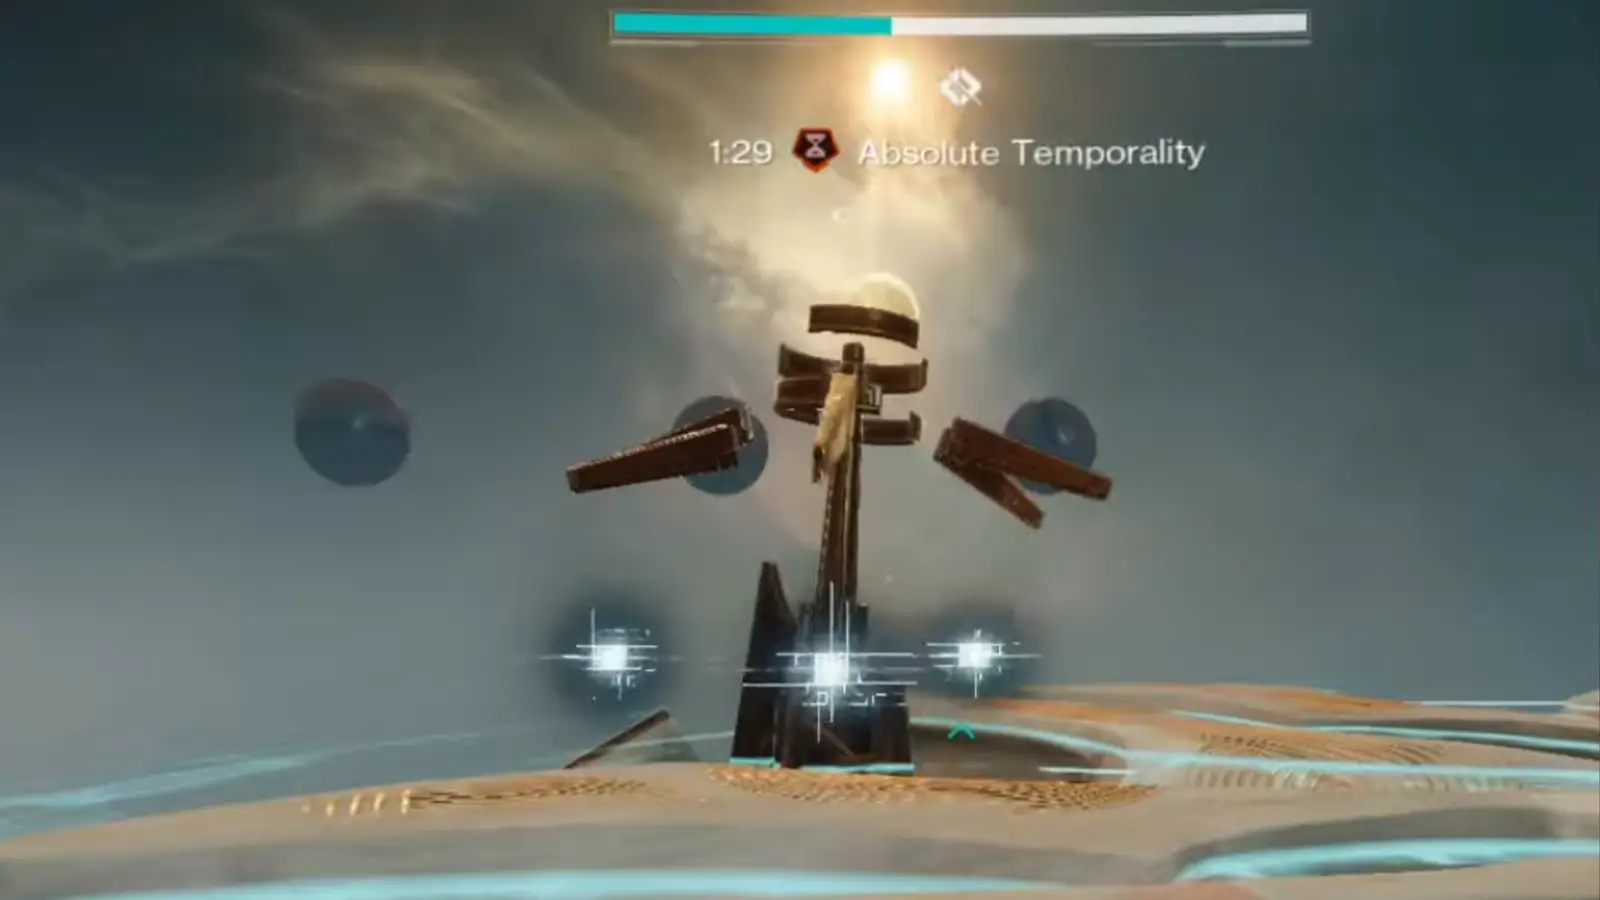
The goal here is for the Cyclical and Constant players to stand on the spots where the “invisible” third cube would be if they could see it. Meanwhile, the Absolute debuff holder should look for the cube that doesn’t have anyone standing on it and interact with that one.
After you complete the mechanic with the Vex cubes four times, you’ll enter the damage phase against Koregos. During this part, two large lasers will start moving around the boss, sometimes getting closer, sometimes pulling away.
These lasers hit hard, so you’ll want to watch your positioning and avoid standing in their path. At the same time, colored Chronons will appear around the arena, and the Hourglass will pop up again. Make sure the correct Chronon gets deposited into the Hourglass, as each one you bank will add extra time to your damage phase, giving your team more time to do the DPS.
Usually, the player who’s using the Tractor Cannon should handle this job since their weapon isn’t as important for dealing damage. Once you’ve done enough damage and the boss reaches its last bit of health, you’ll trigger the final stand.
Koregos’ eyes will start spinning vertically and moving in unpredictable ways, and you’ll need to finish it off quickly. As soon as the boss goes down, a 30-second timer appears; everyone needs to get off the boss platform before time runs out, or the team will wipe right at the finish line.
Roles and Team Setup
Here are what roles you need to set up for each of your members to do:
- 3 or 4 players to stand on the Left Plate to gain the Constant debuff. One of these players (let’s call them Player A) will also be stepping on the Vex Energy together with others who will be doing so.
- Assign 1 player to the middle plate for the Absolute debuff. This player (Player B) will also be stepping on the Vex Energy together with others who will be doing so.
- Place 1 or 2 players on the right plate for the Cyclical debuff. One of these (Player C) should help with the Vex Energy spot as well.
- Make sure at least one of your team, preferably someone who’s on Chronon duty or not focused on main DPS, has the Tractor Cannon exotic equipped.
Order of Operations
Here is the order of operations to get to the DPS Phase:
Phase 1:
- Everyone defeats enemies until the big Vex Hydras spawn in.
- Defeating big Hydras makes plates active; The players who were assigned to each plate should stand on them at the same time. You only get your special debuffs when all plates are occupied.
- Players with the Constant debuff destroy four of the bosses’ weapons to spawn Vex energy.
- Three specific players (A, B, and C) gather at the top of a small pillar with Vex Energy.
- In the meantime, the player(s) with the Constant buff start breaking the boss’s weapons and help clear any remaining enemies.
- Player B calls out which colour Chronon’s the Hourglass needs.
- Player A asks Player C if a certain mine is the right one. Player C answers “Yes” or “No.”
- If it’s the right mine, Player B breaks it.
- Player C picks up the Chronon that drops and deposits it into the Hourglass.
- The last four steps get repeated by players A, B, and C until the Hourglass is filled and a Vex Diamond appears.
- Breaking the Diamond begins Phase 2 and stops the Digitization Wipe timer.
Phase 2:
- The boss disappears and reappears as a giant platform above the middle, creating a bunch of smaller platforms for you to ascend.
- At the top, players A, B, and C begin going to the boss’s vertical weapons clockwise; in the meantime, others deal with any enemies.
- Players A and C stand where their small Vex cube would be in the triangular formation. Player B interacts with the cube, which has nobody on it.
- Steps 2 and 3 are repeated four times, which begins the DPS phase.
Damage Phase:
- During the DPS phase, player D will have to look for and deposit correct coloured Chronons into the Hourglass, which will extend the DPS Phase, while occasionally applying their Tractor Cannon debuff as it runs out.
- In the meantime rest of the team will be doing damage to the boss’s eyes, which will rotate horizontally, while also avoiding the close and far lasers.
The Final Stand:
- After reaching the final stand, you will have around 10+ seconds to defeat the boss.
- Its eyes will change rotation to be vertical. Continue using your weapons and supers until you bring its health to zero. At which point, a new wipe timer will appear called “Decoherence Imminent!” which lasts 30 seconds.
- Important: Get off the boss! Not getting off the boss in the allotted time wipes you.

Congrats! You have beaten the entirety of the Desert Perpetual raid! This unlocks multiple things:
- Gives you progress to the Map and Territory quest.
- Unlocks the Raid store, which is available simply by loading into the raid and going to where it is located. (No need to clear the raid after that)
- Unlocks the ability for you to skip to the final boss without having to do the previous three encounters.

And that’s the full guide on how to complete the Desert Perpetual raid in Destiny 2. While you’re here, make sure to check out our dedicated article for the full raid loot table here.
Don't miss the big stories. Make us your preferred source on Google to get breaking news, leaks, and exclusives first.