Here’s our comprehensive guide on how to complete every encounter in the new Sundered Doctrine dungeon in Destiny 2.
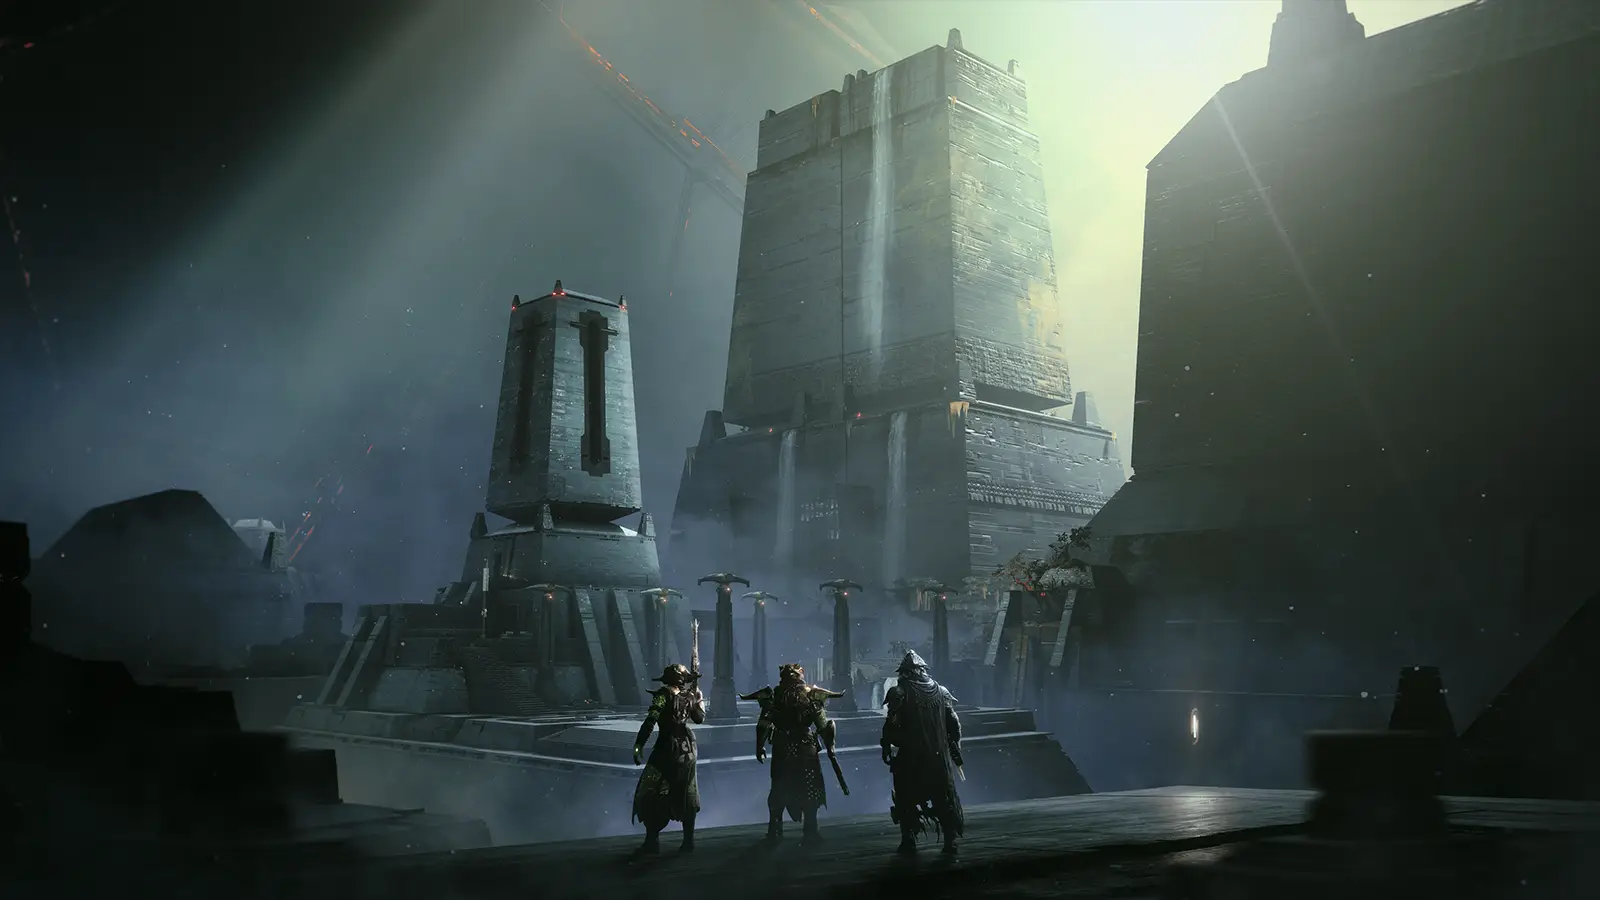
Sundered Doctrine is the latest dungeon for Destiny 2, taking place in the ship of Rhulk, First Disciple of the Witness, located in Savathun’s Throne World. We haven’t been back here since the Witch Queen raid, Vow of the Disciple.
Now, let’s talk about how you can complete this dungeon in Destiny 2.
Opening Encounter
Follow the path downstairs to a large room with Ikora’s Guardians examining artifacts. The large panel of buttons here may be useful for subsequent quests. Take a right from here out of the room. Run across a bridge to a closed door.
Jump up to the left and find an opening a short way ahead on the right. Follow the path and you’ll approach your first enemies: some Dread and two Subjugators. These Subjugators are not boss Subjugators and they can be crowd controlled and taken out with Finishers.
Defeat all the enemies then proceed to the back right room. In the far left corner of the room is a block you can jump on that will lower down. Proceed downward until you enter a large room with more enemies and another non-boss Subjugator.
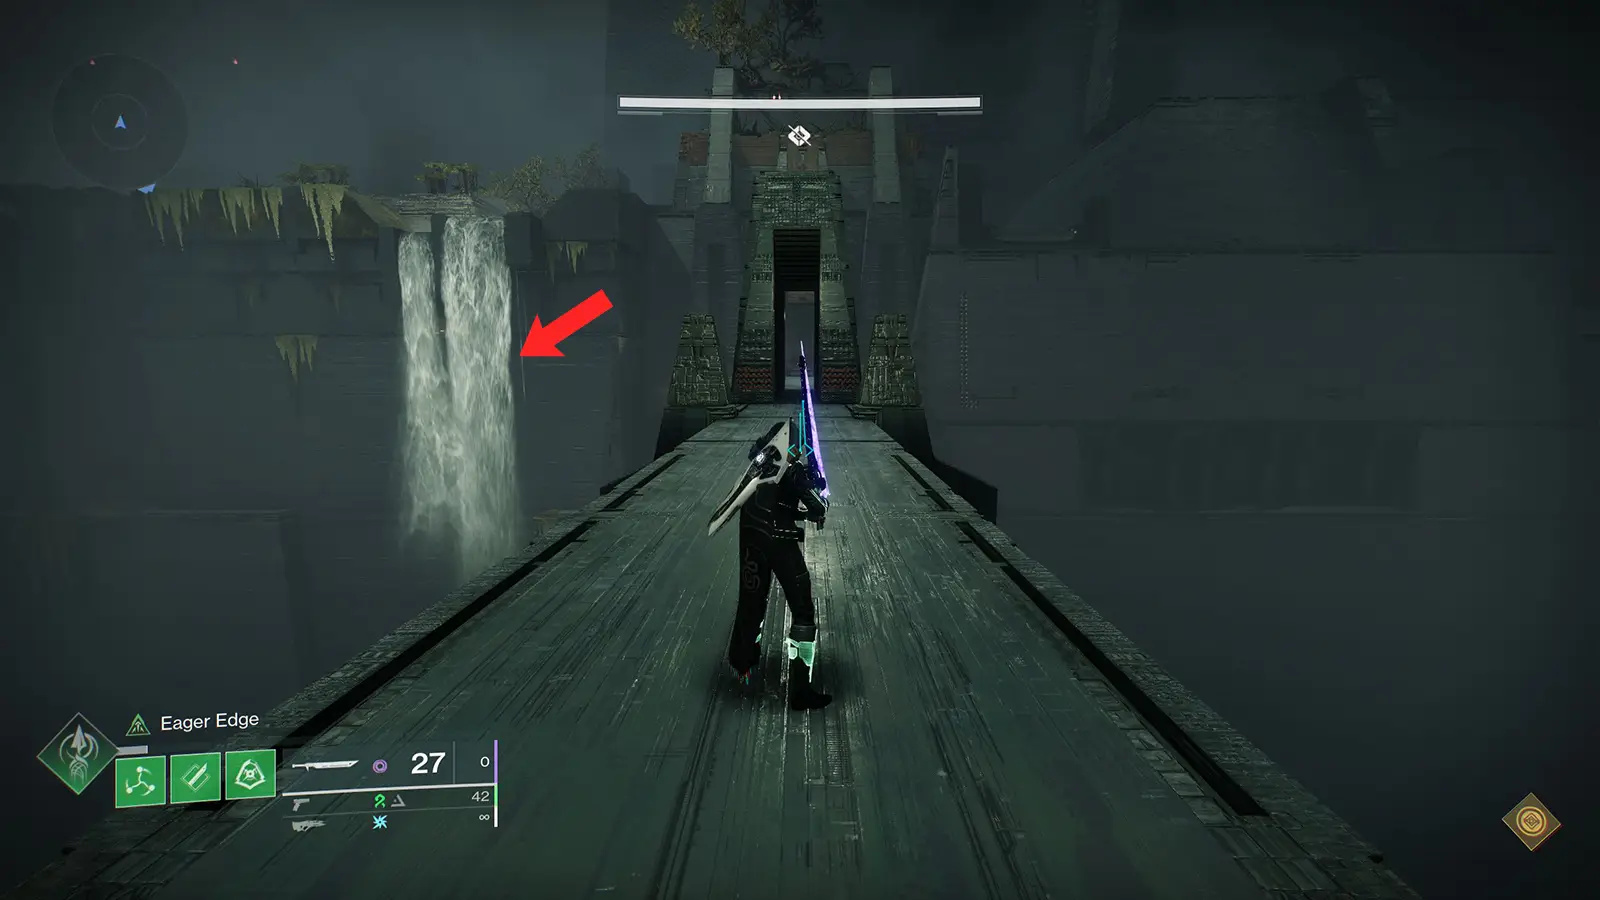
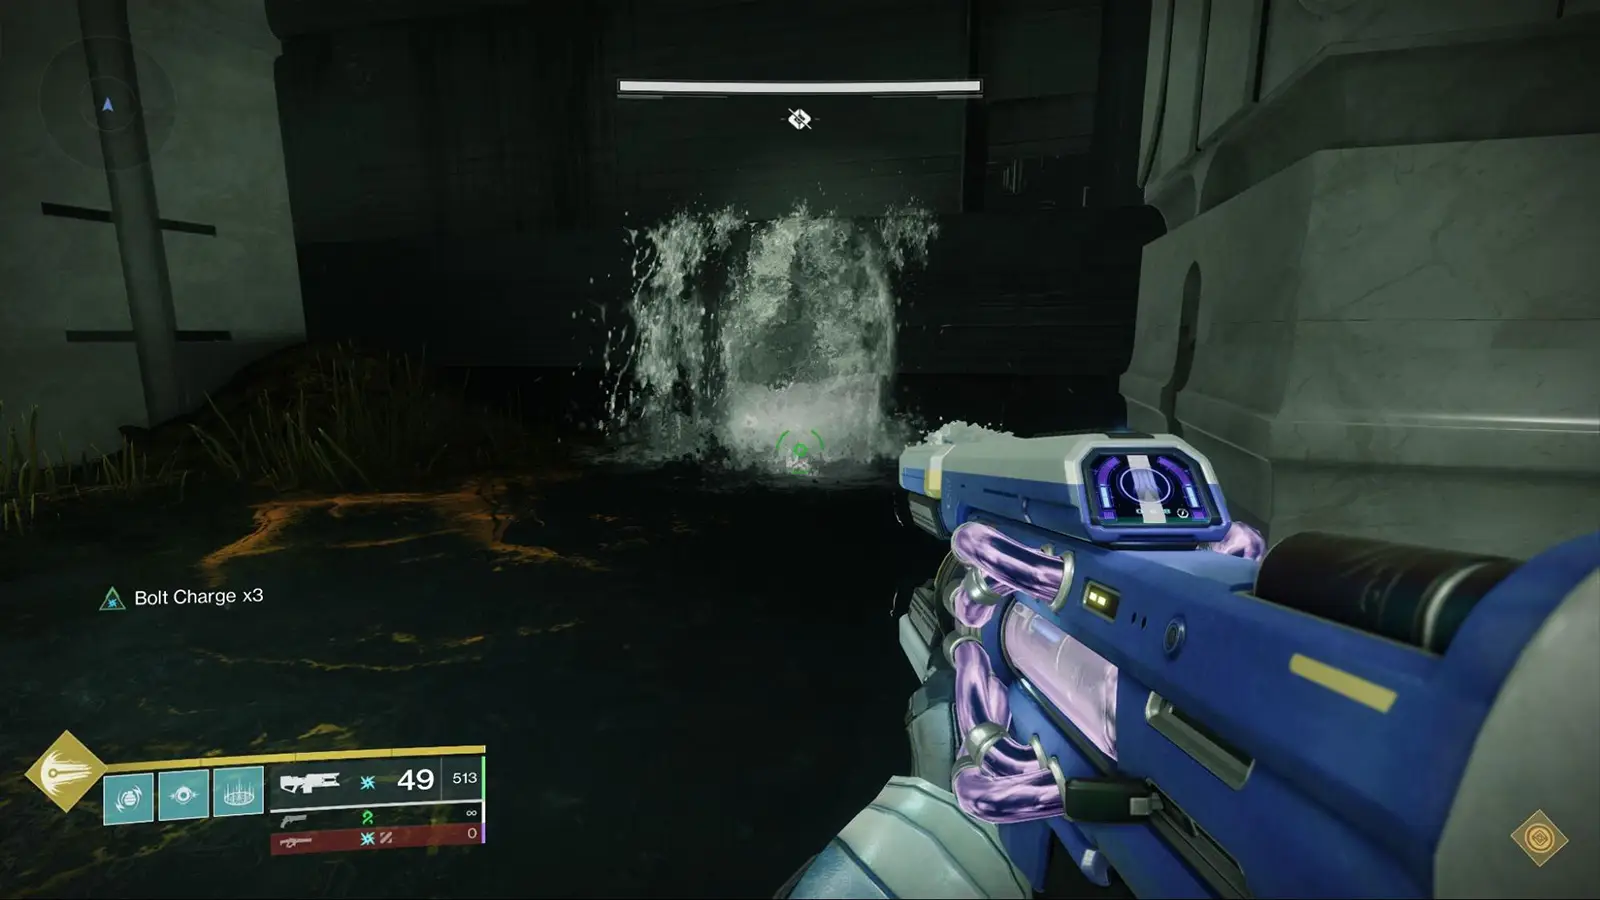
Afterward, look towards the back of the room and look up to see two red lights. Beneath the lights on the ground floor is a small waterfall with an opening through it. Drop down and find yourself at the first encounter.
Vow of the Disciple Symbols Return
If you turn around prior to the first encounter and go down the hallway you will see a room with all the symbols used here and in the Vow of the Disciple raid. As you aim at them from nearby it will give you the name of each symbol.
Good for brushing up if you’re rusty on symbol names. Here is a quick reference as well.

Encounter 1 – Riddle
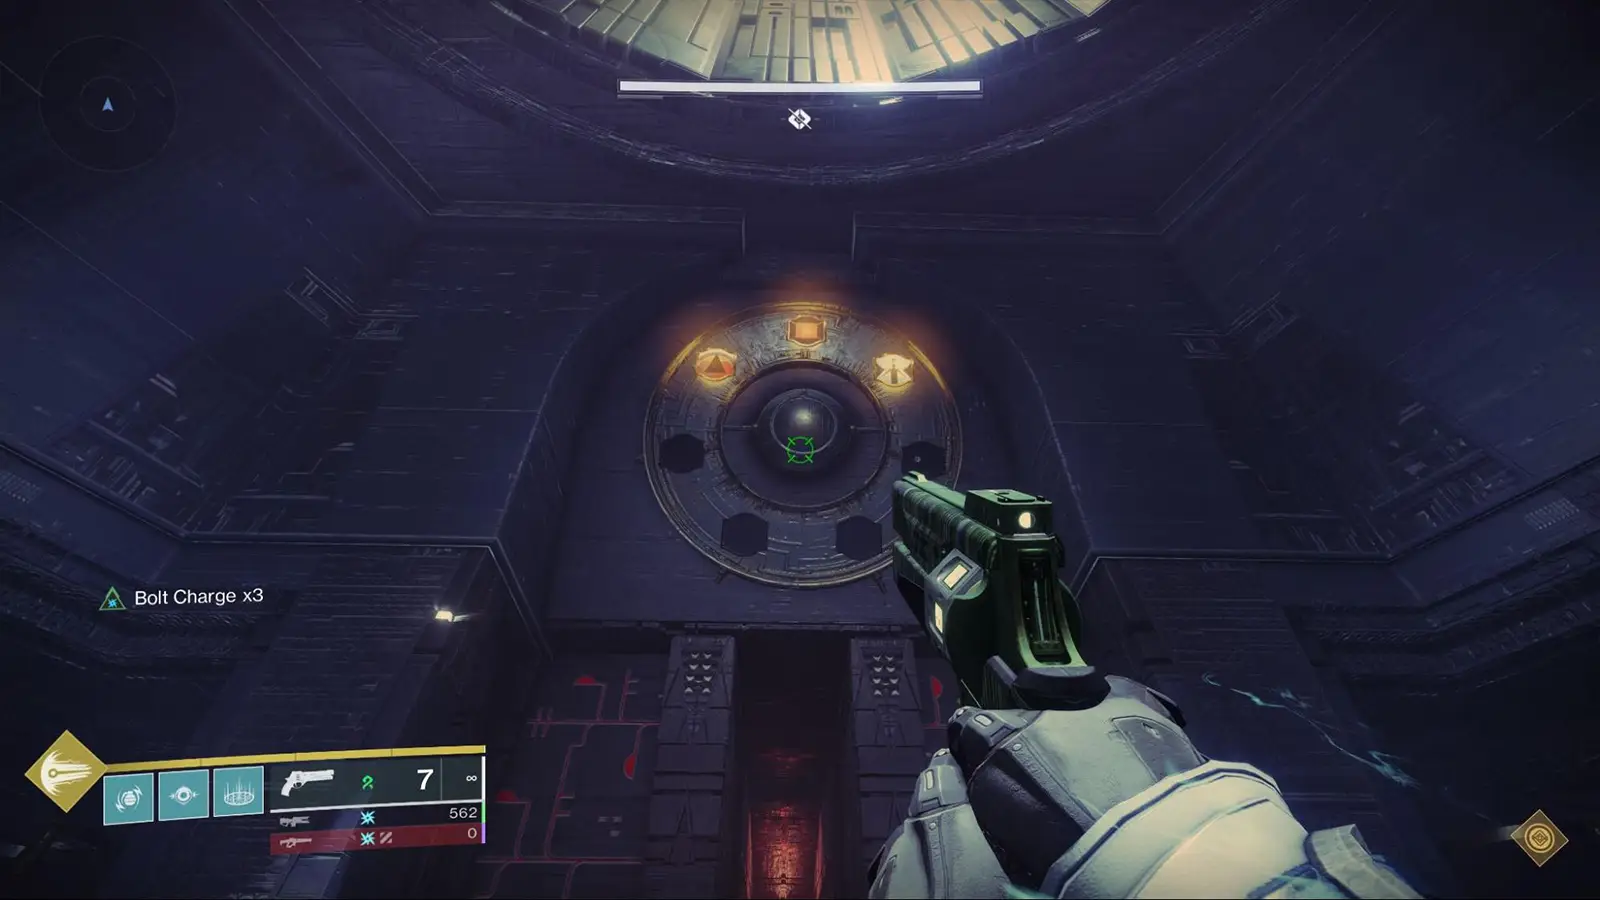
The starting room has 3 lenses to direct a beam of darkness to another lens. Straight ahead in the starting you will see a circle on the wall with 7 slots for symbols. There are 4 rooms around the center with end plates.
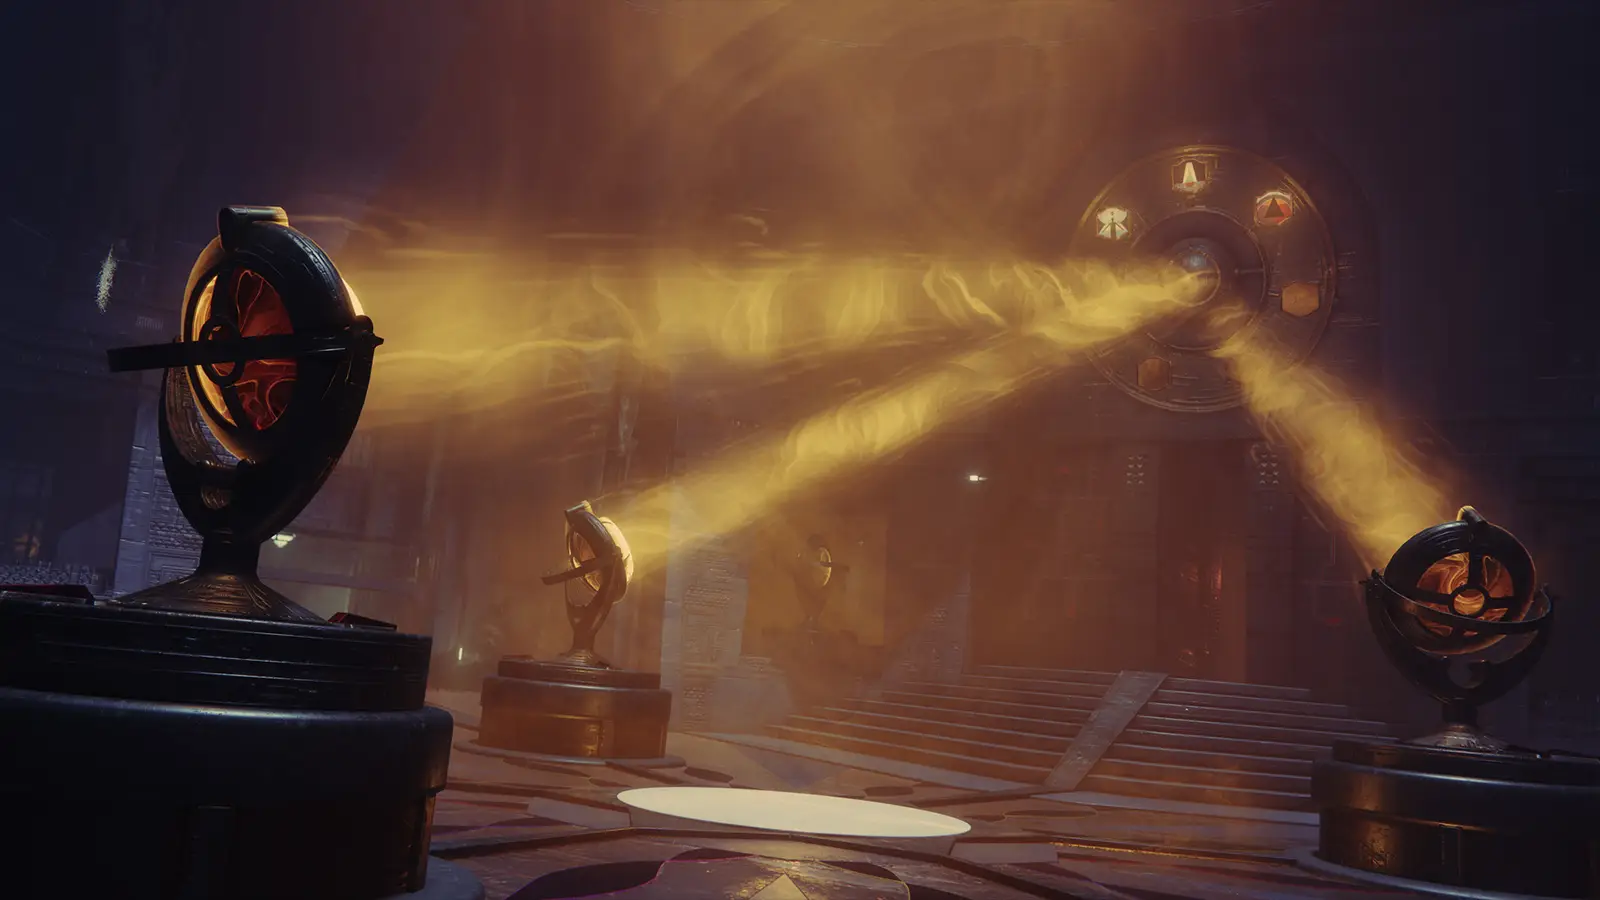
Rotate the darkness lens to start the encounter and change the symbols. A darkness node will appear over each of the starting darkness lenses. Shoot that to make a lens active. Each lens can point in 3 directions.
Next, find a Truthspeaker Major Grim. Defeat it to find the correct symbol. Then your goal is to direct the darkness beam to that symbol’s circle plate in one of the 4 rooms. Defeat a Subjugator to collect a lens. Place it along the path and rotate it towards the lens. The subjugator defeated will respawn once the lens is taken and you leave the room. You will typically need 3-4 lenses to complete the path.
The first round requires 1 beam to be completed. The second round requires 2 completed beams. The third and final round requires 3 completed beams. Only 1 major grim spawns at a time so you have to complete each beam one by one.
If you go to the wrong circle a Tormentor will spawn in the center. If a lens is placed and it is connected to the darkness beam it will break the lens after 3 rotations. Rotate before placing the lens and activate when the path is established when possible.
Optimization of lenses:
- There are optimal starting lenses for each room. In the second and third phases, you may not get to use these but they can often get you to the circle in 2 lenses.
- The three starting lenses in the center are referred to as left, middle, and right, relative to the starting point looking forward.
- Rooms numbered 1-4 from front left to back left to back right to front right. Once again, relative to start looking forward.
- Room 1: Use the left starting lens aimed slightly left when looking at room 1 down the hall.
- Room 2: Use the center starting lens and aim it straight forward.
- Room 3: Use the right starting lens aimed slightly right between rooms 3 and 4.
- Room 4: Use the left starting lens aimed to the right.
You can trace out paths before starting the encounter. It pays to make yourself aware of the paths before. Here is a rough map courtesy of CyanicKenshi on Reddit:
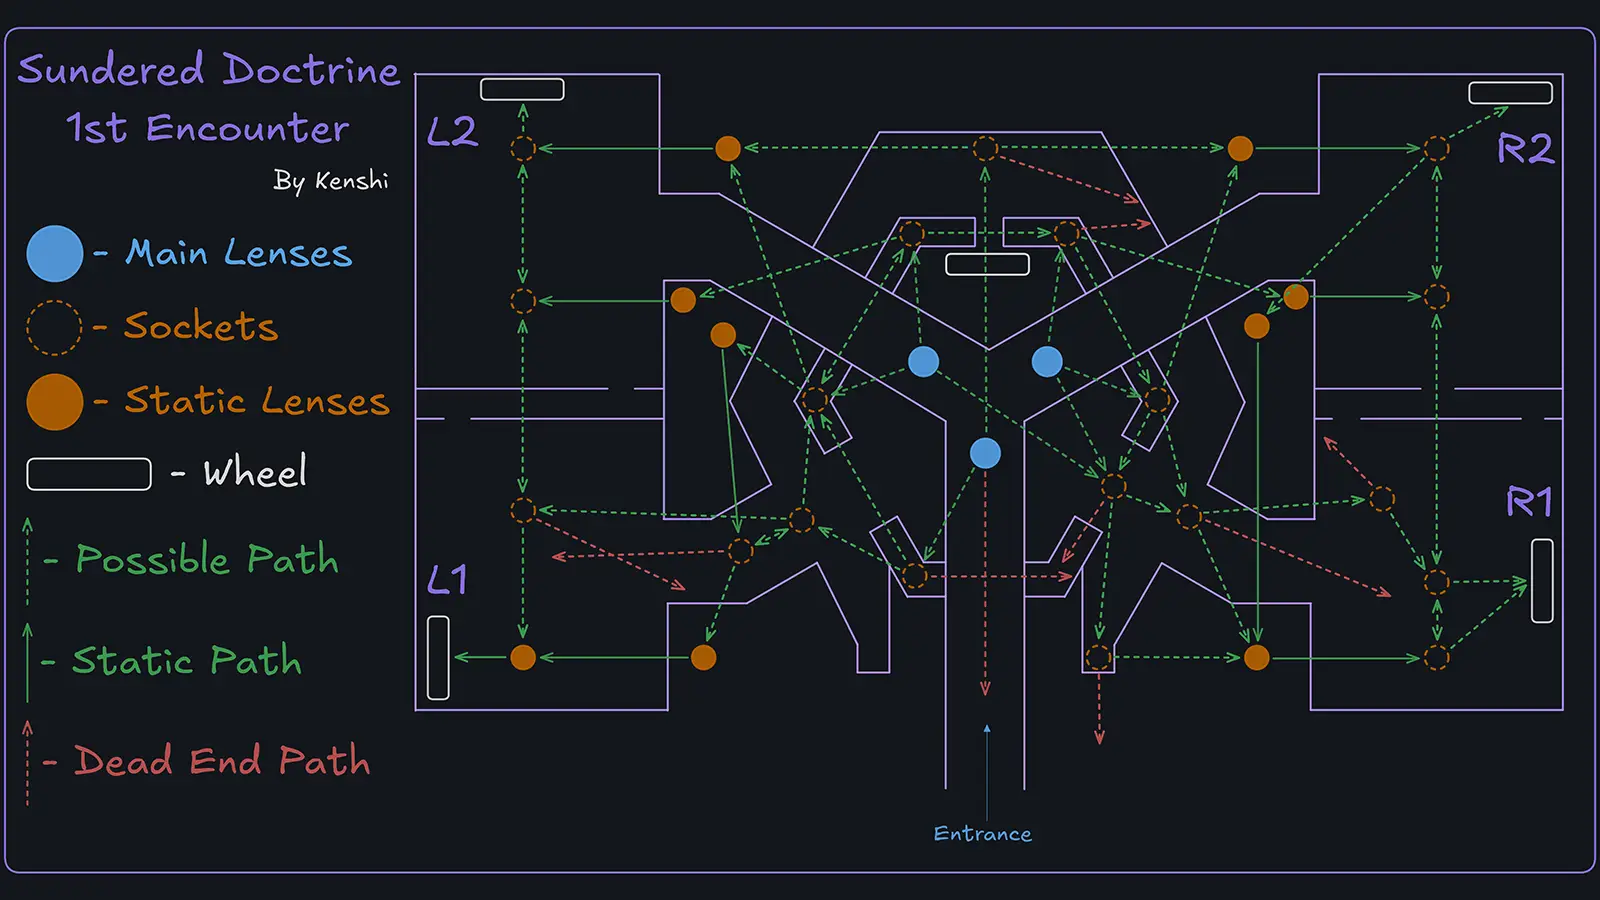
The symbols spell out riddles, hence the encounter name. If you have two symbols known, like in the first phase or the later portion of the second phase, you can guess the missing symbol by completing the riddle. Some examples are Guardian kill Witness, Pyramid stops Guardian, Traveler gives Light, etc.
Order of Operations:
- Rotate the center lens to start.
- Determine the missing symbol by determining what is missing from the riddle or defeating a Truthspeaker Grim in one of the 4 surrounding rooms.
- As you search the rooms defeat the Subjugators and pick up the lens from their bodies.
- Once you find the correct plate determine a path back to the center trying to use the closest starting lens.
- Try to rotate the lens holders before you place the lens. Once a lens is placed and connected to light it will break the lens after 3 rotations.
- Completing a beam finishes phase 1.
- Phase 2 requires 2 beam paths starting from different starter lenses. Because two panels are missing you will need at least one Truthspeaker Grim to know what panels to hit.
- Phase 3 requires 3 beam paths starting from different lenses. This is why it’s important to start a path from close to the finishing room because crossing from right to left or left to right with the beams is challenging.
Tip
You generally want good add-clear and damage. The hardest enemies are non-miniboss Subjugators which can be crowd controlled if you want a little more safety. Queensbreaker is amazing for Blinding whole rooms.
Traversal
Continue on through the new passage under the chest. You will find yourself in a maze eventually. There are 3 darkness cruxes to shoot which will spawn the first secret chest within the maze.
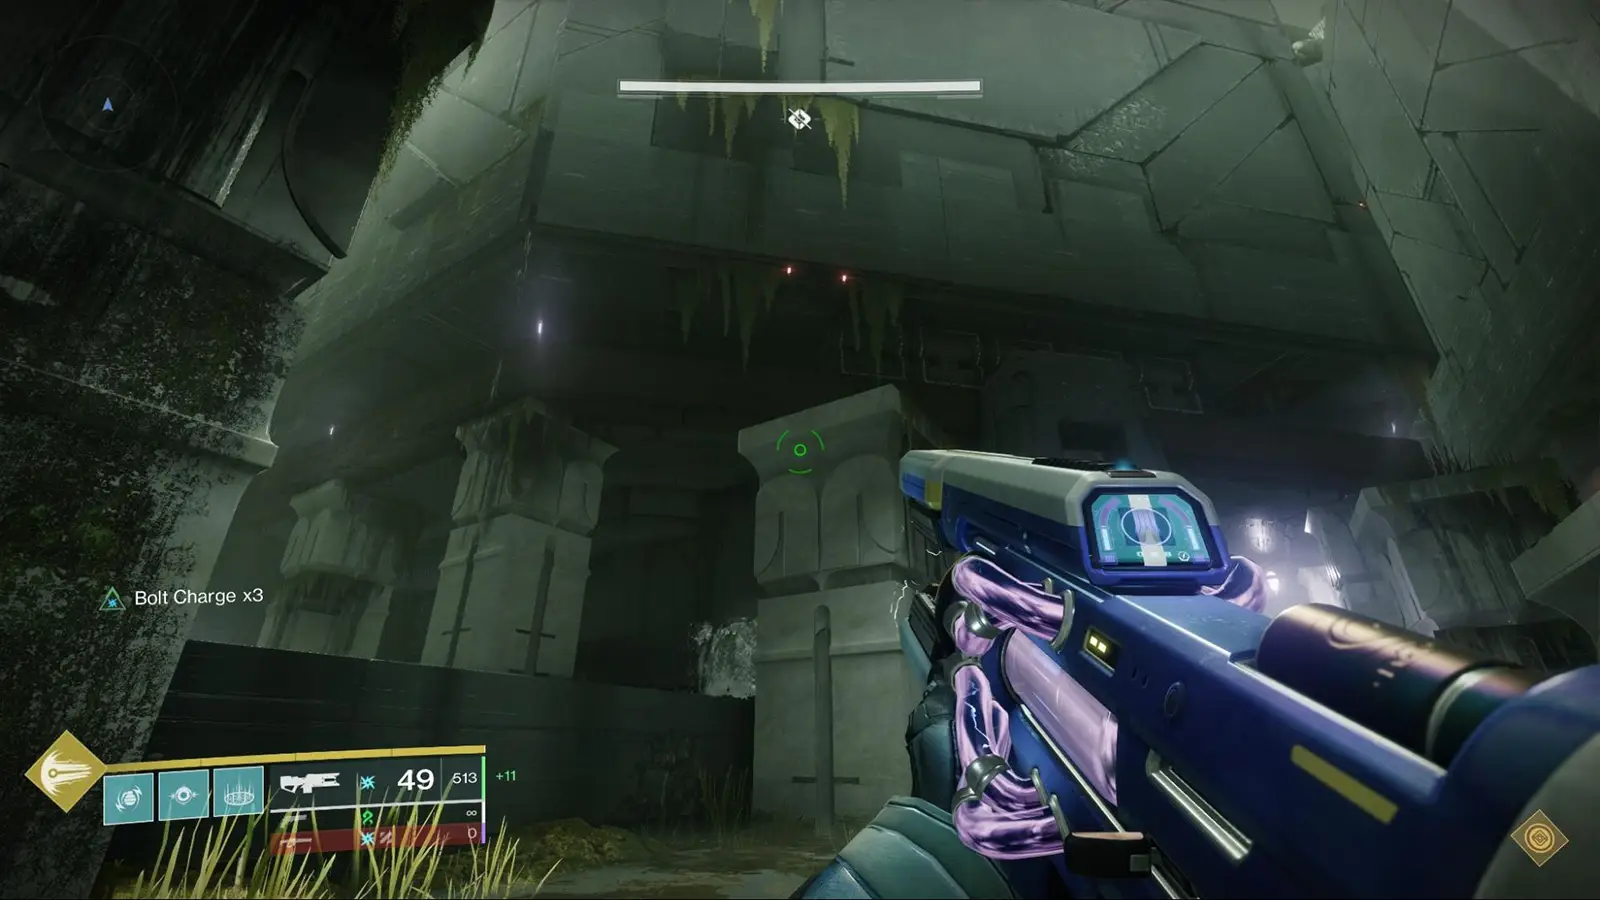
Continue on for a bit defeating enemies. In a large room defeat several miniboss attendants. There will be one door to the right of where you entered this large room. Go down the hallway some and then jump down a hole to the left. You will slide down towards a pit so be careful. Proceed along the sloped sides to the end of the room, hop over to the right, and look down to the left for a doorway.
That will drop you to a tunnel where large, spiked balls roll down. Jump diagonally to the safe alcoves and make your way to the door in the middle of the ramp. In the next hallway, more balls will roll across. Wait for them and proceed forward to the next room which introduces the second encounter mechanic.
There are wheels like last time. On each wheel is a glowing symbol and a rotating device at the center which indicates which way you can rotate the glowing symbol. You can shoot the crux over the wheel to change the rotation direction.
Collect Resonance Splinters around the arena by defeating Wizards. You can hold 1 to 3 splinters and dunk them on a wheel to move the glowing symbol. Rotate the glowing symbols on the two wheels to match the symbols by the exit door you need to open.
Encounter 2 – Zoetic Lockset
This is a construct-type boss made of several Darkness/Dread Shriekers that fire Resonance Seekers like Caretaker in the Vow of the Disciple Raid.
This encounter relies on the wheels like last time. On each wheel is a glowing symbol and a rotating device at the center which indicates which way you can rotate the glowing symbol. You can shoot the crux over the wheel to change the rotation direction. Collect Resonance Splinters to gain stacks of Knowledge around the arena by defeating wizards.
You can hold 1 to 3 Splinters and dunk them on a wheel to move the glowing symbol. You get a buff for how many splinters you have: Heightened Knowledge for 1, Brimming Knowledge for 2, Overflowing Knowledge for 3.
You get a buff for how many splinters you have:
- Heightened Knowledge for 1
- Brimming Knowledge for 2
- Overflowing Knowledge for 3

The wheels are activated when one of the Shriekers gazes at a wheel. What happens depends on the glowing symbol:
- Hive: Spawns an Ogre
- Brain: Spawns a Knight and Wizards
- Stop: Does nothing but does not hurt you.
- Kill: Starts DPS phase. The length of the damage phase is relative to how far left Kill is located.
- Commune: Has bosses spawn Resonance seekers
- Wheels activate when a Shriker gazes at the wheel
There is a bar across the top labeled Lockset Progression. At each quarter notch, a wheel begins locking from right to left. Lock the Rightmost wheel in first with Stop. Lock the next two wheels from right to left to Stop. Then lock the last wheel all the way left to Kill. Change any Hive wheels as soon as possible to prevent constant Ogre spawns.
There are 4 wheels. Ideally across 4 wheels, you want 3 Stops and 1 Kill – locked in the leftmost wheel plate. Panels in front of the 4 shriekers will show you what they have gazed at and locked in for the round.
Once the Shriekers lock in a Kill symbol the damage phase will start shortly after. Gather up and deal damage to any of the 4 Shriekers. The damage phase is very long but the boss has a great deal of health. The damage phase is very long but the boss has a great deal of health.
Order of Operations
- Defeat Hive Wizards that drop Knowledge pick-ups.
- Input Knowledge to the right-most circle plate to set it to Stop (orange square). You can shoot the darkness node at the top to change the direction of rotation.
- Scan the 4 wheels to find any with Hive symbols. You want to rotate the highlighted node off Hive asap.
- Input knowledge to the second right-most plate to set it to Stop.
- Input knowledge to the third right-most plate to set it to Stop.
- Input knowledge to the left-most plate to set it to Kill. This starts the DPS phase.
- Group up and deal damage to any of the 4 Shriekers.
- Repeat the phase again as needed to defeat the boss.
Tip
Sleeper Simulant and Grand Overture seem effective. Snipers as back-up damage. Well of Radiance and Storm’s Keep Barricades are good for damage. One Player can use Anarchy and a sniper. Stick an Anarchy shot to each Shrieker for the passive damage.
Ammo Finders and Scouts will be very valuable in maintaining damage. Use exotic primaries to progress ammo finders faster if possible.
Traversal
Take one of the Shrieker’s eyes and work it to the rounded-out spot in front of the loot chest to open the door forward.

Move forward till you find a room with more Darkness lenses. On the right side jump up the fossilized work to find the second secret chest on top. Complete the two lens paths in this room to open the door. In the next room, there is a glowing door. Keep shooting it to open it and keep it open.
Climb up the platform ahead, turn around, and jump through a door. Proceed through the collection room to the boss.

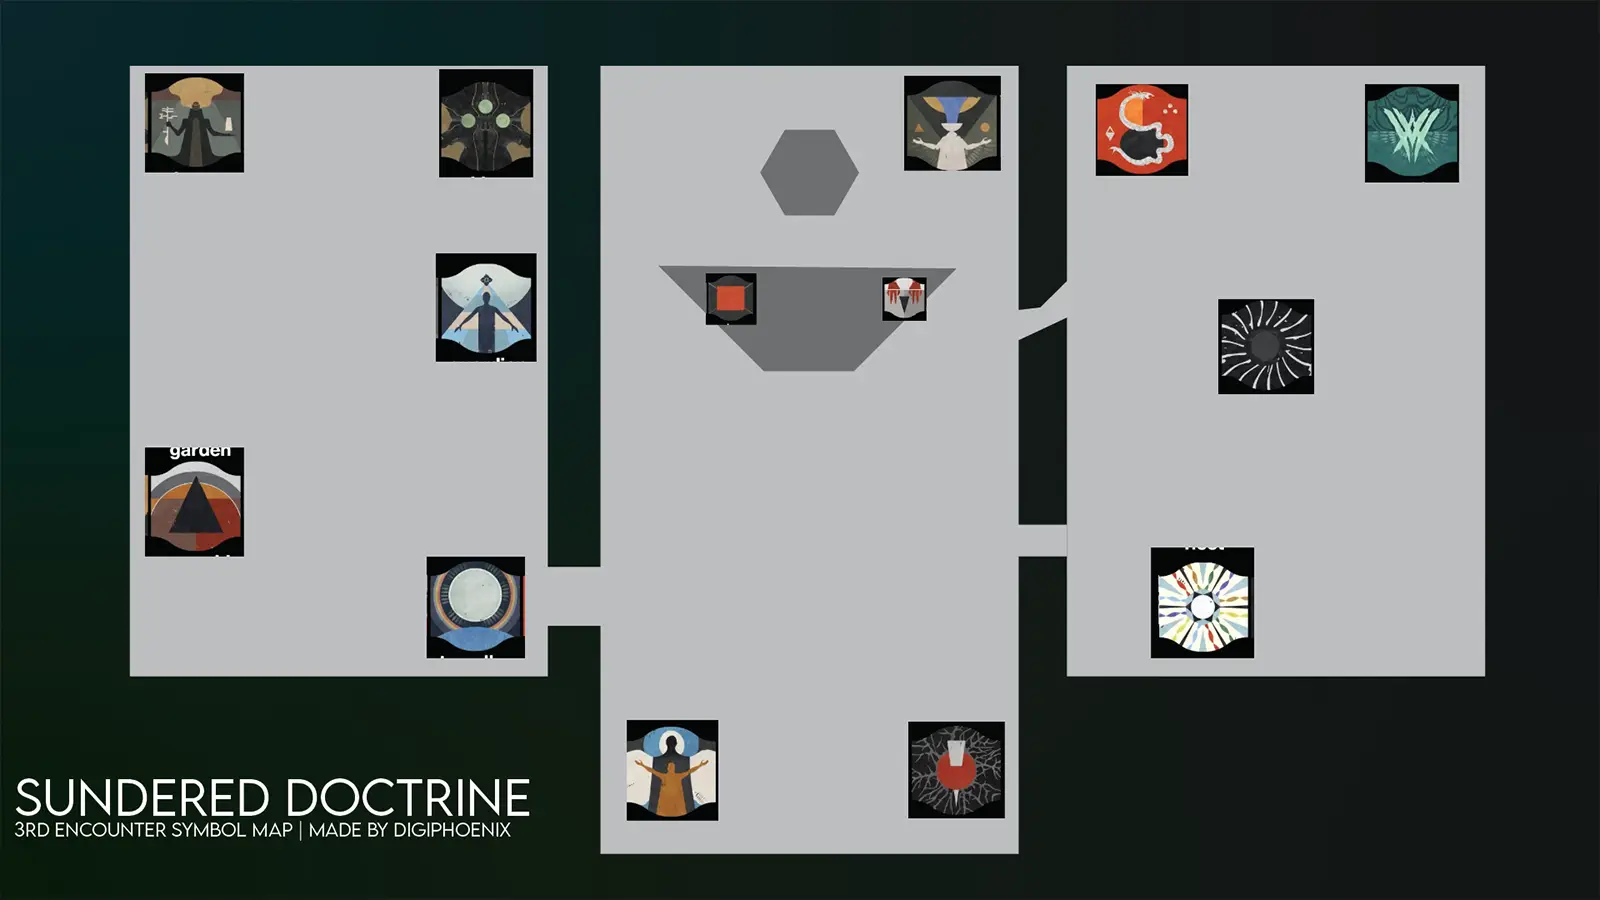
Encounter 3 – Kerrev, The Erased
This encounter is split into three rooms – Middle, Left, and Right. The boss is located in the middle room standing in front of a circle with 3 symbols on each side. Divide this circle in half vertically so there is a left and right side. Each side then tells a story or riddle like the first encounter. One of the stories is a lie. For example, Traveler, Darkness Guardian is “Traveler gave Darkness to Guardians.”
This encounter uses mirrors like the first encounter. Shine the beams on the Lies and turn the beams away from the Truths. There is also a Truthspeaker Grim you can use to know which side is true.

The left room is accessed by another door you have to shoot the front face of to open. There is a room under the center plate in the middle. The right room is entered by jumping on a block on the front right which will lower itself as you stand on it. You exit the right room through a small tunnel you crouch through in the middle of the wall between the right room and the center.
If a pillar, node, or lens is locked down, you must defeat an Unwritten Attendant to gain a buff called Unwritten Empowerment that lets you break the Strand locks.
Here is a map of symbols, courtesy of Digiphoenix22:
Once you have correctly lit up the Lies and unlit the Truth, there is a button right in the front of the middle plate you press, upon which you must take cover from the obelisk by breaking the line of sight as it burns away the boss’s shield, and then DPS starts.
When DPS ends the Obelisk will burn again so find cover. You can still deal some damage during this second Obelisk burn phase. Repeat the mechanic and damage phases until the boss is defeated. The boss will move around a lot and Strand pull you or Suspend you. The boss will also dish out a good bit of damage. Healing and defense are crucial as revives can cause a wipe pretty quickly.
Order of Operations
- Read the center plate. There are two riddles, one on the left and one on the right. You read them from top to bottom. One will make sense because it is considered truth and one will not make sense because it is a lie.
- If you are not sure, search the left or right room for a Truthspeaker Grim who will give you a true symbol when defeated. The side of the center plate with that symbol will all be true.
- Now, move lenses in the left, center, and right rooms to shine beams on the lie symbols and do not shine beams on the truth symbols.
- Some buttons or lenses will be locked with Strand. Defeat Attendants to get a buff that lets you break Strand nodes to unlock the lens or buttons.
- Once all lenses are correctly directed, go up to the center plate and activate the panel in front of it.
- Get to cover from the large orb as it burns away the boss’s shield.
- Deal as much damage as you can to the boss.
Recommended Builds and Weapons
We highly recommend a Strand Resist mod for the boss.
- Hunters: For Hunters Celestial Nighthawk remains good. On Arc Gathering Storm is strong.
- Titans: Storm’s Keep Titan can provide a lot of extra weapon damage especially stacked with a well. Thundercrash on Arc or Prismatic is very good for damage along with Twilight Arsenal.
- Warlocks: Well of Radiance can be challenging with the boss’s mobility unless you set up with a clear line of sight. Recommend Speaker’s Sight in that case. Song of Flame can provide team Radiant, healing, and personal damage resistance. Nova Bomb and Needlestorm are good one-off damage.
Weapons:
- Most good boss damage weapons work, though precision damage is challenging with the boss’s mobility. Divinity can help precision damage weapons.
- If you can land critical shots or have Divinity, Linear Fusion Rifles are strong thanks to the Particle Reconstruction Artifact perk. Queensbreaker is very strong.
- Grenade Launchers with Bait and Switch can deal solid damage still.
- Grand Overture and Thunderlord can be decent damage.
- Melee heavy weapons are challenging due to the boss’ suspend attacks.

If you’re looking for the complete loot table for the Sundered Doctrine dungeon, we have a dedicated article that you can check out here.
Don't miss the big stories. Make us your preferred source on Google to get breaking news, leaks, and exclusives first.