Destiny Rising now lets players upload their own dance videos to make custom emotes. Here’s everything you need to know to create your own emote.
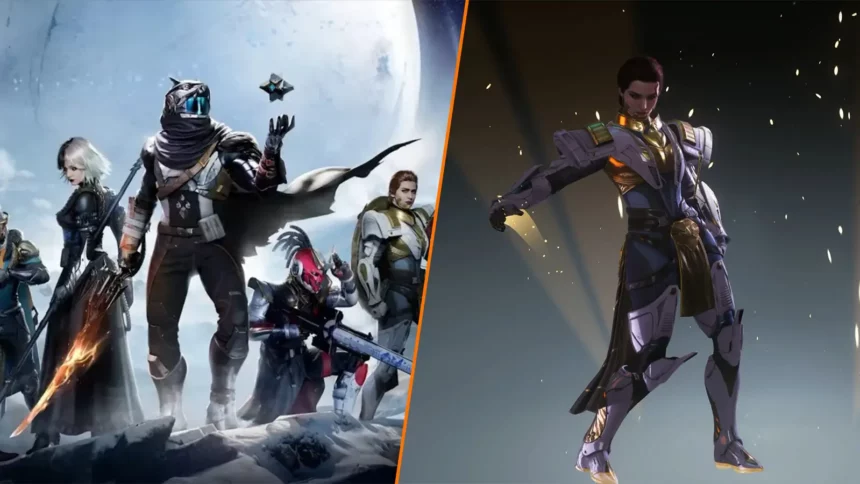
Destiny Rising keeps finding ways to surprise its players. The latest update from NetEase adds something fans didn’t expect: the ability to make your very own custom emotes. That’s right, you can now upload short videos of real dance moves and turn them into personalized in-game animations. It’s fun, creative, and fans have already created some custom emotes from some of the iconic dance moves from popular movies and TV shows.
In this guide, we’ll go over how to create your own custom emote in Destiny Rising and what you need to know before getting started, including file limits, formats, and where to find the new feature.
Custom Emote Requirements in Destiny Rising
Before you start recording or uploading your dance, there are a few things you need to know. Destiny Rising has set some clear guidelines to make sure everything stays smooth.
Here’s what to keep in mind:
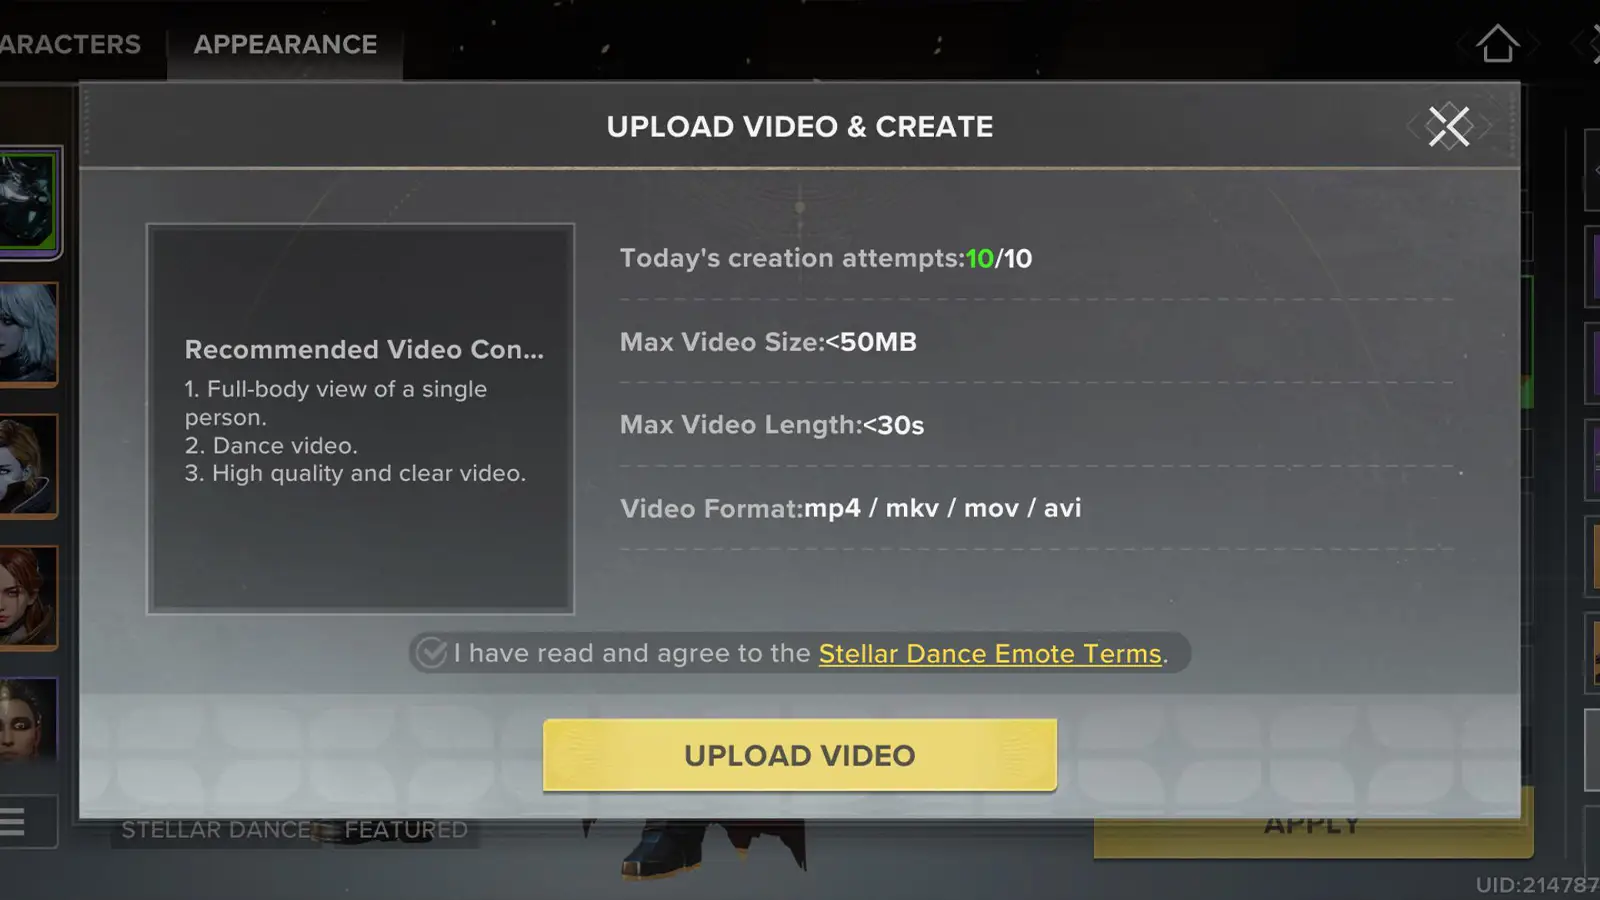
- You get 10 attempts per day to create custom emotes.
- Each video must be under 50 MB in size.
- Videos can be a maximum of 30 seconds long.
- Supported video formats include MP4, MKV, MOV, and AVI.
- The video should be a full-body view of a single person.
Now, let’s talk about how to create one.
How to Create Custom Emotes in Destiny Rising
Once your video is ready, here’s how you can turn it into a dance emote inside the game.
- Enter the Character menu after you spawn in.
- Select Appearance from the top bar.
- On the right-hand side, choose the Emotes box; it’s the second-to-last option.
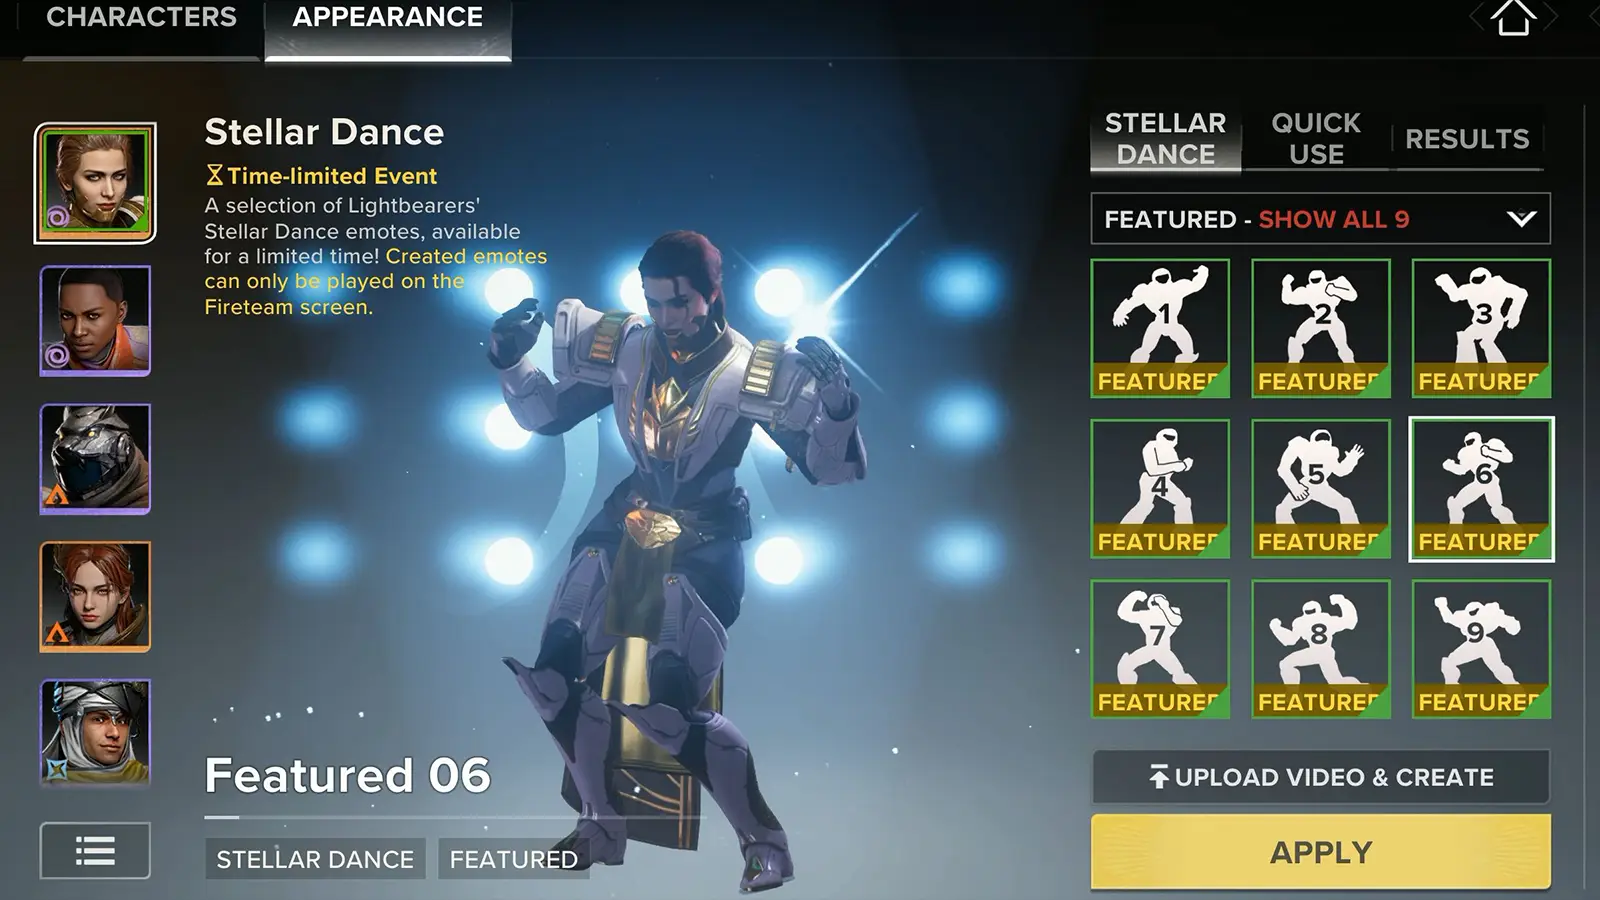
- In this menu, you’ll see a new section called “Stellar Dance.”
Inside Stellar Dance, you’ll see two sections:
- Featured: These are popular emotes made by other players.
- My Creations: This shows all the custom dances you’ve personally made.
To create one:
- Click “Upload video and create.”
- A small window will appear with all the upload rules (video size, length, formats, and attempt limit).
- Read and accept the terms before uploading your clip.
- Once you upload, you’ll go through four quick steps: Upload > Review > Create > Download.
- When the process finishes, your new emote will appear in “My Creations.”
It usually takes just a few minutes for everything to complete.
Since this feature dropped, players on social media have been sharing some hilarious and creative custom dances. You can already find emotes inspired by the Deadpool and Wolverine opening sequence, and the Wednesday dance.
Don't miss the big stories. Make us your preferred source on Google to get breaking news, leaks, and exclusives first.