
Here’s our comprehensive guide on how to complete every encounter in the new Vesper’s Host dungeon in Destiny 2.
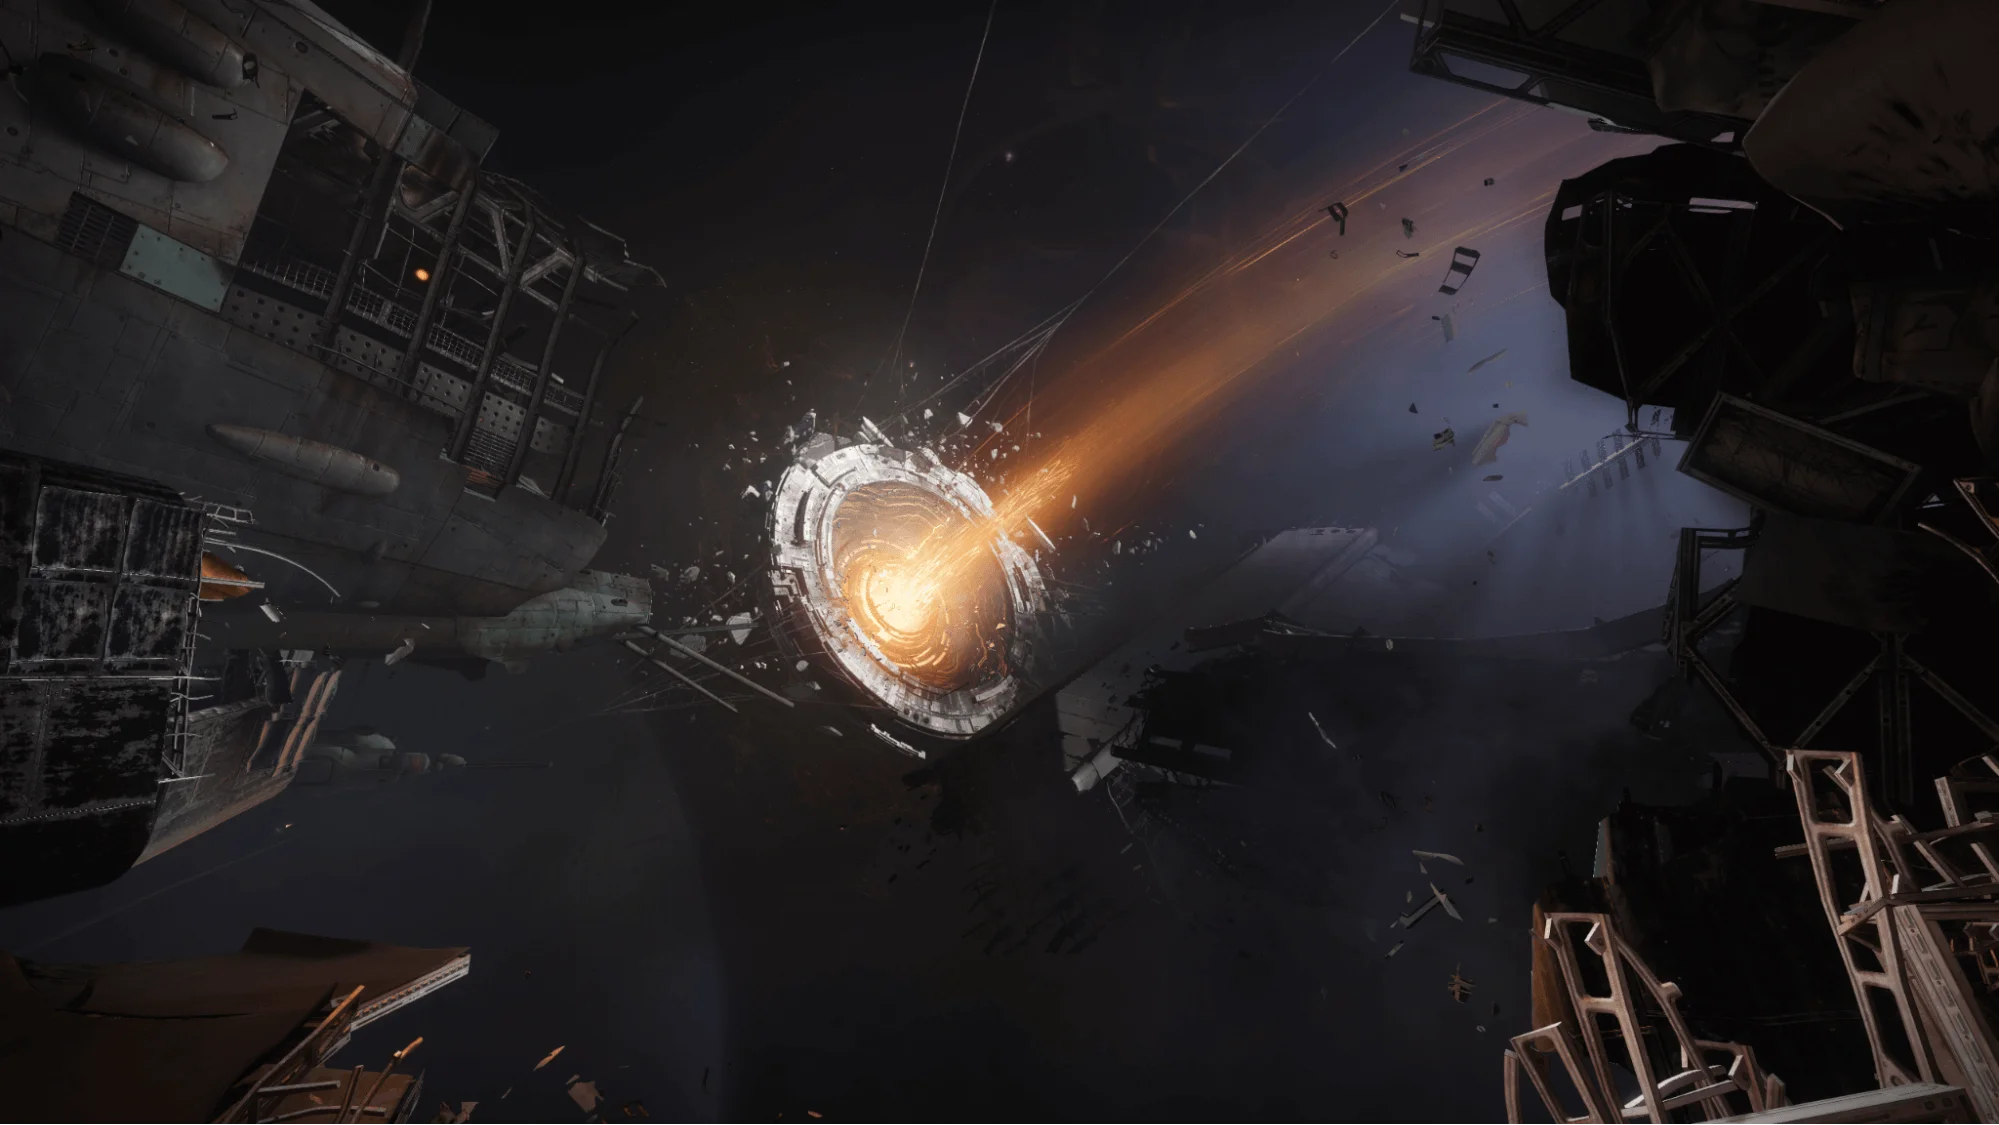
Vesper’s Host is the latest dungeon for Destiny 2, taking place on a space station high above the snow-covered moon of Europa.
As long-time players will know, Europa was the setting for the Beyond Light expansion, and both the story themes and gameplay mechanics from Beyond Light are present in Vesper’s Host.
Now, let’s talk about how you can complete this dungeon in Destiny 2.
Opening Encounter: Embarkation
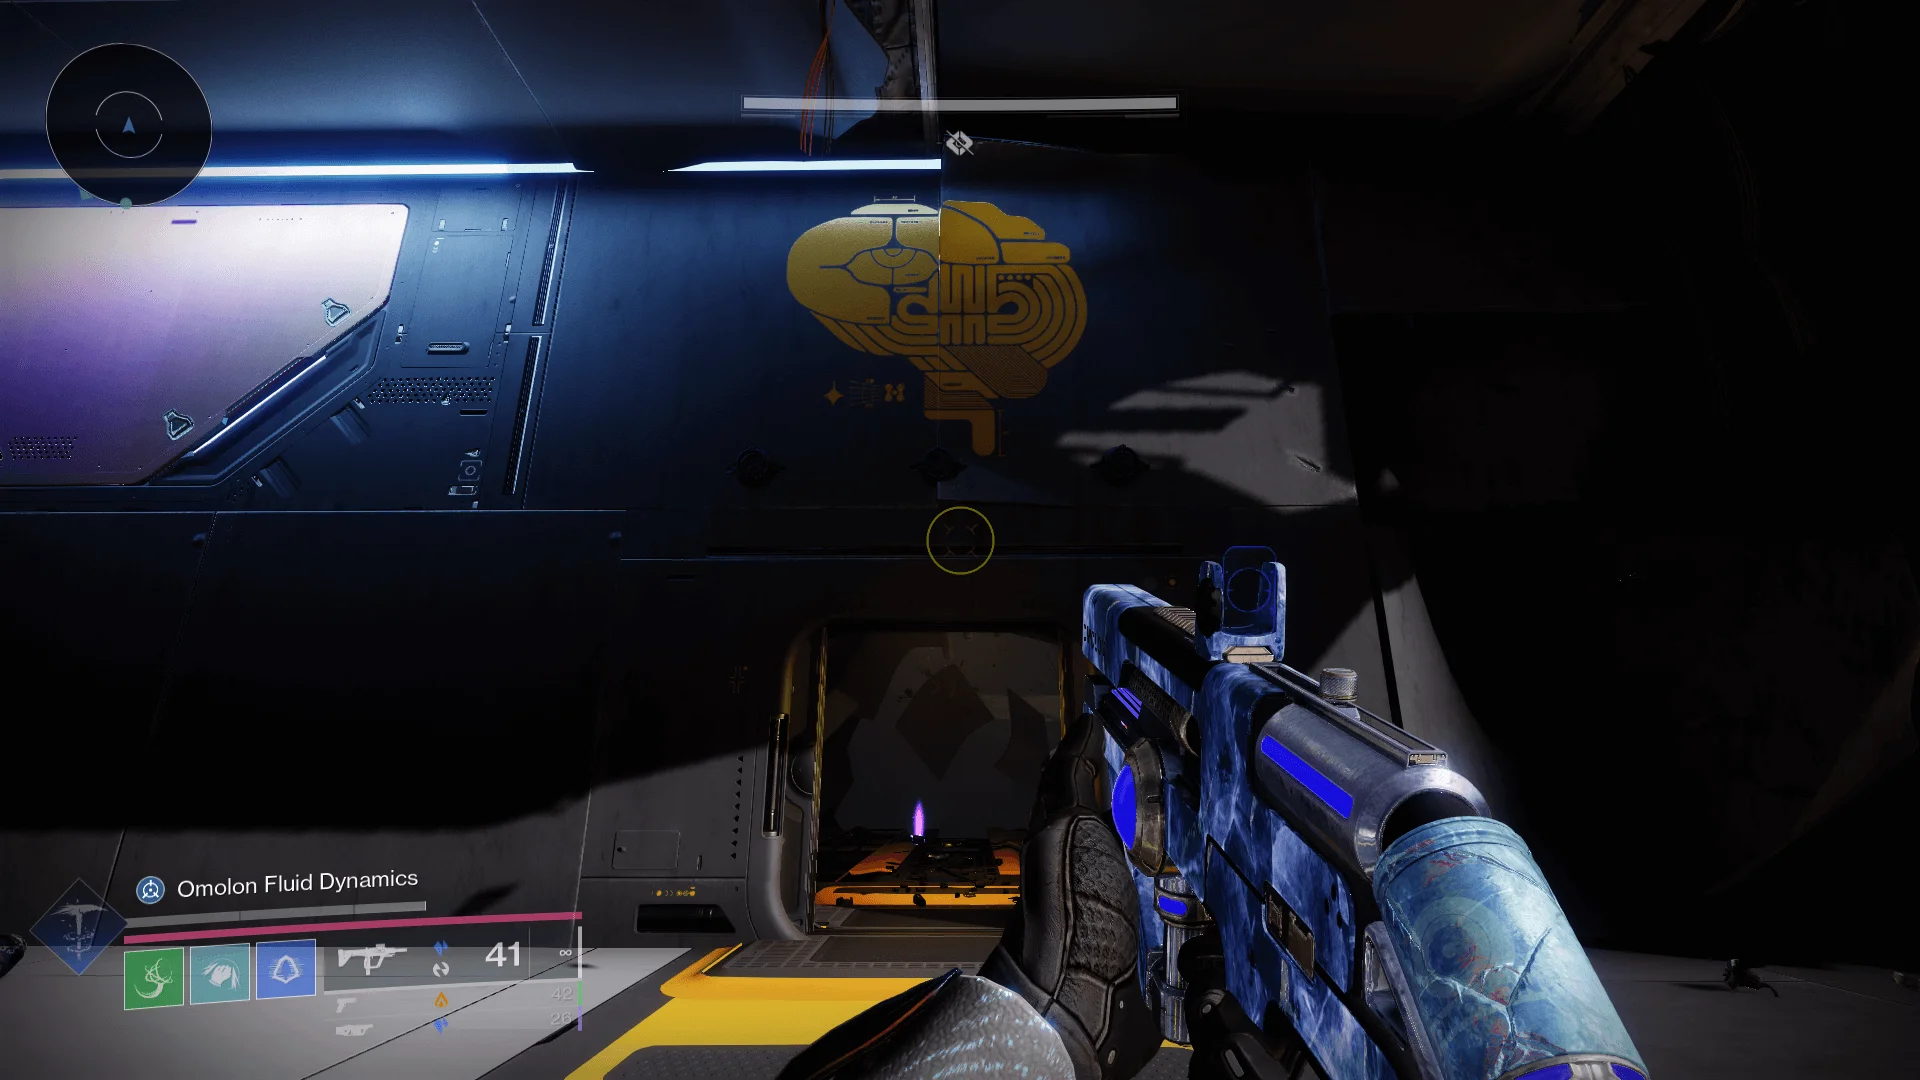
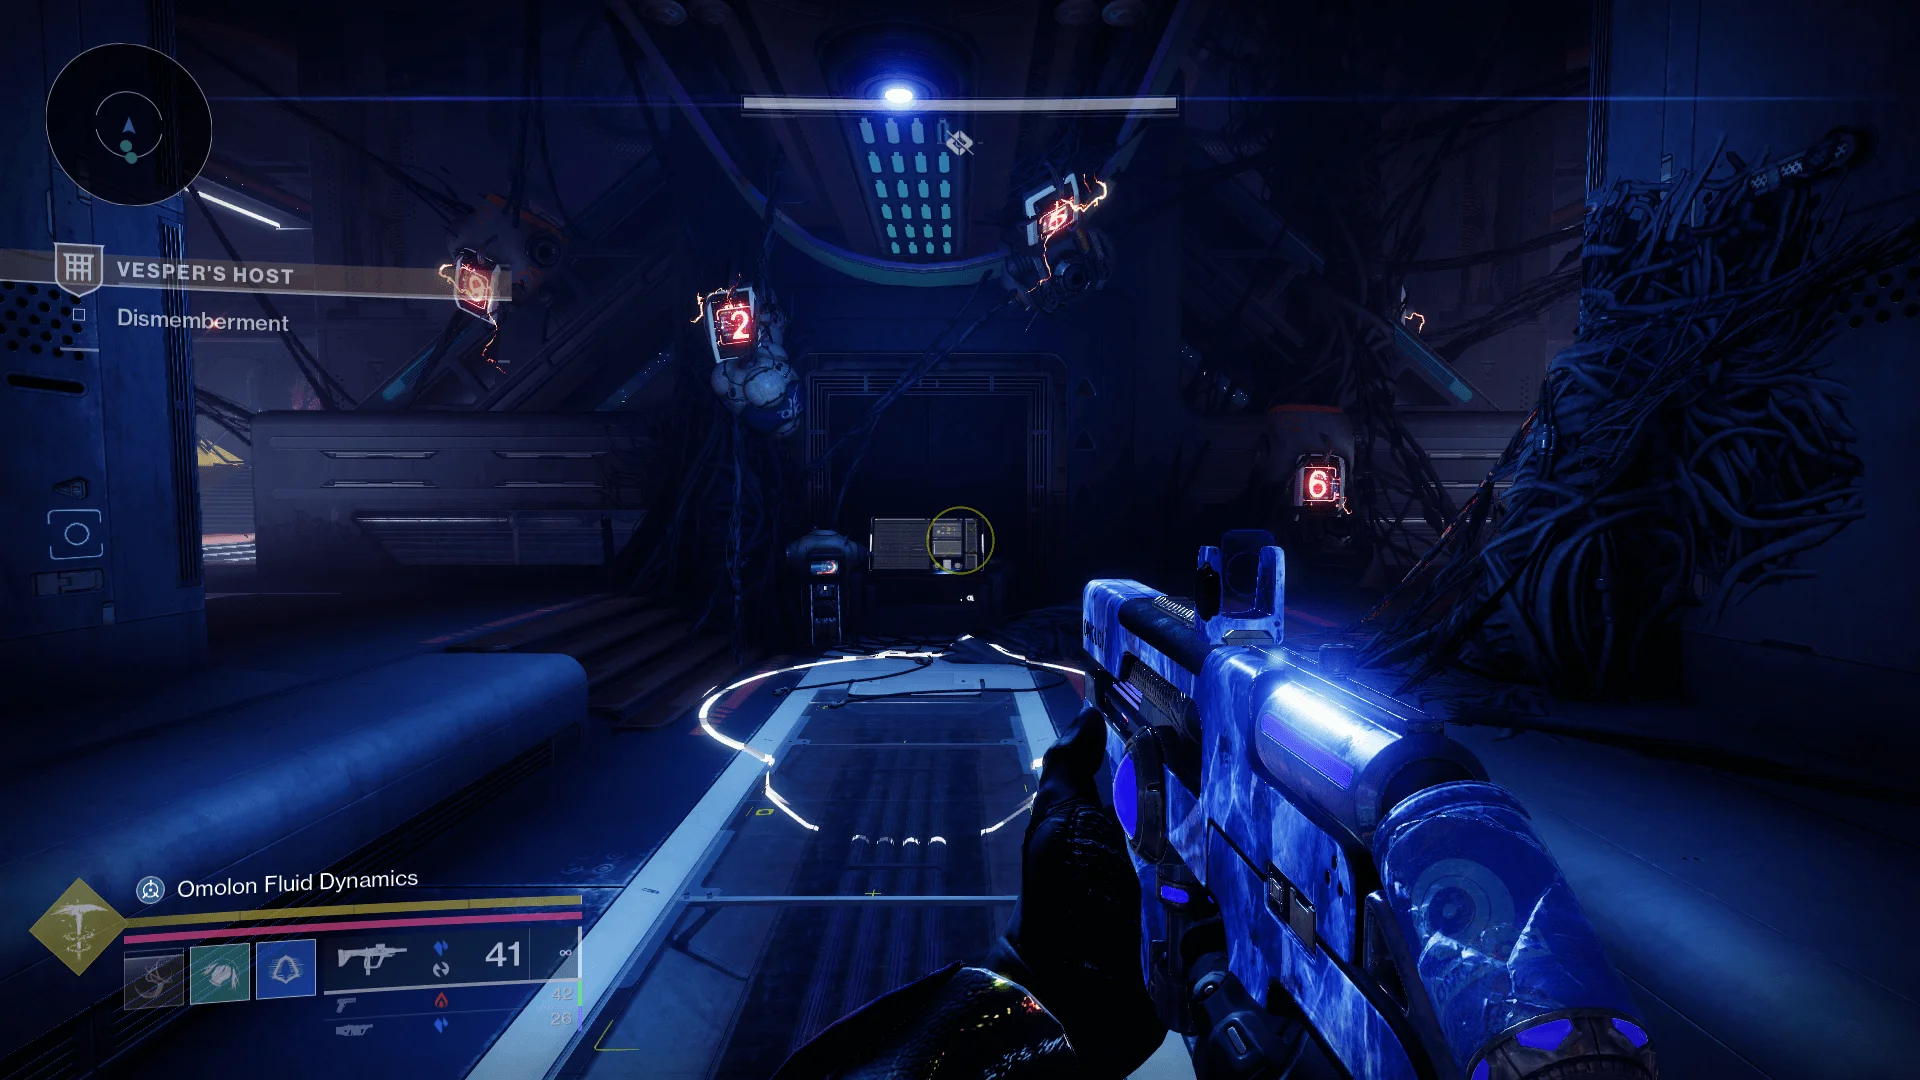
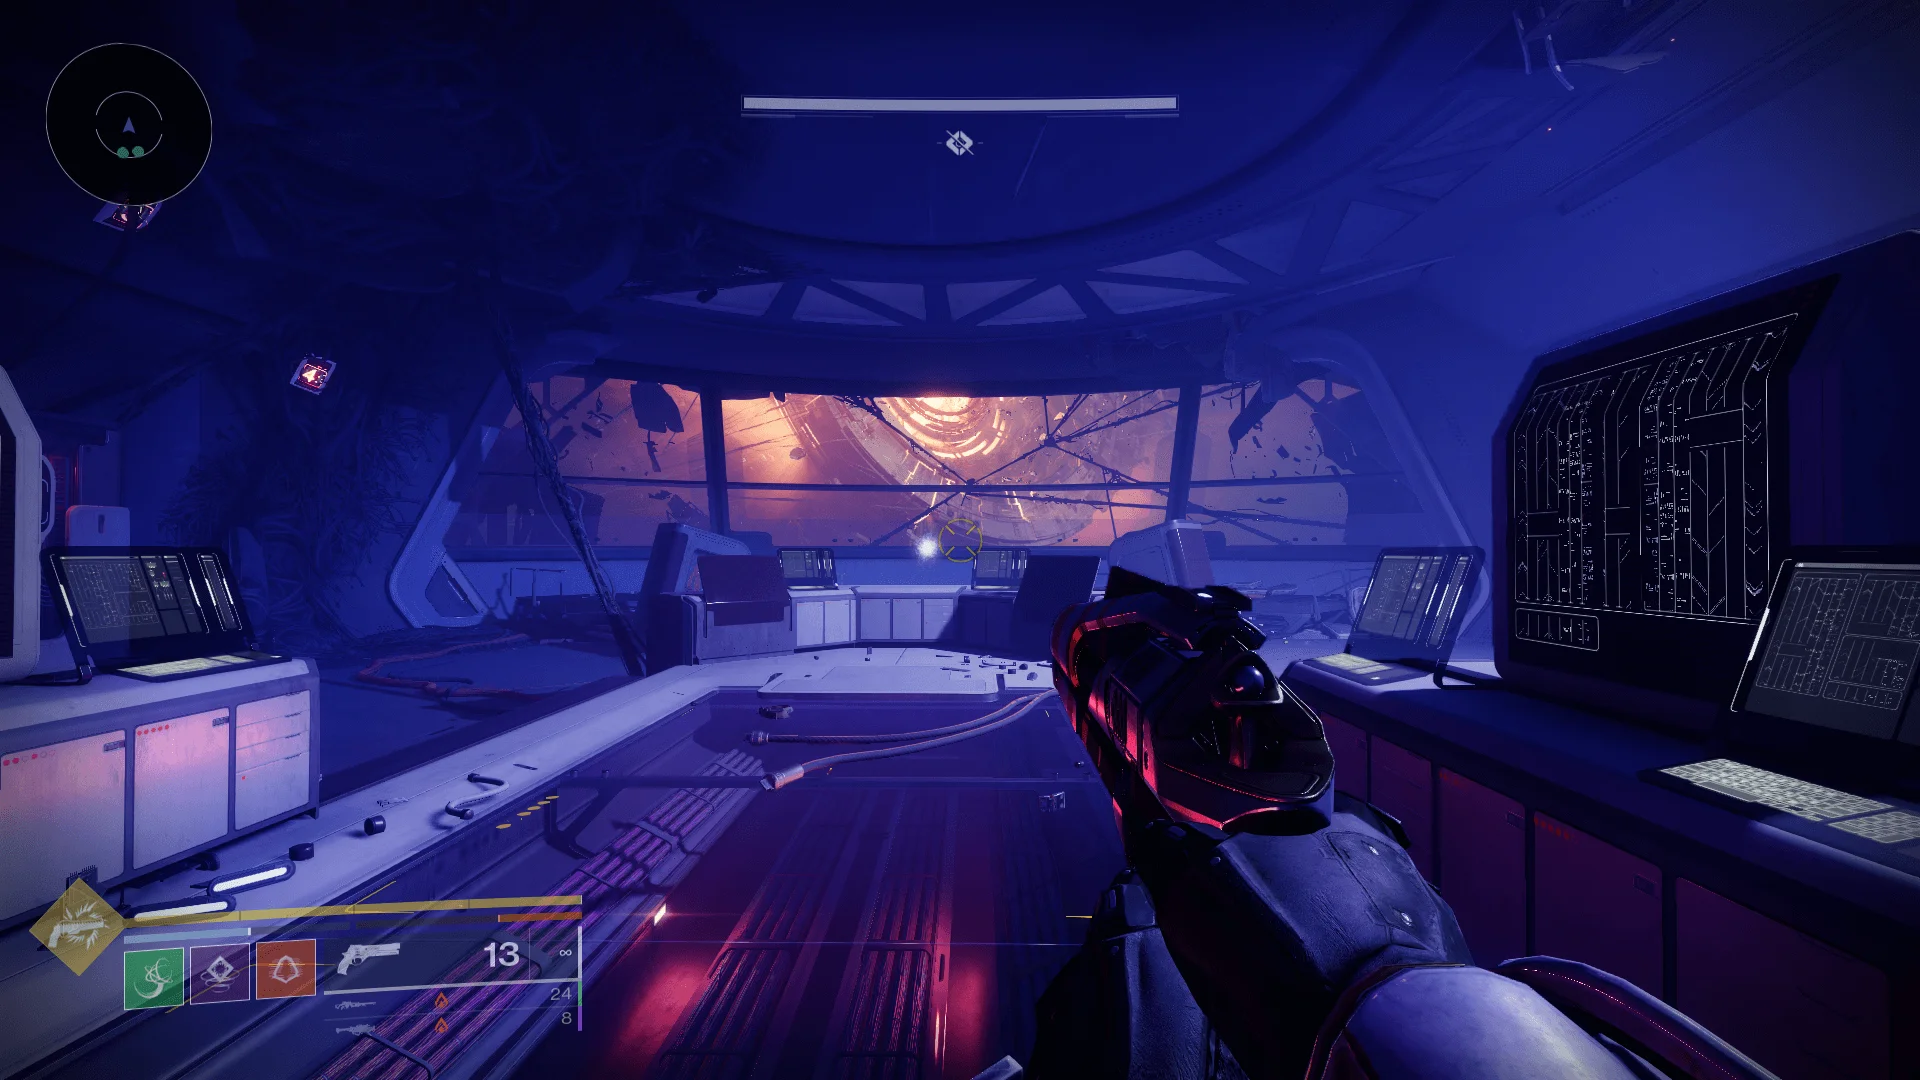
The opening to the dungeon will spawn you on metal scaffolding just outside the entrance to Vesper’s Host. Head straight until you come to a set of stairs heading right, towards the big red lights. You’ll find yourself in a hangar area with several Fallen Marauders spawning in.
Clear the Marauders, staying wary of their invisibility, until you see the phrase “A Viral Carrier Approaches!” pop up on your HUD.
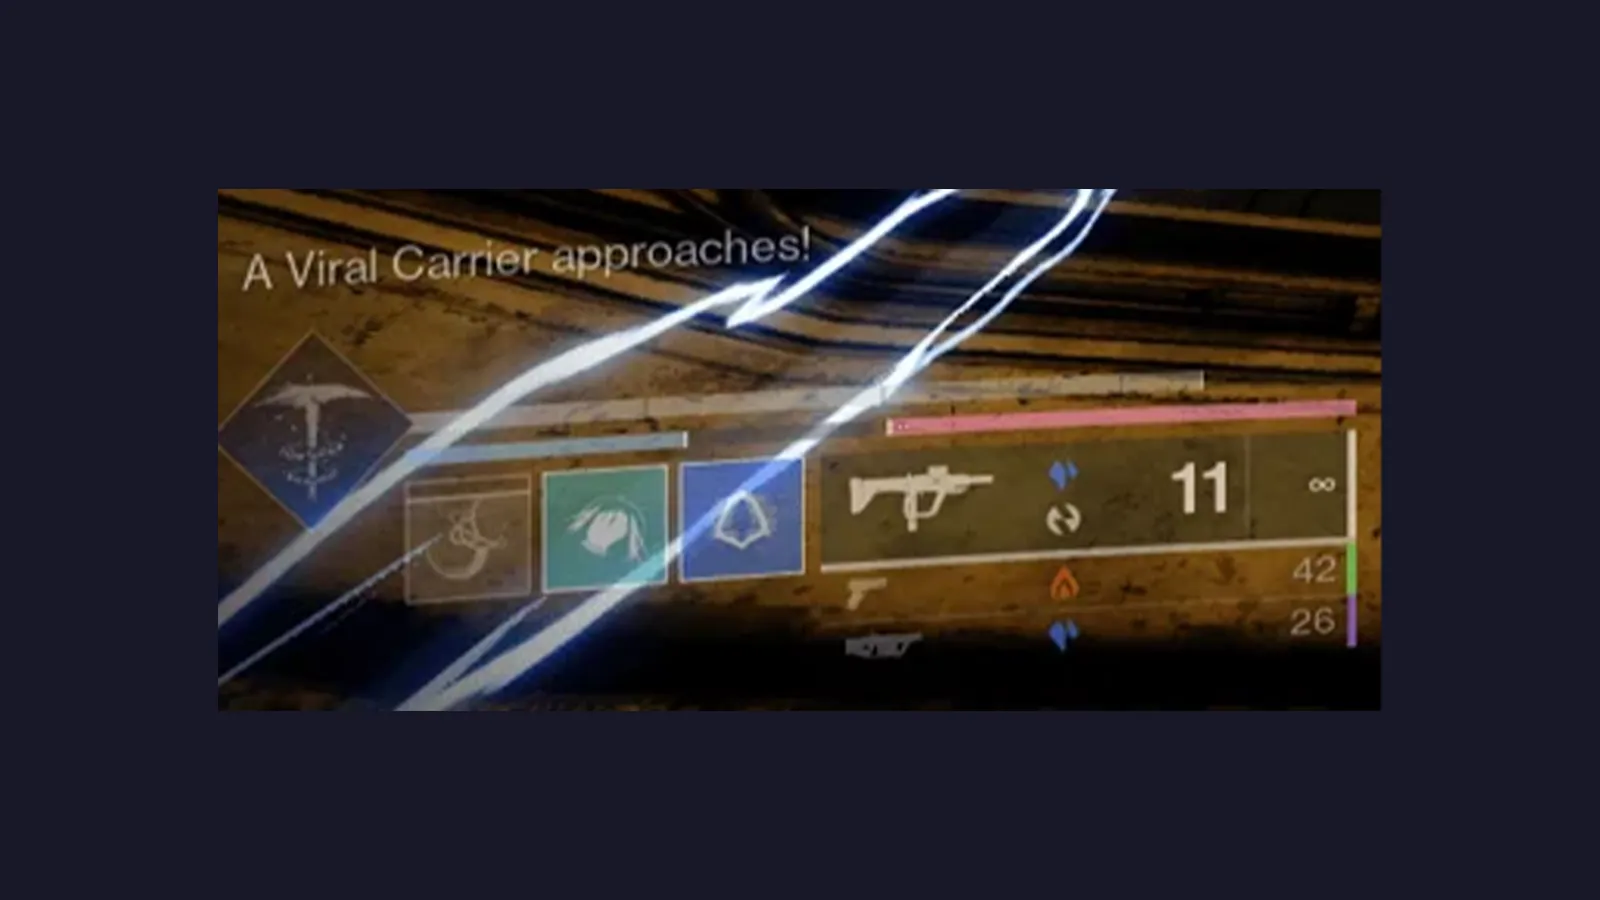
These Viral Carriers will spawn in and drop the Scanner and Operator augments when defeated. Players who have completed the Deep Stone Crypt will be familiar with these augments, but they work a little differently here in Vesper’s Host.
You’ll also notice five White Panels in the hangar area. These panels are used to progress in conjunction with the Augments.
Here’s how these two augments work:
- Scanner Augment: The yellow Scanner augment allows a player to see the White Panels in orange on their minimap.
- Operator Augment: The red Operator augment allows you to shoot the White Panels, opening a door to the next area.
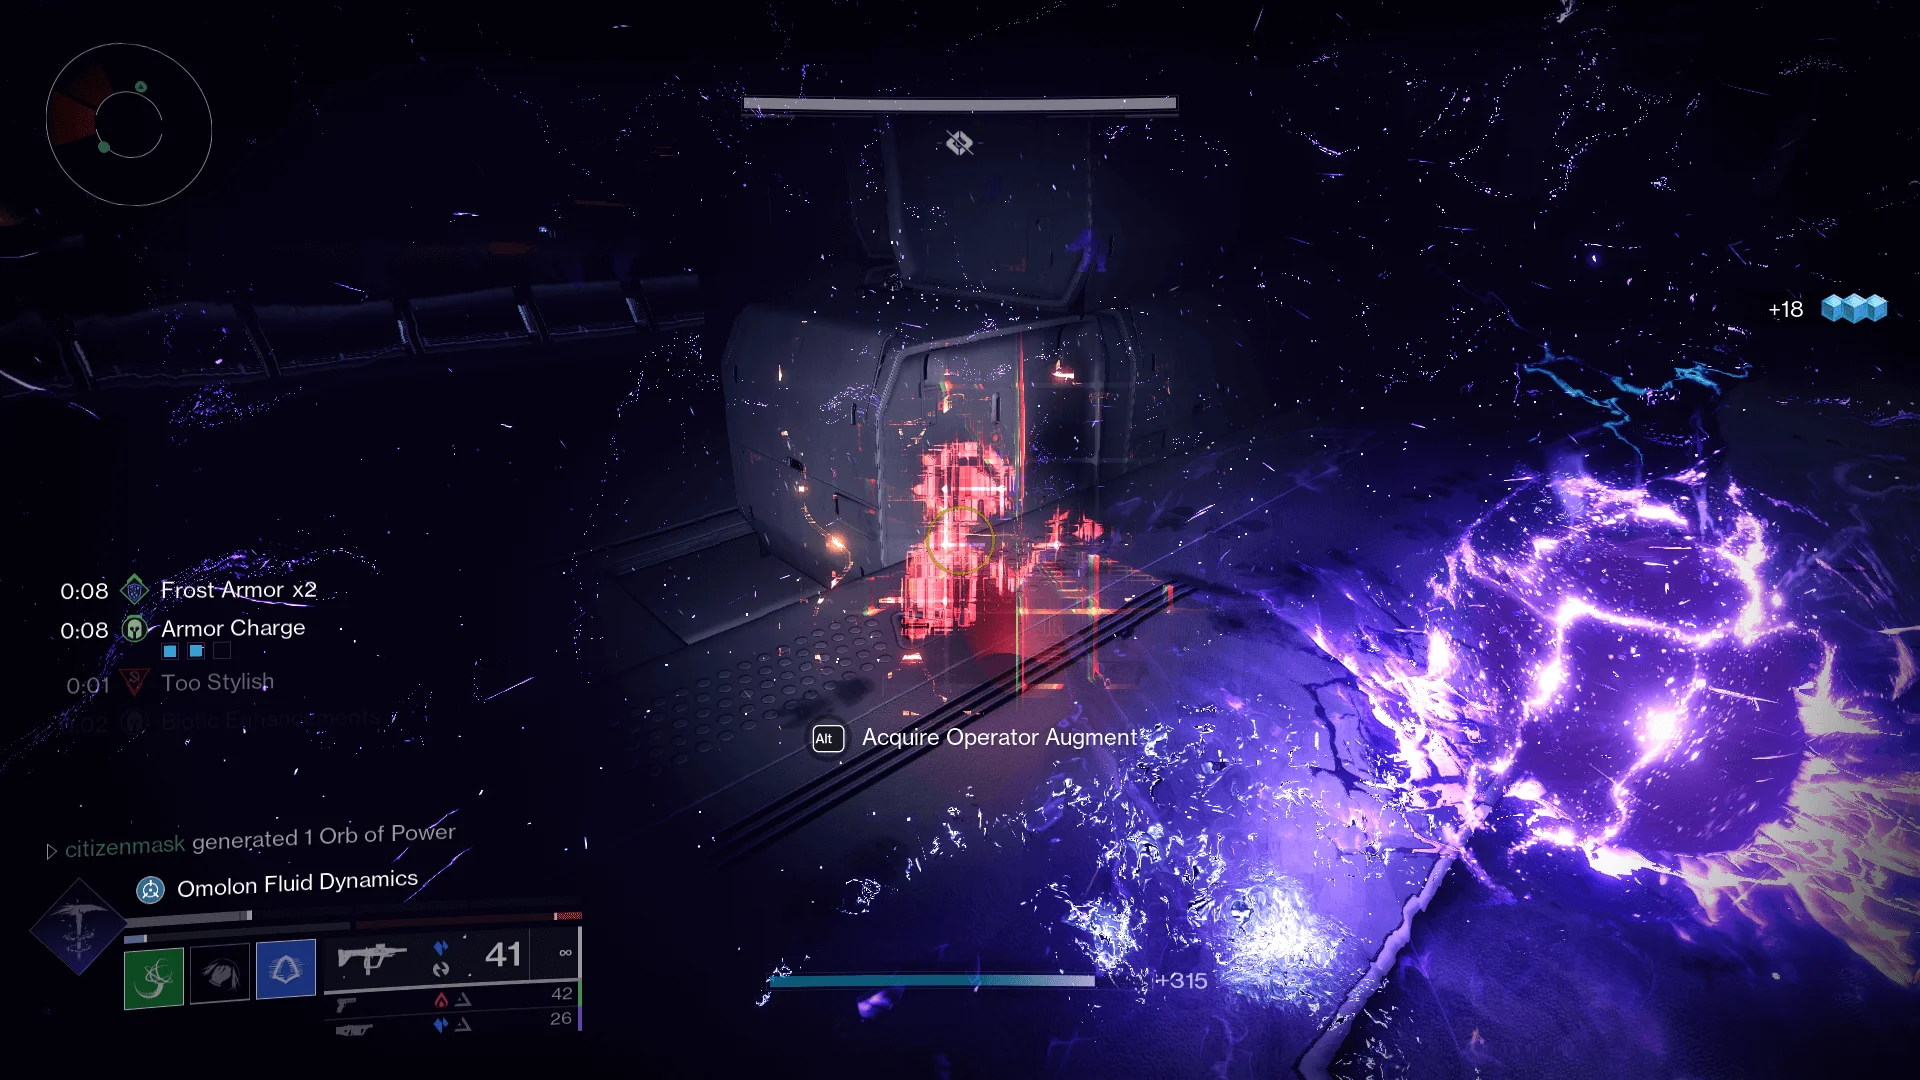
Players with Scanner augment can approach the White Panels and will hear a good sound or a bad sound, in addition to the White Panel changing colour on the minimap. When the good sound plays, the minimap will also update the White Panel’s icon from orange to white, indicating that it must be shot by the player holding the Operator augment. When the bad sound plays, the White Panel’s icon will disappear from the minimap entirely, and if shot by the Operator, they will die instantly.
Only the player with the Scanner augment can see on the minimap which Panels must be shot, therefore communication is key. If the player with the Operator buff shoots the incorrect panel, they will die instantly.
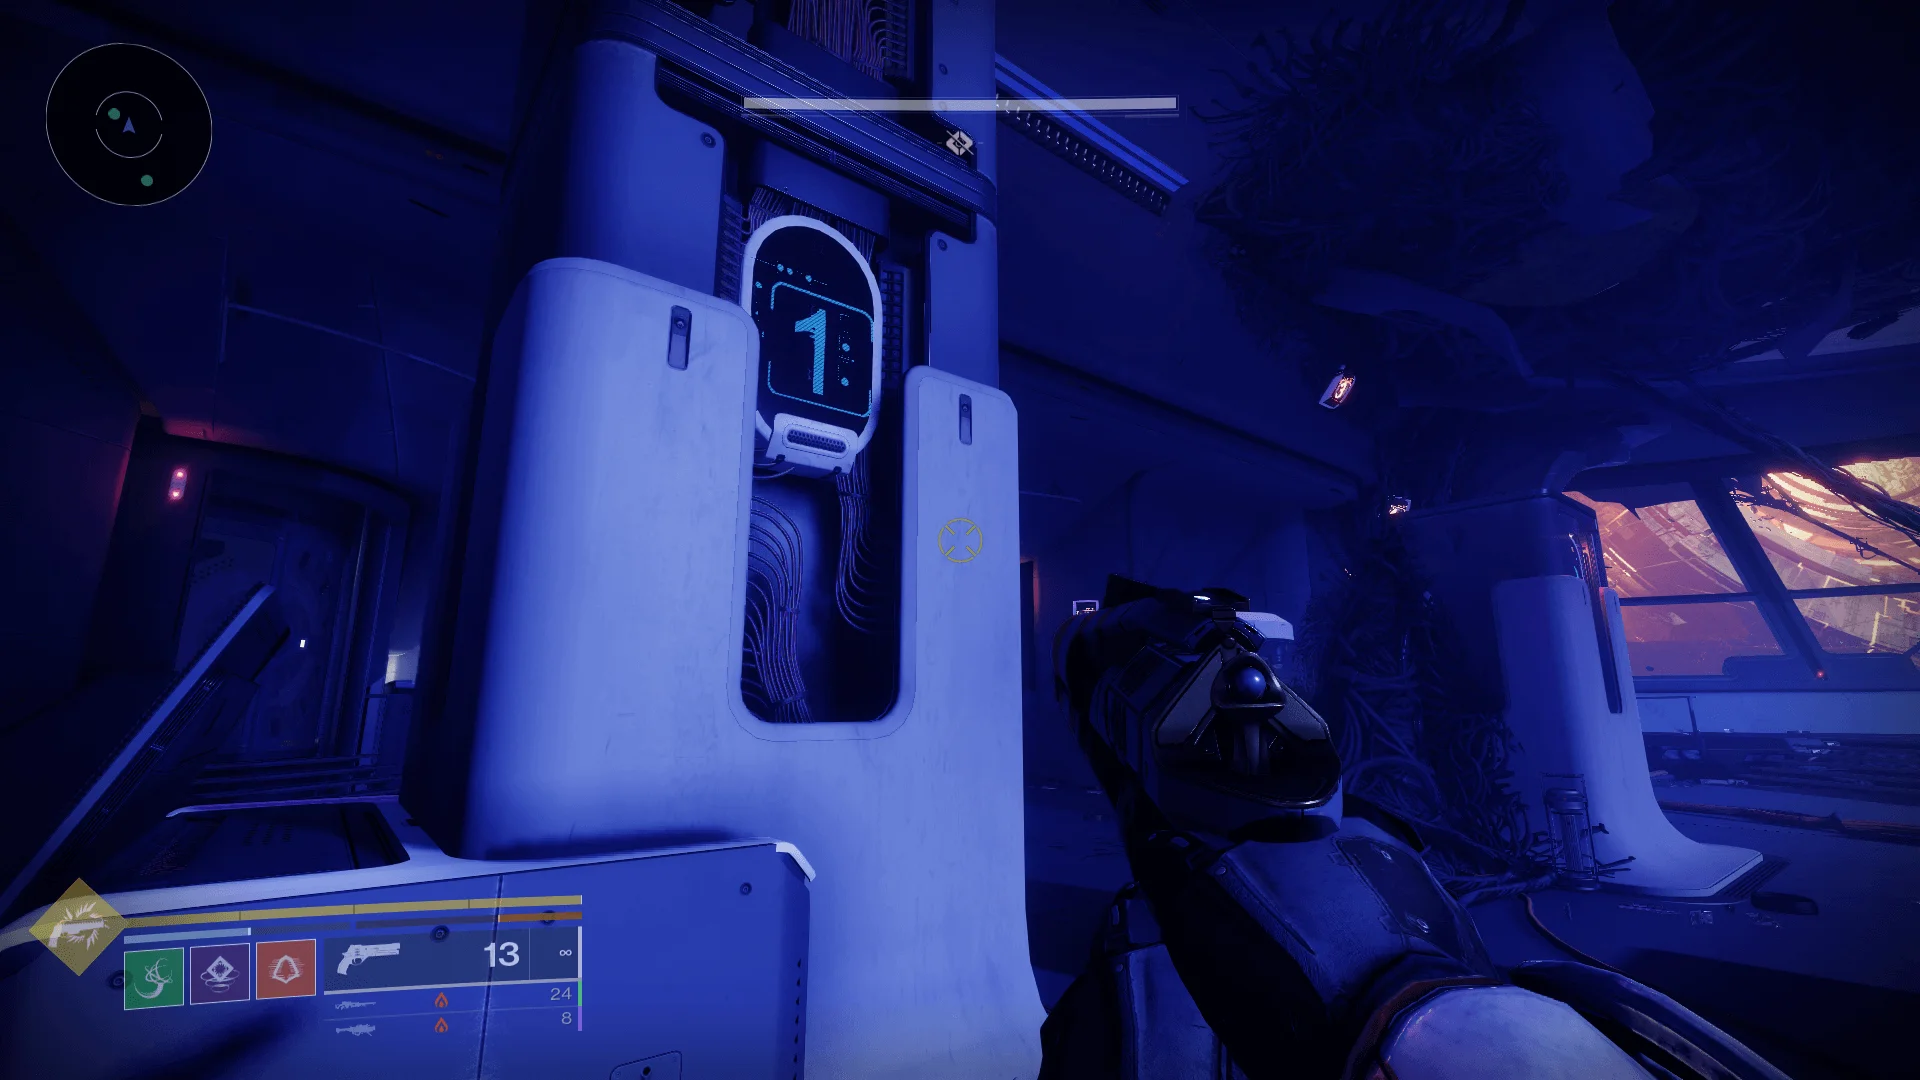
Important
You can only hold onto an Augment for 1 minute before it kills you. In order to prevent this and refresh the Augment buff, use Augmentation Stations, which you will find throughout the dungeon.
The method here, which will repeat in variation throughout Vesper’s Host, is as follows:
- A player uses the Scanner augment to check which white panels in an area must be shot.
- Then another player uses the Operator augment to shoot the panels that the Scanner calls out.
Do this with the Panels in the Hangar, you’ll need to shoot a total of 4. Keep this in mind as you go forward, as each encounter will require you to shoot 4 White Panels in various situations.
Once you have unlocked the airlock, follow the path until you reach a square room with a large machine with two cubes inside of it. Once there, head to the right until you see a broken wall panel. Drop down to reach a cramped red-lit area with several Tripmine grenades blocking your path. Shoot or run through the grenades depending on your level of resilience, and head left.
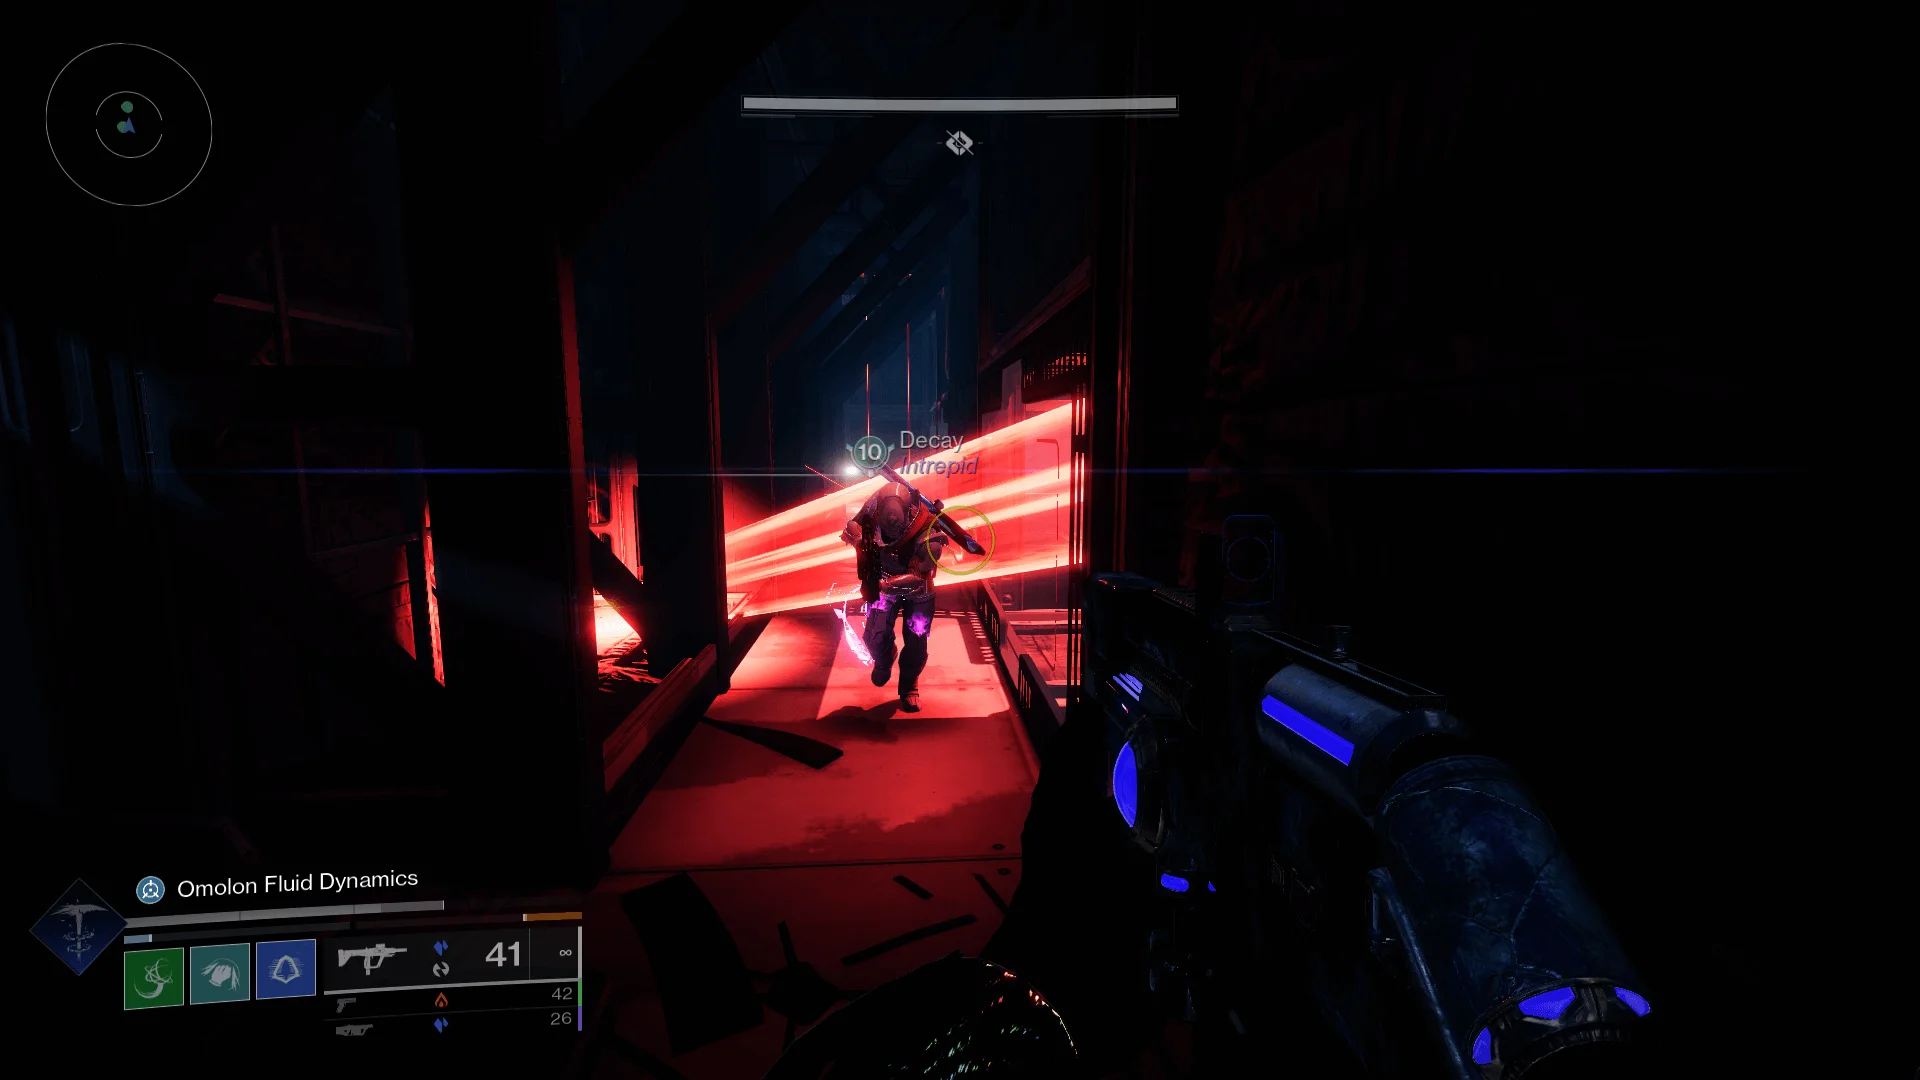
You’ll drop down onto a bridge in another red-light room with another broken panel. Keep heading down until you hit the bottom. Your path forward will be marked with two Tripmine grenades in the shape of an X.
Clear the grenades and the enemies in the next room. You’ll be in another broken hallway. Head right towards the purple lights, left and down into a shaft with more Tripmine grenades. Congratulations, you’ve made it through the intro and into the first encounter.
Encounter 1: Activation
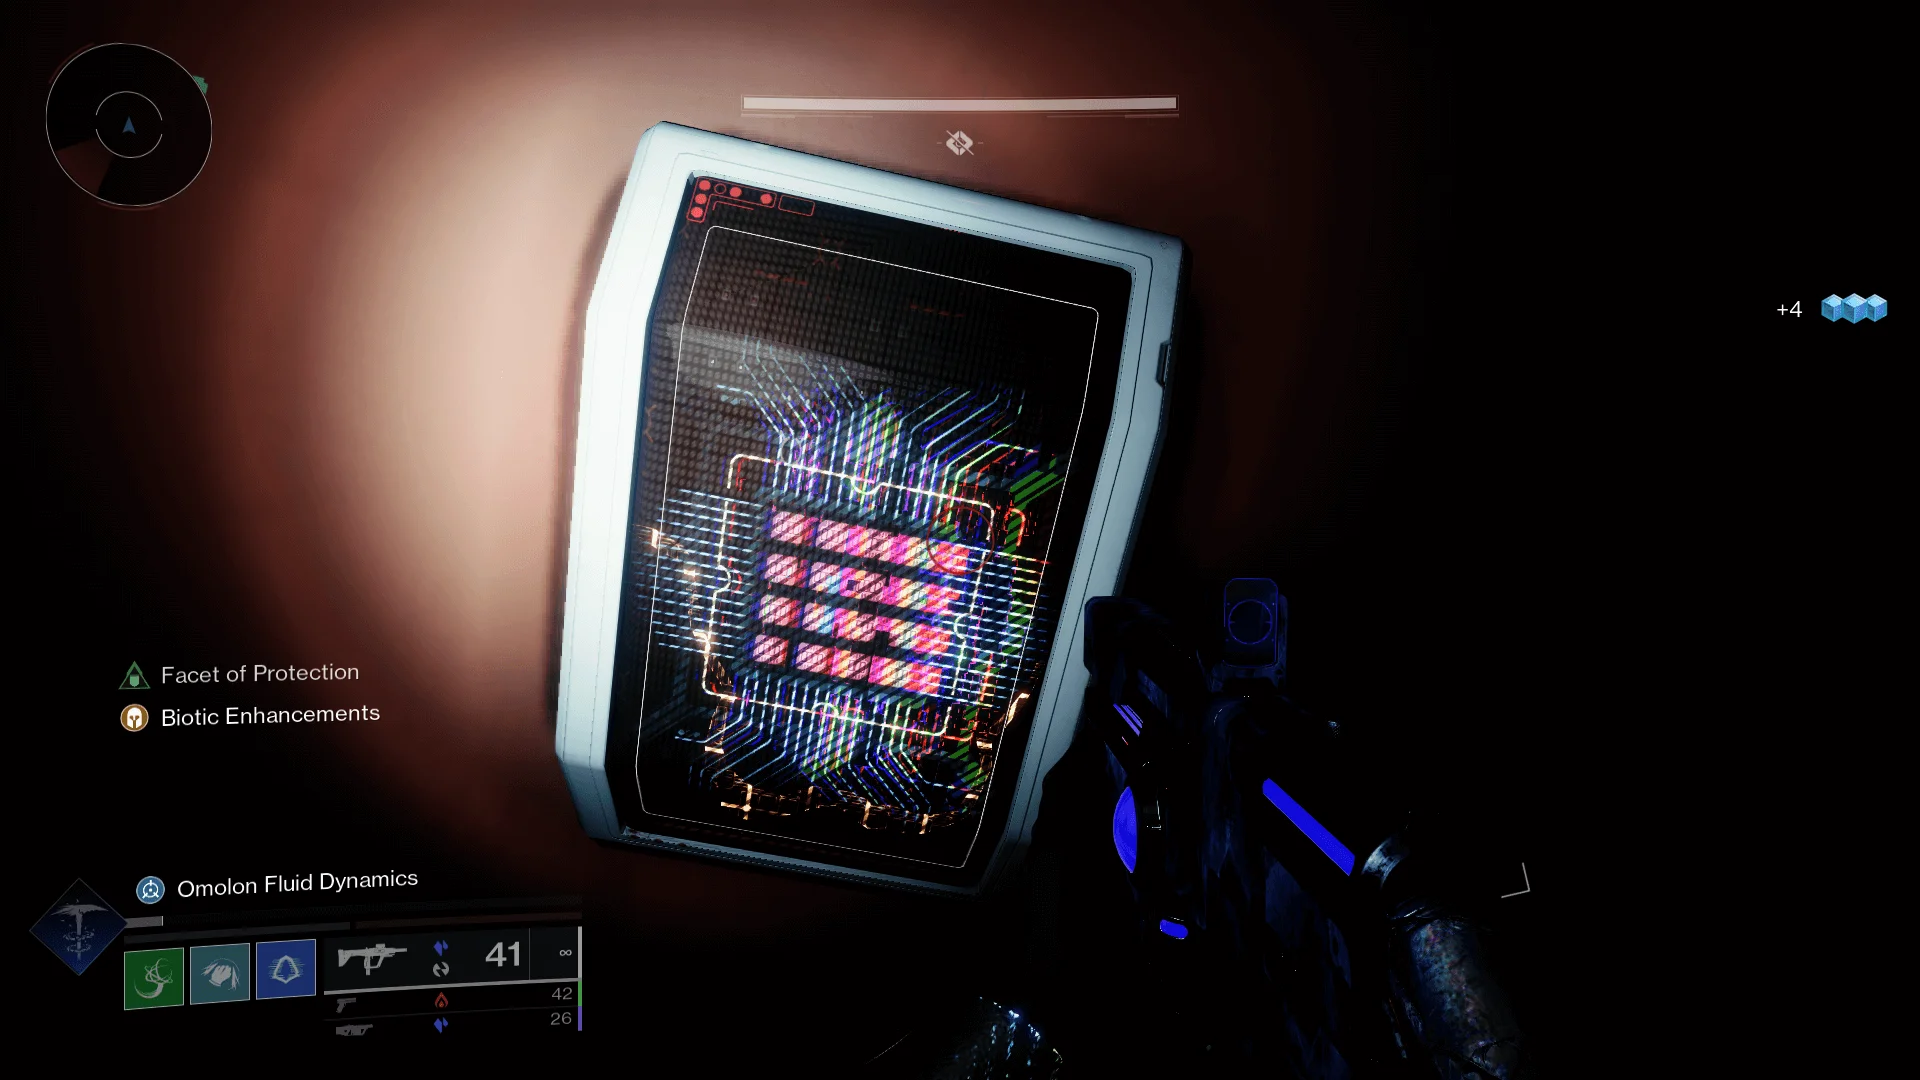
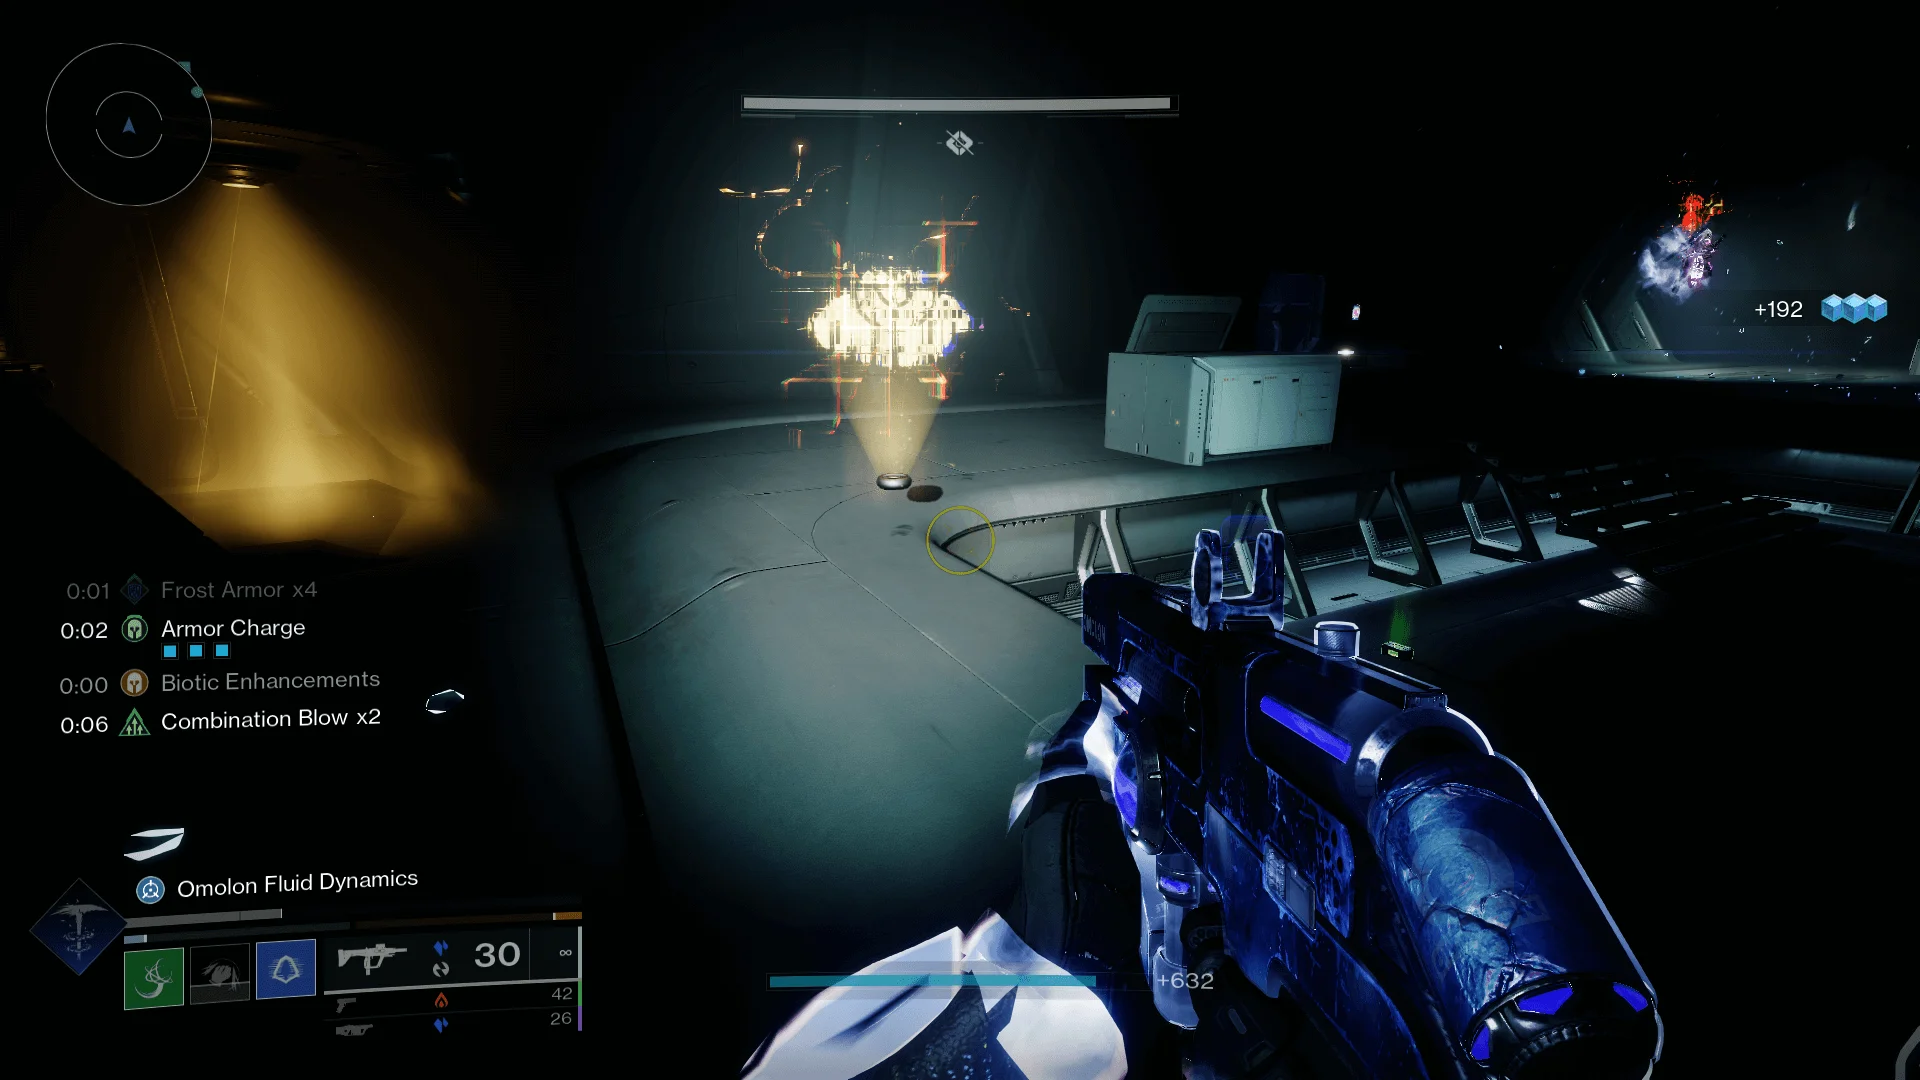
You’ll be in a large room with a rally spot in front of you, and a large white orb just ahead. Take note of the three Containment Units behind it, which look like open chests. The orb is used to start the encounter.
Upon activating the orb, a yellow bar Brig, several Resilient Dregs, and Shanks will spawn, Clear the enemies until like the intro encounter, you see “A Viral Carrier approaches!” in the info feed, just like in the intro. Kill the little guy and grab his Scanner augment.
Picking up the Scanner augment will unlock the Heart, Brain, and Lung doors in the arena.
Each of these rooms follows the same gameplay pattern and can be completed in any order.
In the first Heart/Brain/Lung area, you’ll find multiple enemies flanked by two Machine Priests and an energy shield wall. Kill them as quickly as you can (minding the Scanner augment’s 1-minute time limit) to access the second area.
Important
As the Scanner augment may run out of time by the time you reach the second room, the Scanner player will need to dunk it in an Augmentation Terminal in either the first or second areas, then pick it back up to refresh the timer.
Once you’re past the shield wall and into the second area, kill all the enemies until a Viral Carrier with the Operator augment spawns.
Just like the intro, there are 4 White Panels that must be checked by the Scanner augment player and then shot by the Operator augment player. There are 6 panels in every room, so you can use the process of elimination alongside the Scanner augment to figure out which is which, as the player with the Operator buff doesn’t actually need you to check the White Panel before they can shoot it.
When all 4 White Panels are shot, a Nuclear Core will spawn. You will need to transport the Nuclear Core back to the main room and drop it in the containment units behind the big white orb before the Nuclear Core’s timer runs out.
However, the player carrying the Core will gain stacks of Radiation, which will kill you once it reaches 10 stacks, in addition to reducing movement speed and jump height.
Any players with Augments should drop them in the Augmentation Terminals before running back to the main room with the core. Help clear the enemies to ensure your fireteam member with the core has a safe run back. If your radiation gets too high or a player finds themselves stuck, they can drop the Core or another player can take it from them by using the interact key.
Once you enter the main room, a larger version of the Brig you fought at the beginning will spawn. Kill it, and you’ll be able to drop the Core into one of the Containment Unit boxes behind the white orb. The player with the Nuclear Core can drop it to assist your fireteam with killing the Brig, as long as they pick it back up and deposit it before the Core expires.
Rinse and repeat for all 3 rooms. Note that on your final Core deposit, the Brig that spawns will have more health. Once you’ve deposited all 3 cores, you’ve completed the encounter.
Order of Operations:
Here you’ll want to focus on builds that are primarily about crowd control as you’ll be swarmed by them while transporting the Core back and forth. Save your burst damage for the Brigs, as they’ll need to be put down quickly. A Strand Hunter using Whirling Malestrom can make quick work of the dregs and vandals in your path, or even a classic Ignition-based Solar Warlock. Find what works for you here to ensure your teammate has a clear path ahead.
Traversal: Raneiks Unified – Puzzle Door Section
You’ve got a Capital-B Boss ahead of you, but before you get to face him down, you’re gonna have to get chased a little. Completing the first encounter will deactivate a shield wall at the back of the main room. Follow the path until you reach a room lit with orange light.
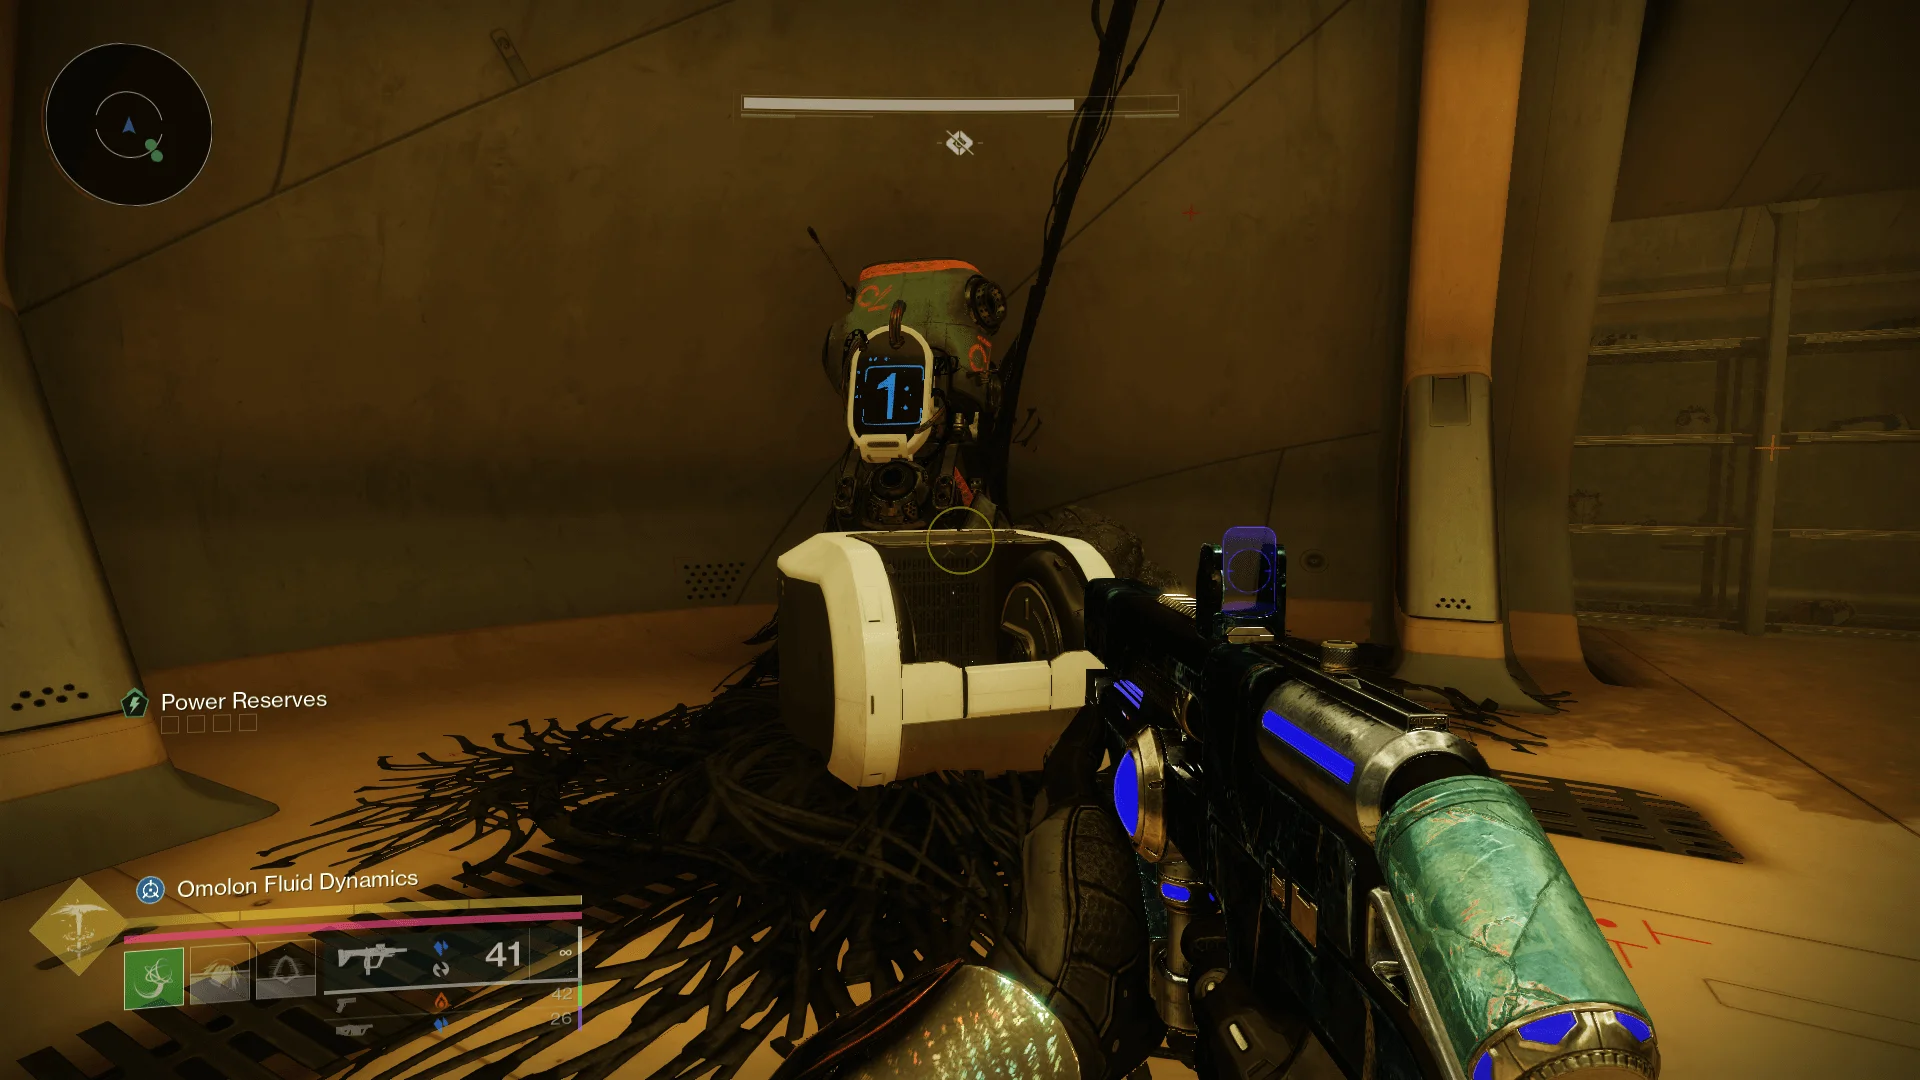
You’ll notice a locked door here with the message ‘Power Reserves Empty’. And a console nearby with the option to ‘Power Off’.
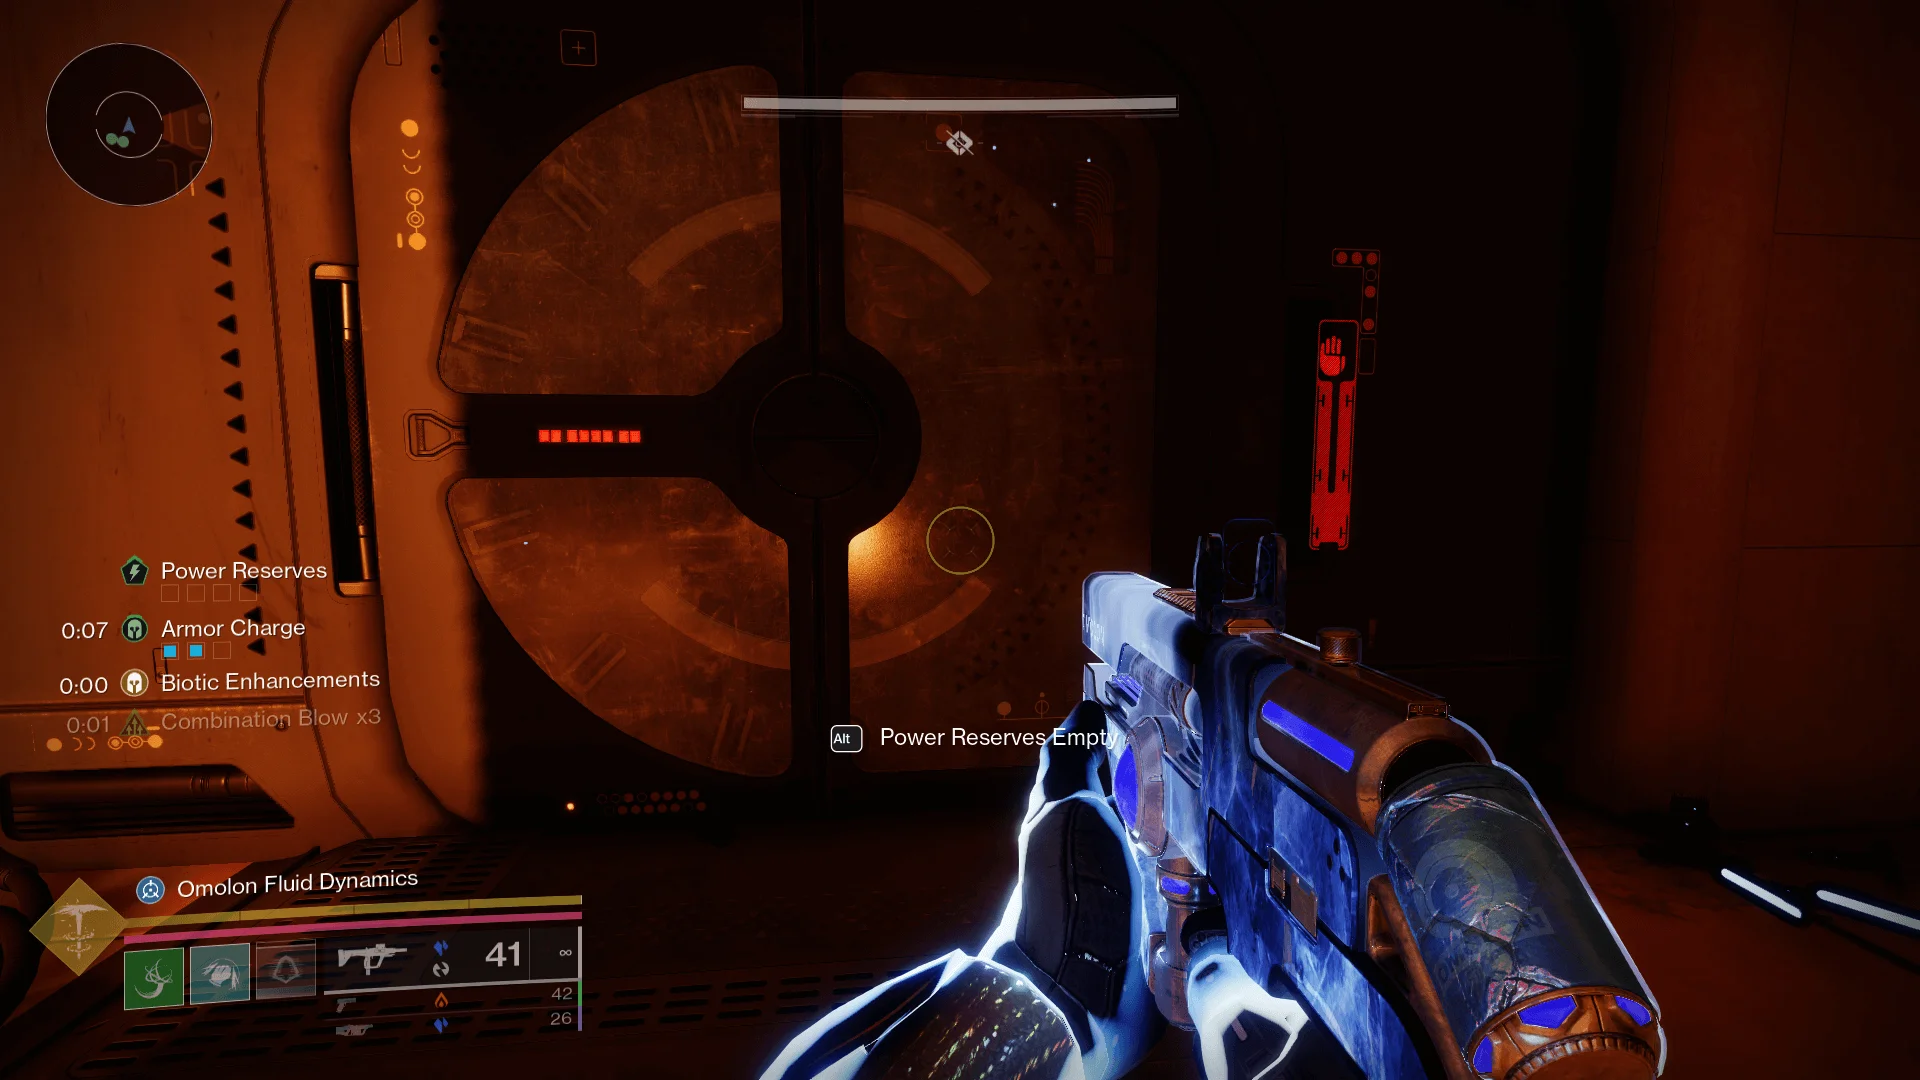
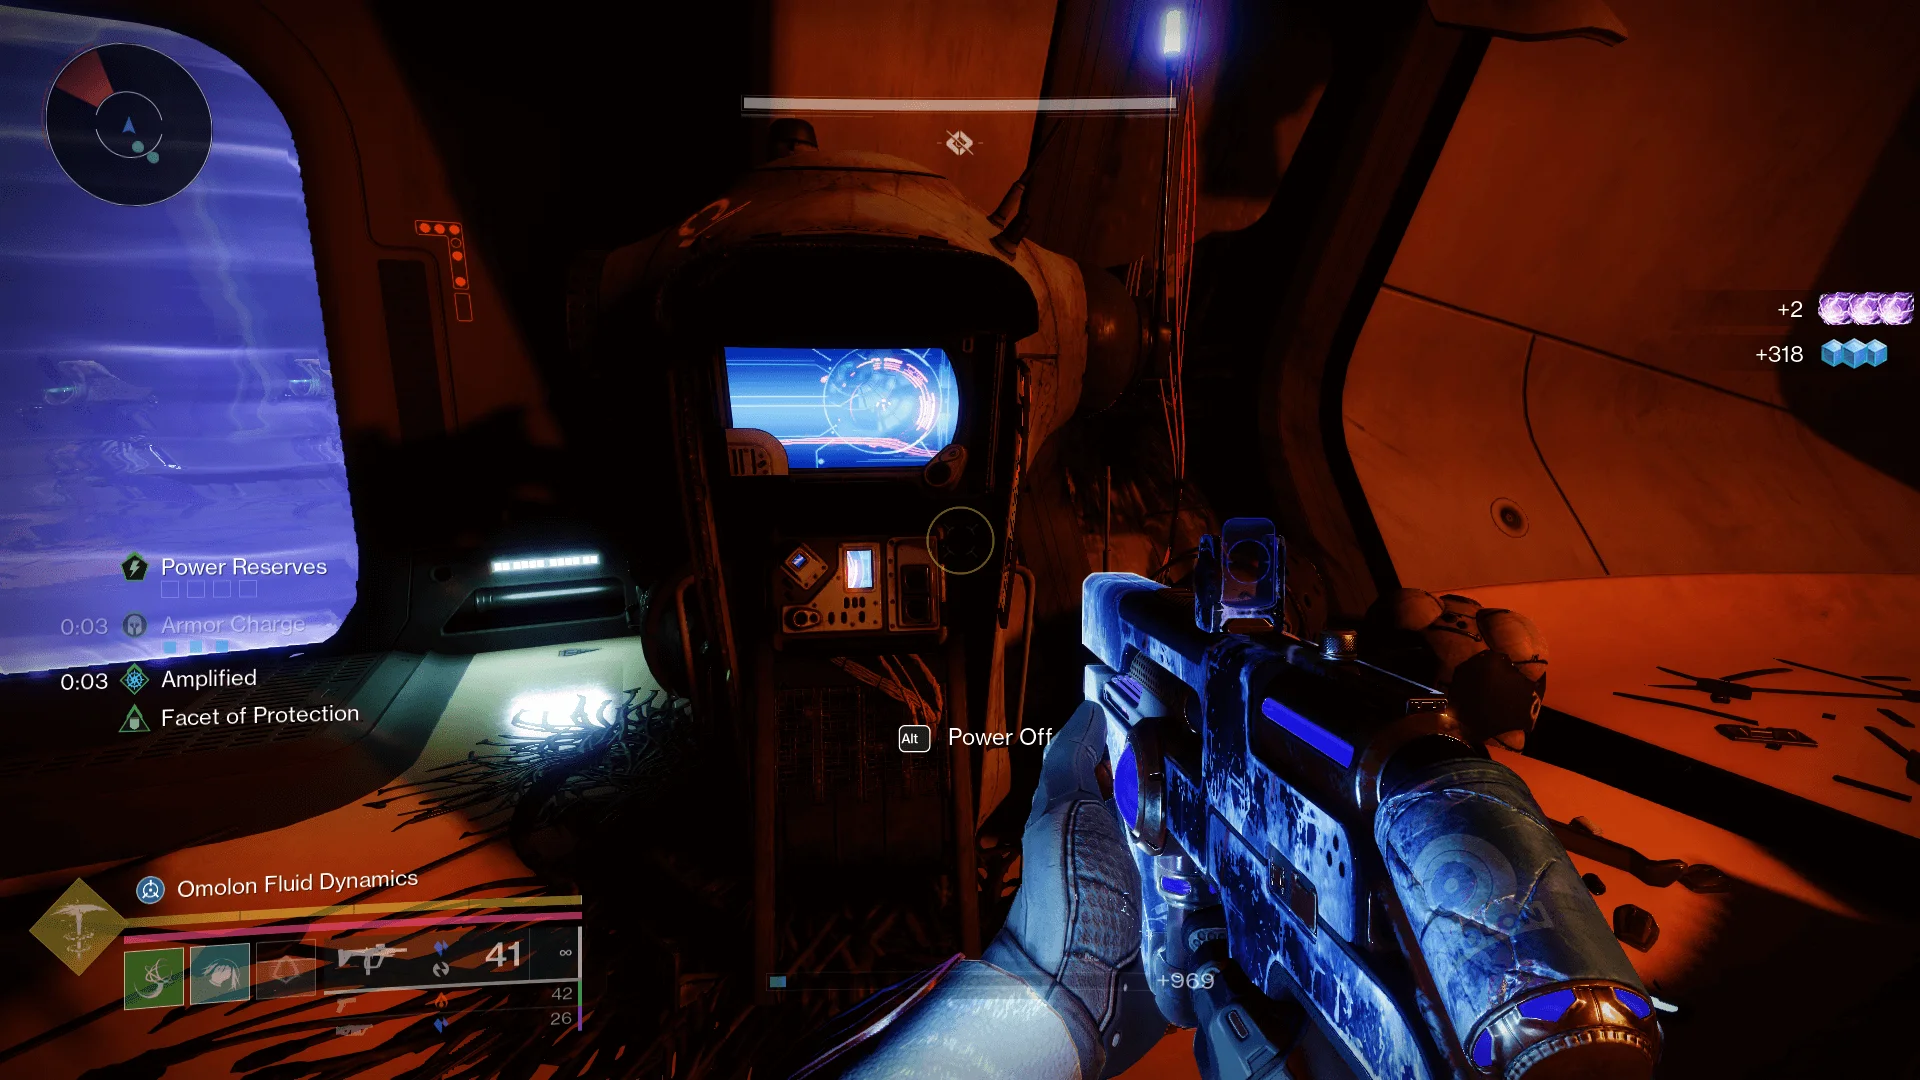
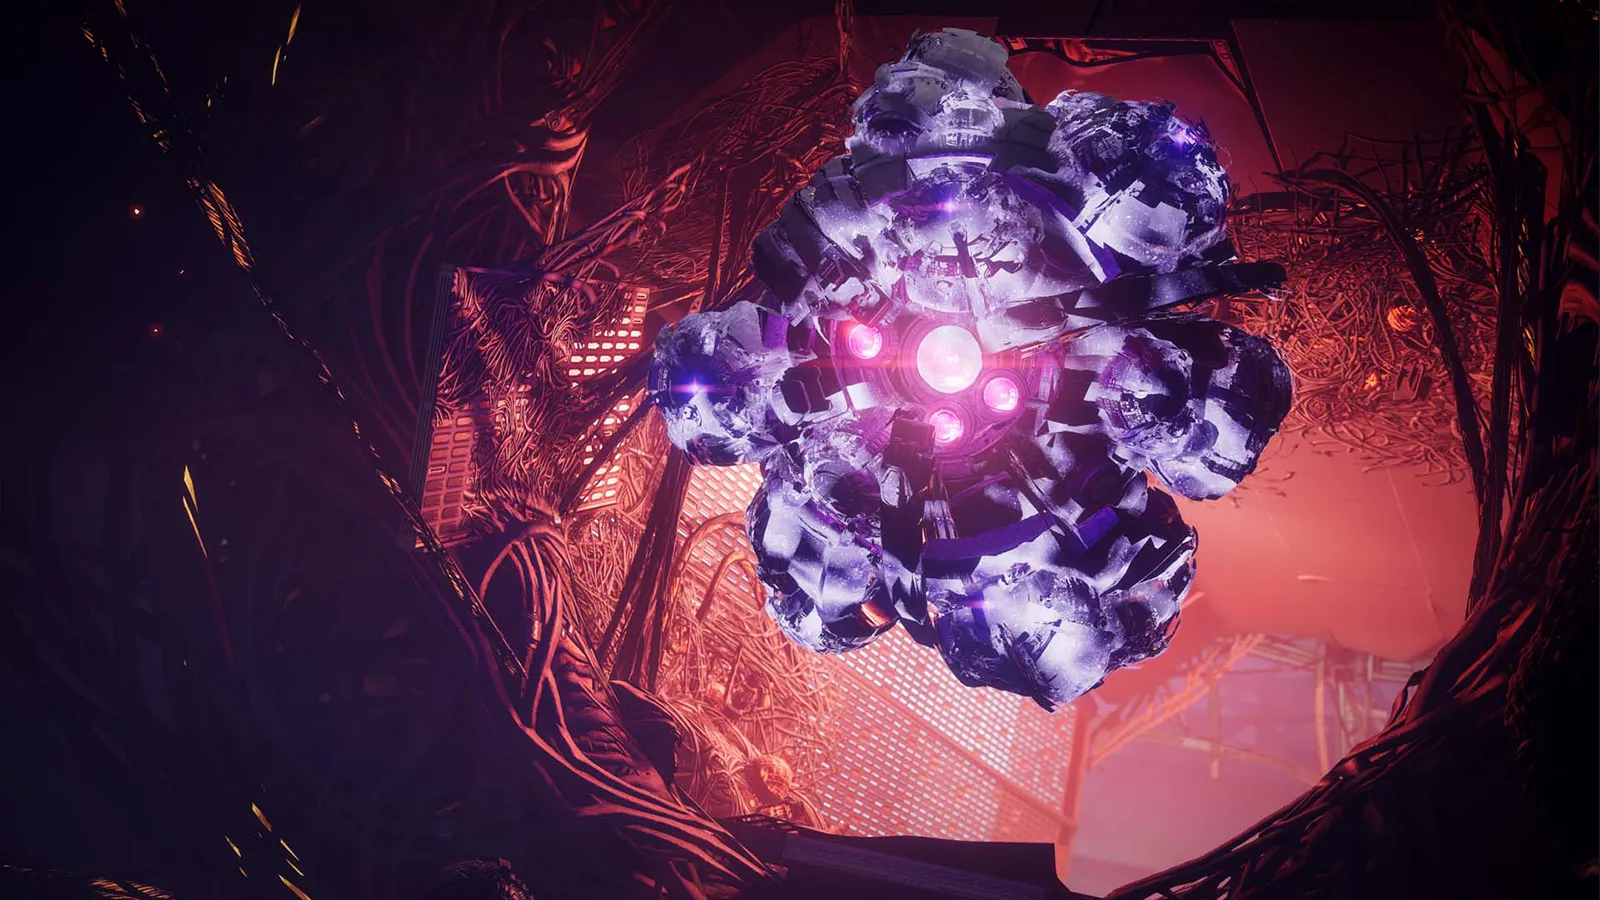
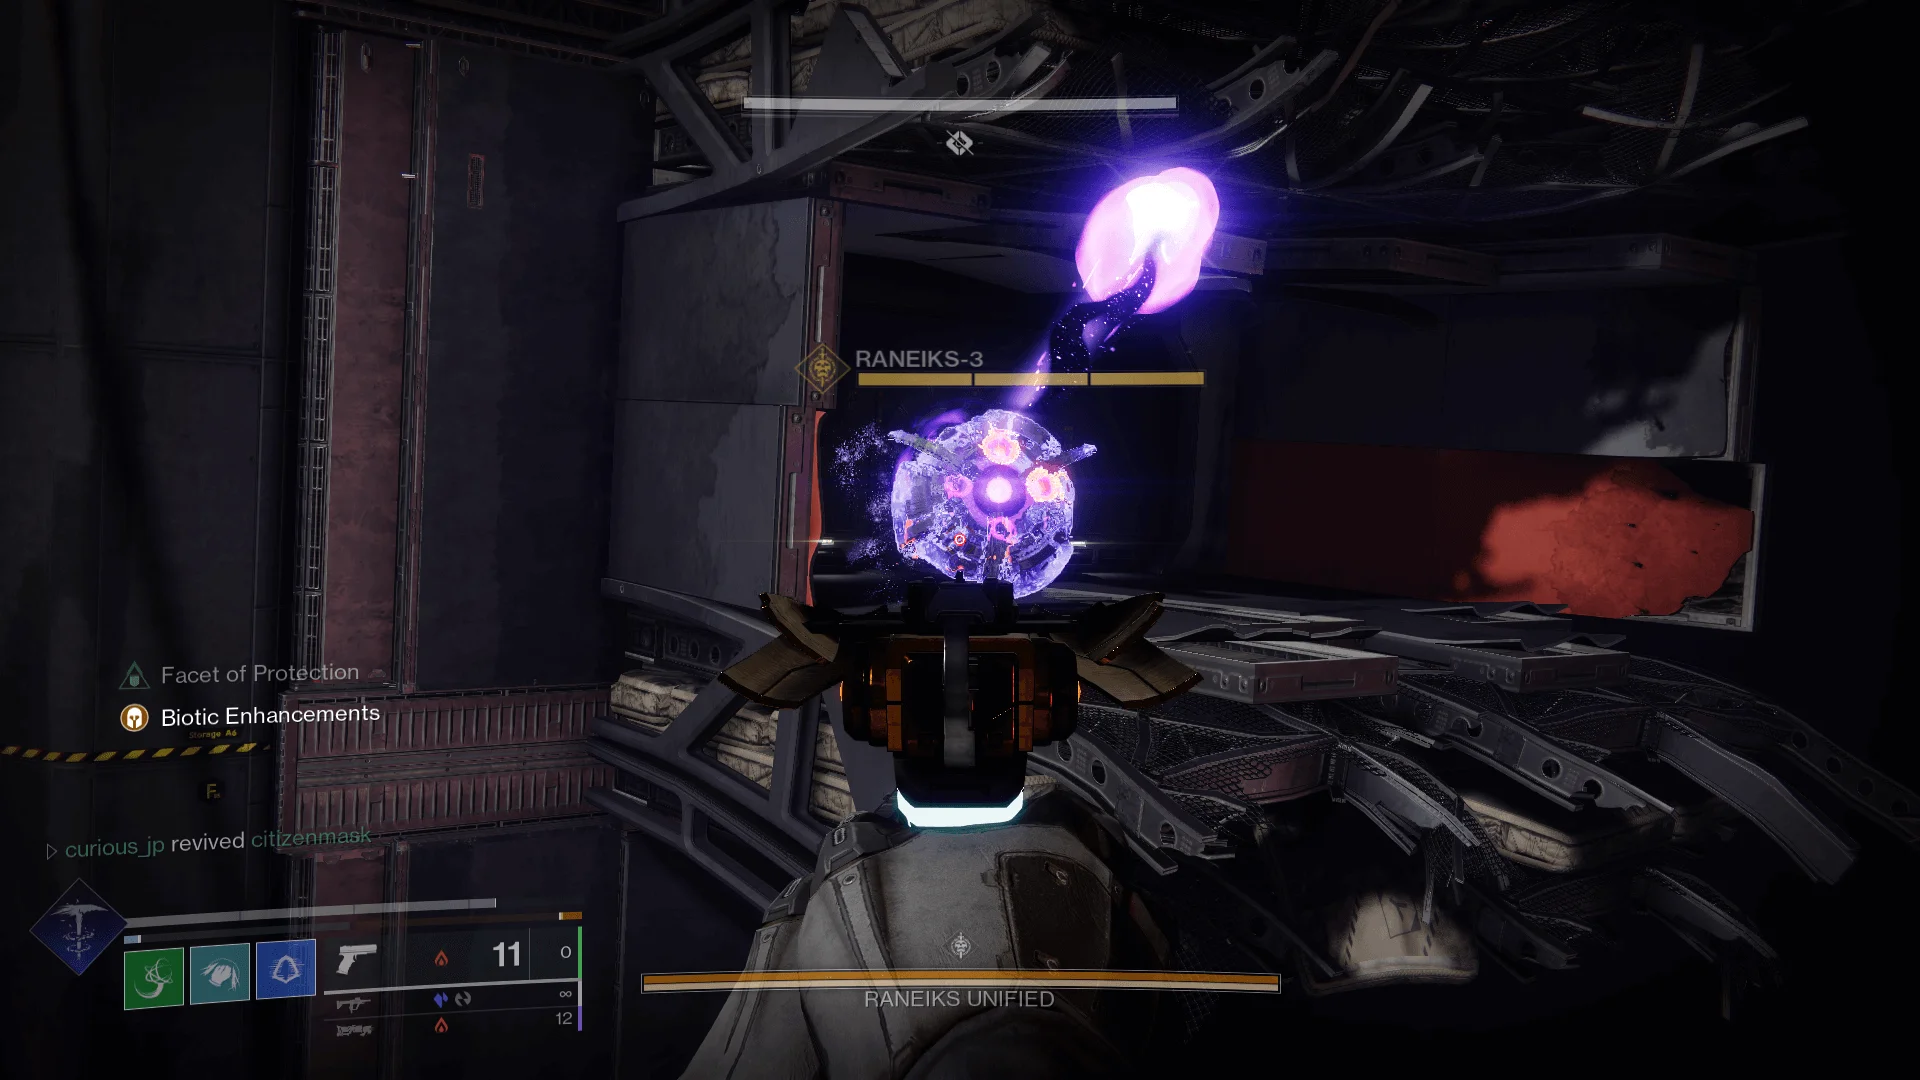
Upon hitting ‘Power Off’, the door will open to reveal your nemesis for the next encounter: Raneiks Unified, a massive Fallen Servitor made out of Servitors, who spits out explosive Servitors. Neat. It’s one of the funniest designs for a boss we’ve seen in Destiny 2 but simultaneously manages to look incredibly cool due to it adhering to the Fallen’s cobbled-together tech aesthetic.
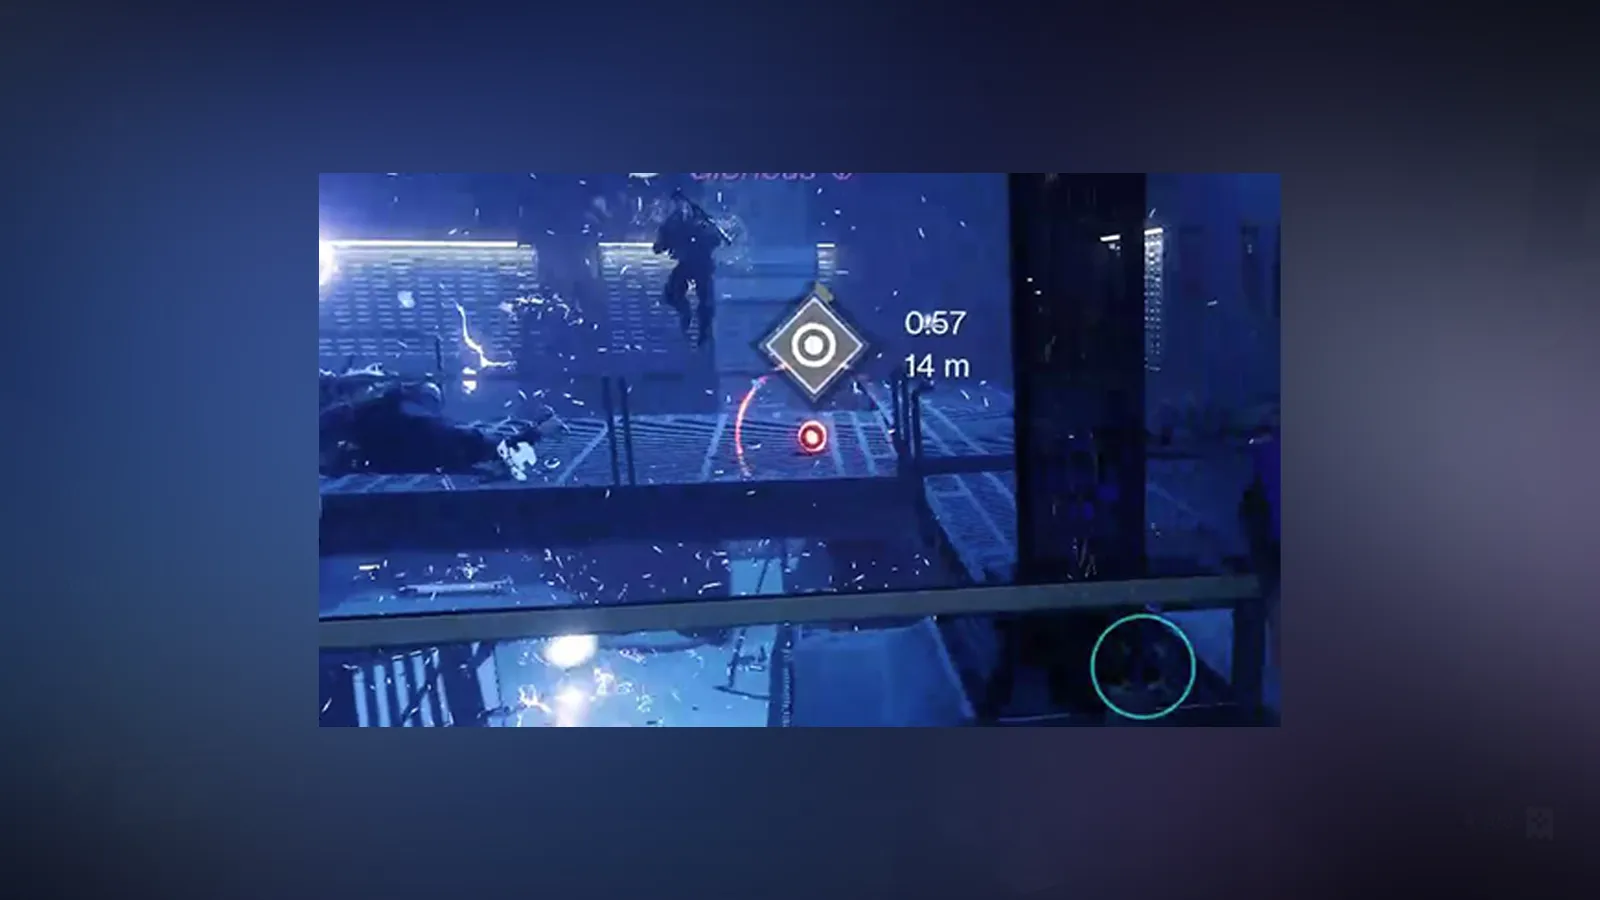
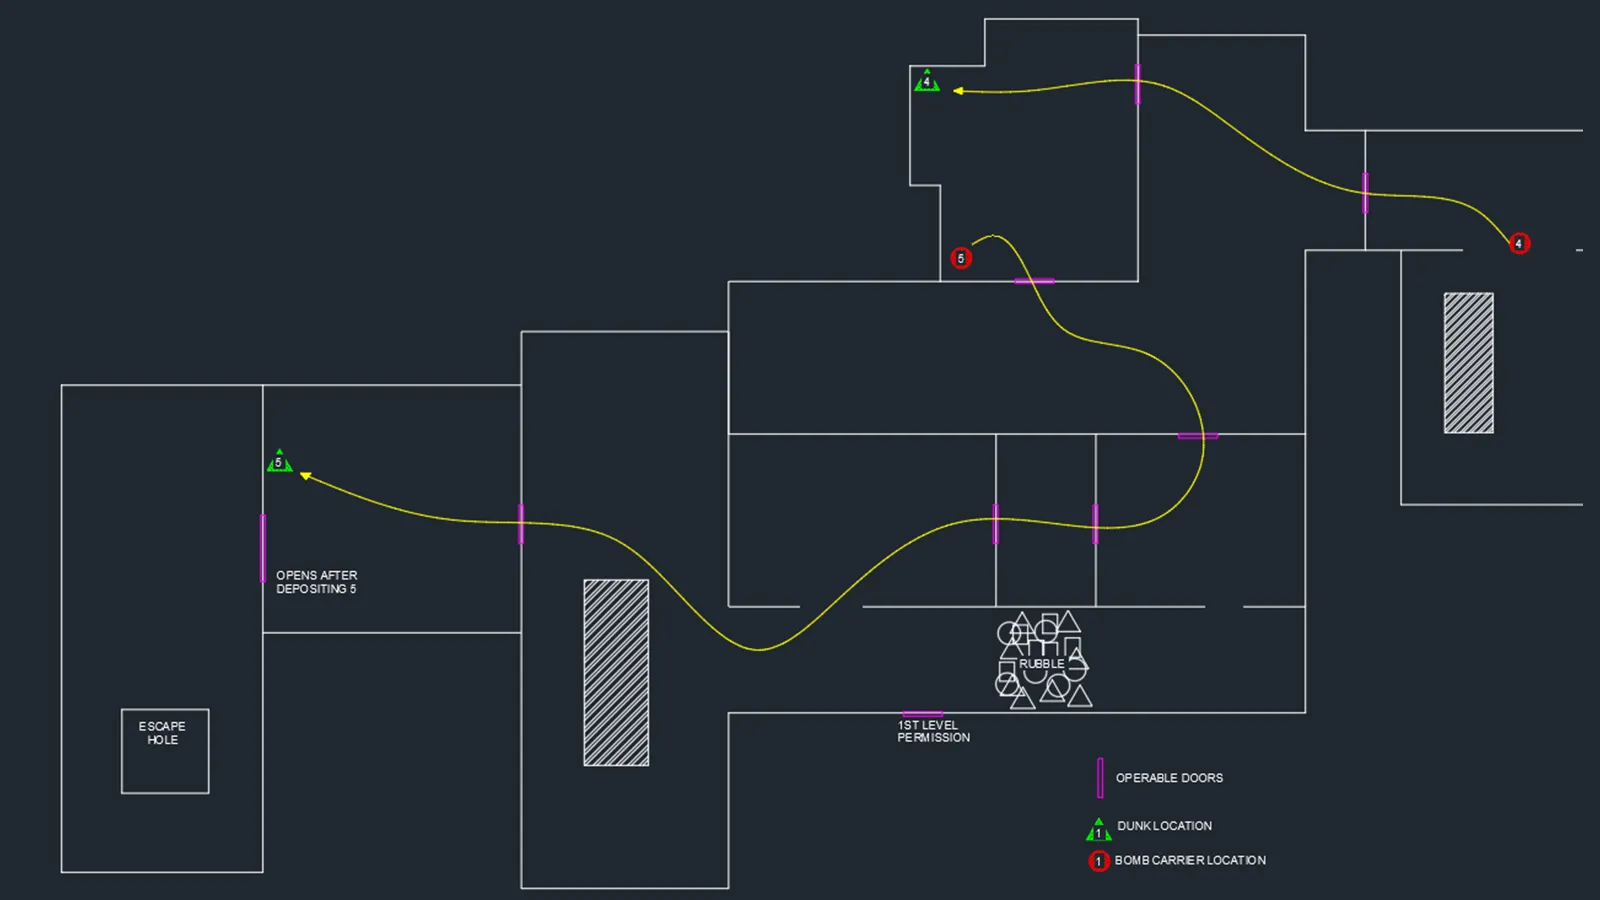
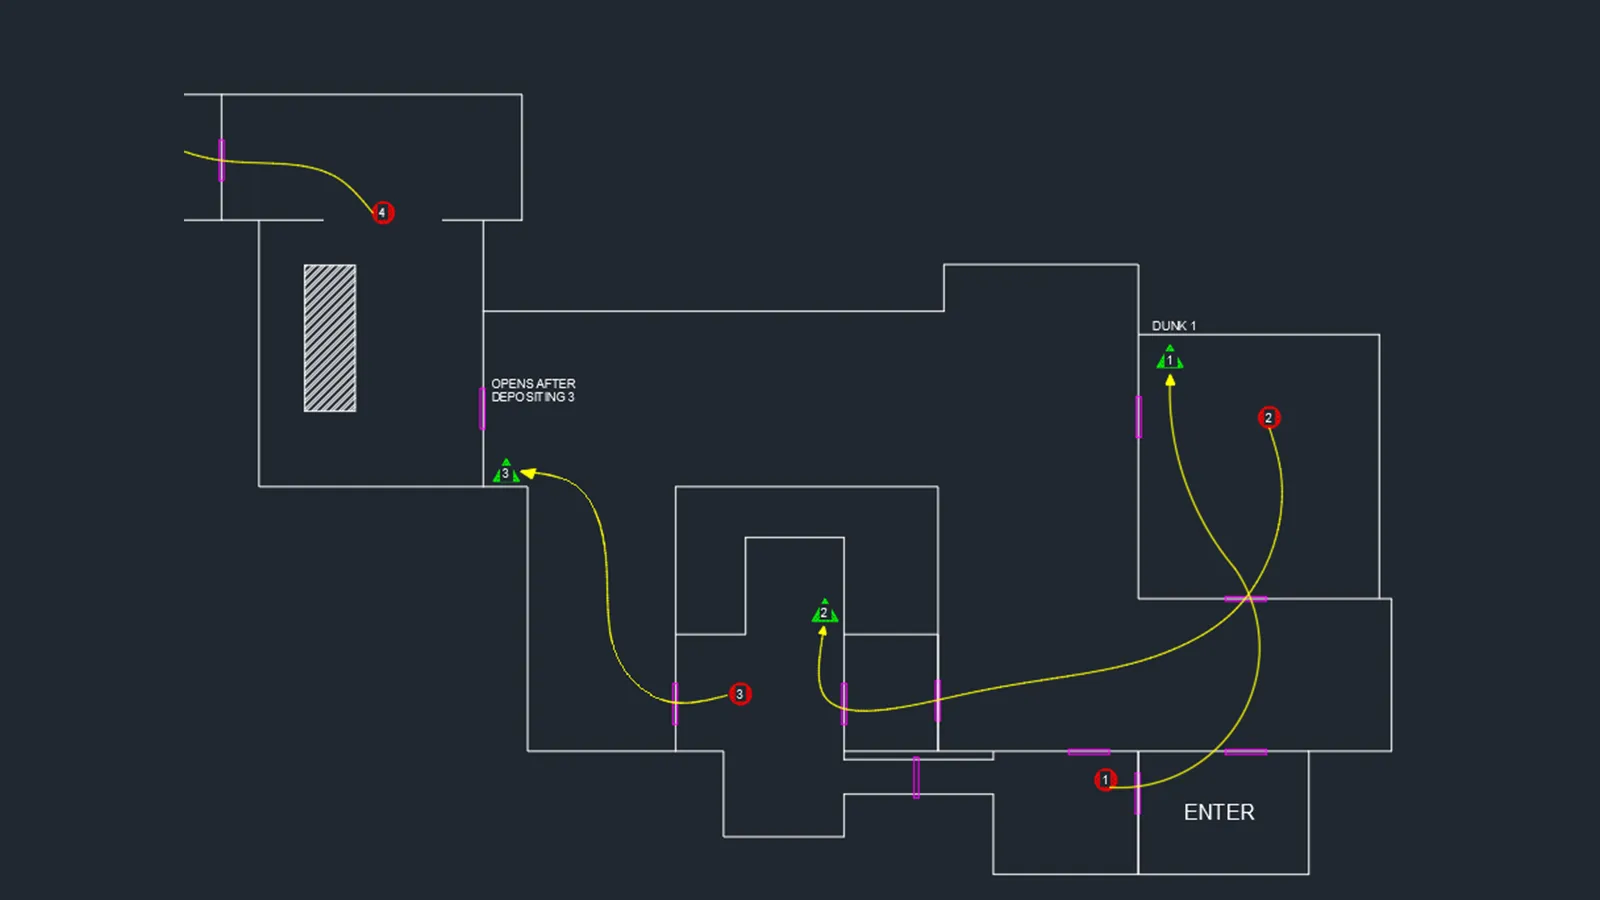
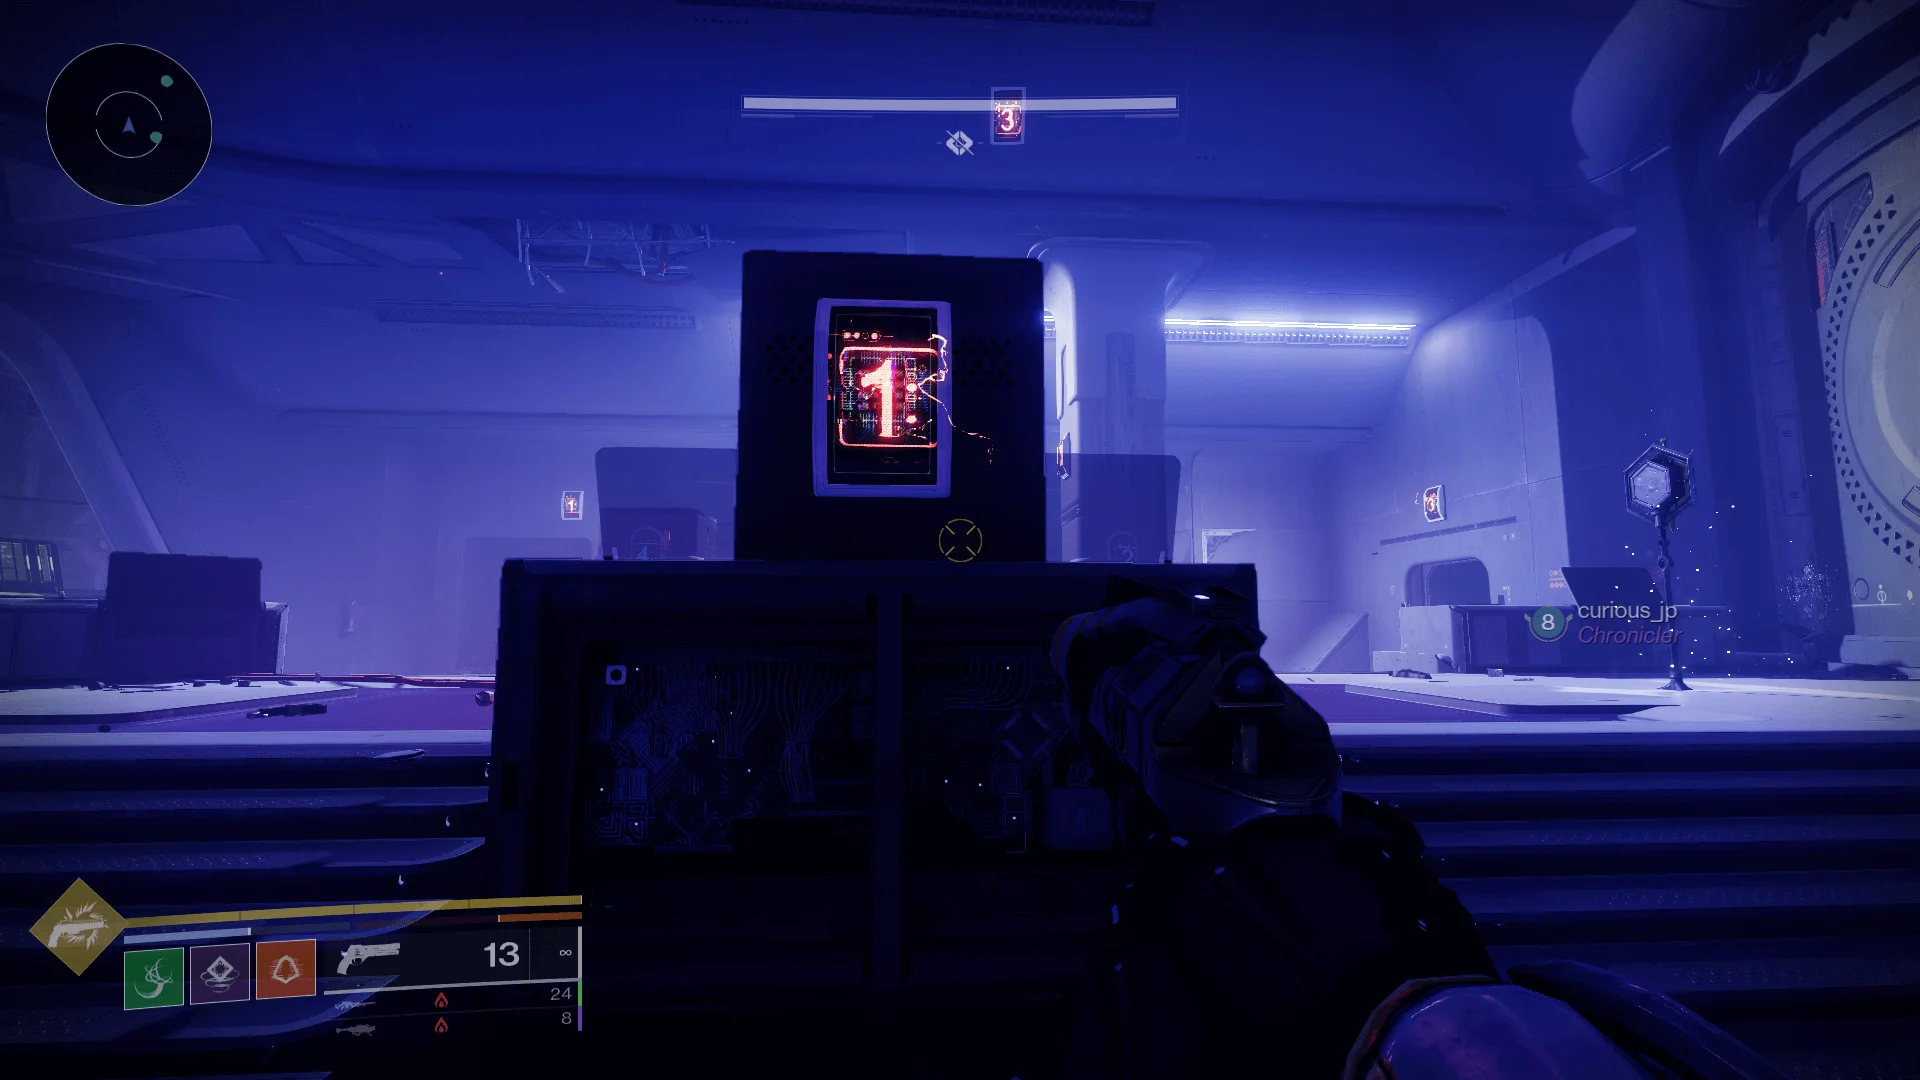
Though not immediately obvious, your goal in this following section is to drop 5 Nuclear Cores into 5 Containment Units each numbered 1-5. The first catch is that Raneiks (who is invincible) will be chasing you down the entire time. He has the ability to instantly kill a player if they linger in his line of sight for too long, so it’s important to keep moving or get into cover where he can’t see you. You’ll know he’s targeting you when you see the Integration affliction in the middle of your HUD. You’ll have 5 seconds to find a cover when you do.
The main mechanic here revolves around an encounter-specific ability called ‘Power Reserves’. If you look at your HUD, after interacting with the console, you’ll see that you have a new ability called “Power Reserves” with a total of four possible charges.
Interacting with the “Power Reserves Empty” door you saw previously after hitting Power Off on the console will show that you can spend a charge of “Power Reserve” to open the door, and get said chargeback when you close it.
Don’t go through that door though – conserve your power and instead run left past Raneiks, killing as many ads as you can. It’s important to move as a fireteam here, in order to survive as well as make opening and closing doors easier. Your goal here is to make your way down this hallway, left of the blue “3” panel, and kill the Fallen until one of them drops a Nuclear Core.
Grab the core and run back to near where Raneiks first spawned. You’re looking for a door near him which has a small set of metal stairs to the left of it.
Open that door and you’ll find the Containment Unit labeled ‘1’.
Deposit the Core into the Containment Unit, and another wave of Fallen should spawn right at their location. Defeat them to grab another Nuclear Core.
From here, it’s a fairly easy process of finding Containment Units 2-5. Every time you deposit a Nuclear Core another wave of Fallen will spawn to drop yet another until you finish at Unit 5. Dropping the first 3 Nuclear Cores will unlock the back section which will allow you to do the last 2, so it’s not as confusing as it seems due to the fact it’s more or less split in half.
Remember that when a player’s Radiation debuff is getting too high, you can pass the Nuclear Core around, and close a door after opening it in order to get your Power Reserve charge back to progress. Move as a team!
You can check out the map for this puzzle below, thanks to MyKidsAreOCD.
Encounter 2: Raneiks Unified – 1st Boss
Enough running, it’s time to take Raneiks out. Unfortunately, he’s still got a shield, so you’ll have to deal with that first.
You’ll notice in front of the Rally Point that there are several White Panels, each numbered from 0-9, for a total of 10. Take note of these panels, and their locations (they’re all grouped fairly close together) as like the previous encounter, you’ll need to shoot a specific 4. This time, however, your methods of figuring out which will differ slightly.
Begin the encounter and start killing enemies until once again, a Viral Carrier spawns. Kill it and grab its Operator augment, but deposit it in one of the Augmentation Stations nearby – you’ll be using it later, but not right now.
Continue to clear the room of enemies until you see a Machine Priest spawn. Take him down and Raneiks will teleport you classic Servitor style into a completely different area, where he’ll send a massive wave of Exploding and Resilient Homing Shanks at you.
Here you’ll want to clear the field of Shanks until you see a Viral Carrier Shank, who will be carrying the blue Suppressor augment. Kill it and grab the augment.
- Suppressor Augment: The Suppressor augment, like the others, functions a little differently here than in Deep Stone Crypt. When you pick it up, your Grenade ability will be replaced with the ability to drop a blue holographic decoy that can be shot until it detonates into an orange explosion, much like the Strand Hunter’s Threaded Spectre aspect.
Detonating the clone near the boss will cause the message “Raneiks loses strength in unity” to appear on your HUD. Raneiks Unified will then de-unify into 10 separate Raneikses (Raneiks’? Raneiskes’?), each numbered 0-9.
Get a good view of the multiple Raneikses. You’re looking for two specifically with glowing marks on their faces, that look like controller face buttons. The arrangement of the symbols themselves doesn’t matter – you need to take note of the number next to the name of the 2 Raneikses that have the glowing symbols, and then head back down into the main room.
So if Raneiks 8 and Raneiks 3 have glowing marks on their faces, then look for the White Panels with the numbers 8 and 3 down below. But don’t shoot them just yet.
You’ve got 2 numbers now, but you need a total of 4, so head back down and repeat the process, making a note of where you stored the Operator augment earlier. Kill enemies, the Machine Priest, get teleported and take note of the last 2 Raneiks numbers you need to complete your sequence.
Once you have all 4 numbers, get you or a member of your fireteam to grab the Operator augment. Match the Raneiks numbers to the White Panels from earlier and activate them with the Operator augment.
Activating the correct 4 numbers will allow you to initiate the damage phase, where Raneiks will teleport to the center of the room and begin attacking you. Like before when you got teleported, wait for the Suppressor Viral Carrier to spawn, kill it, and grab the augment. Use your Grenade ability with the Suppressor augment equipped on the boss like before, which will cause it to split into the 10 different Servitors once again, without its shield. Once Raneiks is split in the main room, he’s vulnerable, so deal as much damage to him as you can during this time.
Repeat this process until Raneiks and the Ranikeses are gone for good.
Order of Operations:
The fact that Raneiks 10 different Servitors makes him incredibly easy to hit with burst damage Super abilities such as Thundercrash or Nova Bomb. Due to the number of enemies you’ll be clearing leading up to damage, the Solar Exotic Grenade Launcher Parasite is also a good option, as it deals more damage based on the number of enemies you’ve killed before firing it.
You have a decent chunk of time to deal damage while Raneiks is split, so weapons that deal major damage over time in addition to burst damage such as the Exotic Rocket Launcher Dragon’s Breath is also a good option. Leave your Heavy Machine Guns at home unless you’re on enemy clearing (Except maybe Thunderlord).
Having someone run a crowd control Super to deal with the Shank phase isn’t a bad idea either – I personally used Prismatic Hunter with Silence And Squall and a class item with Spirit of Galanor to make that phase a non-issue.
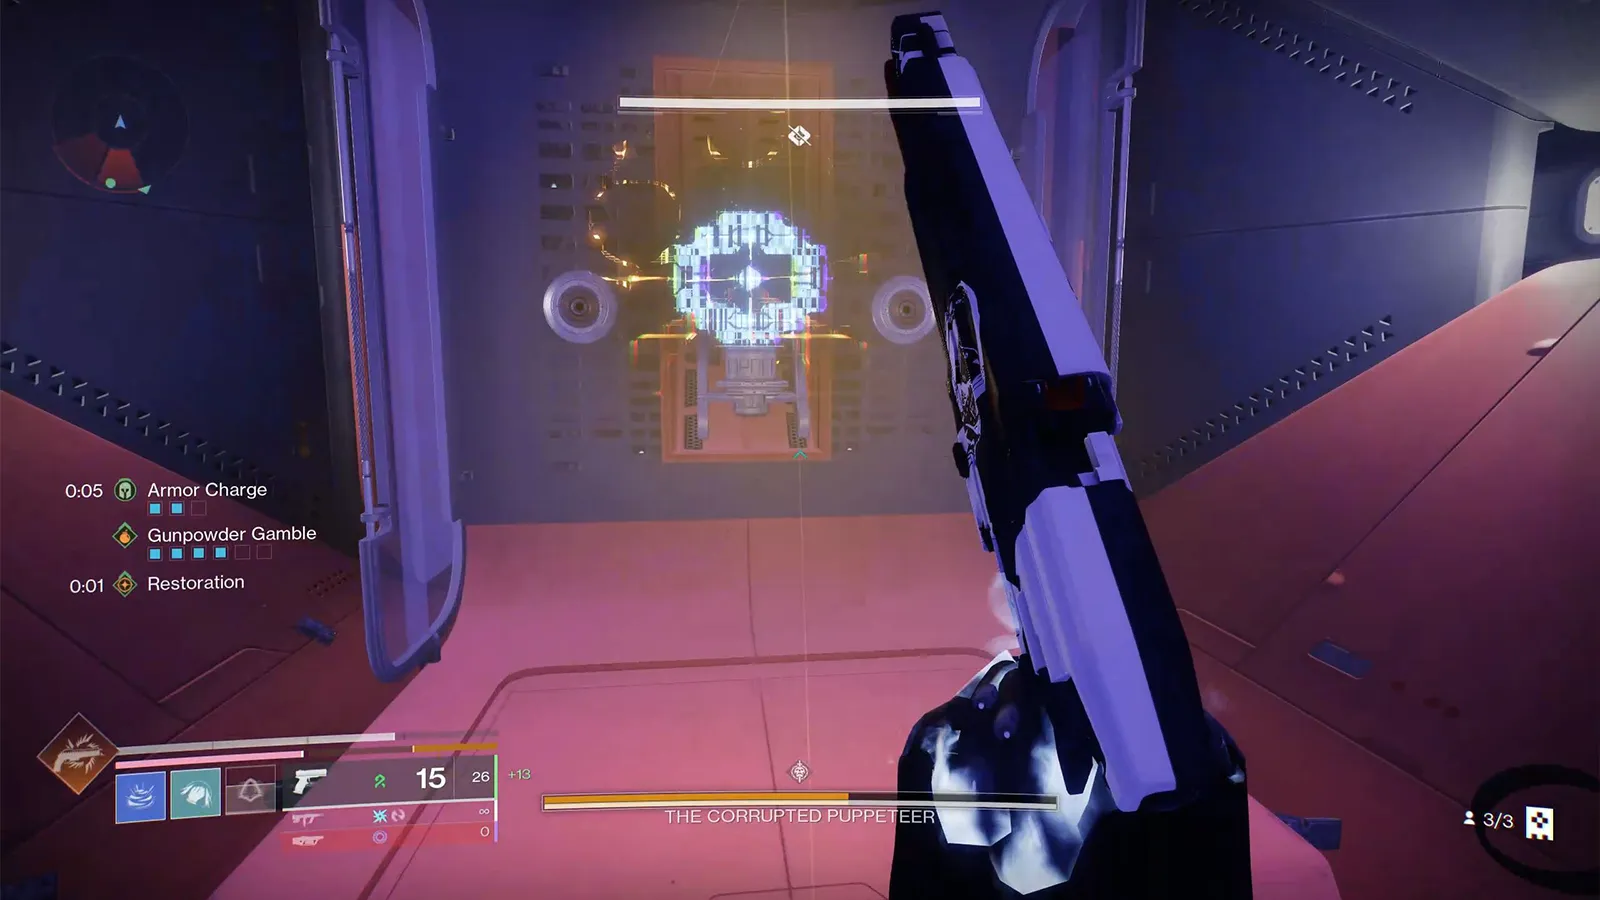
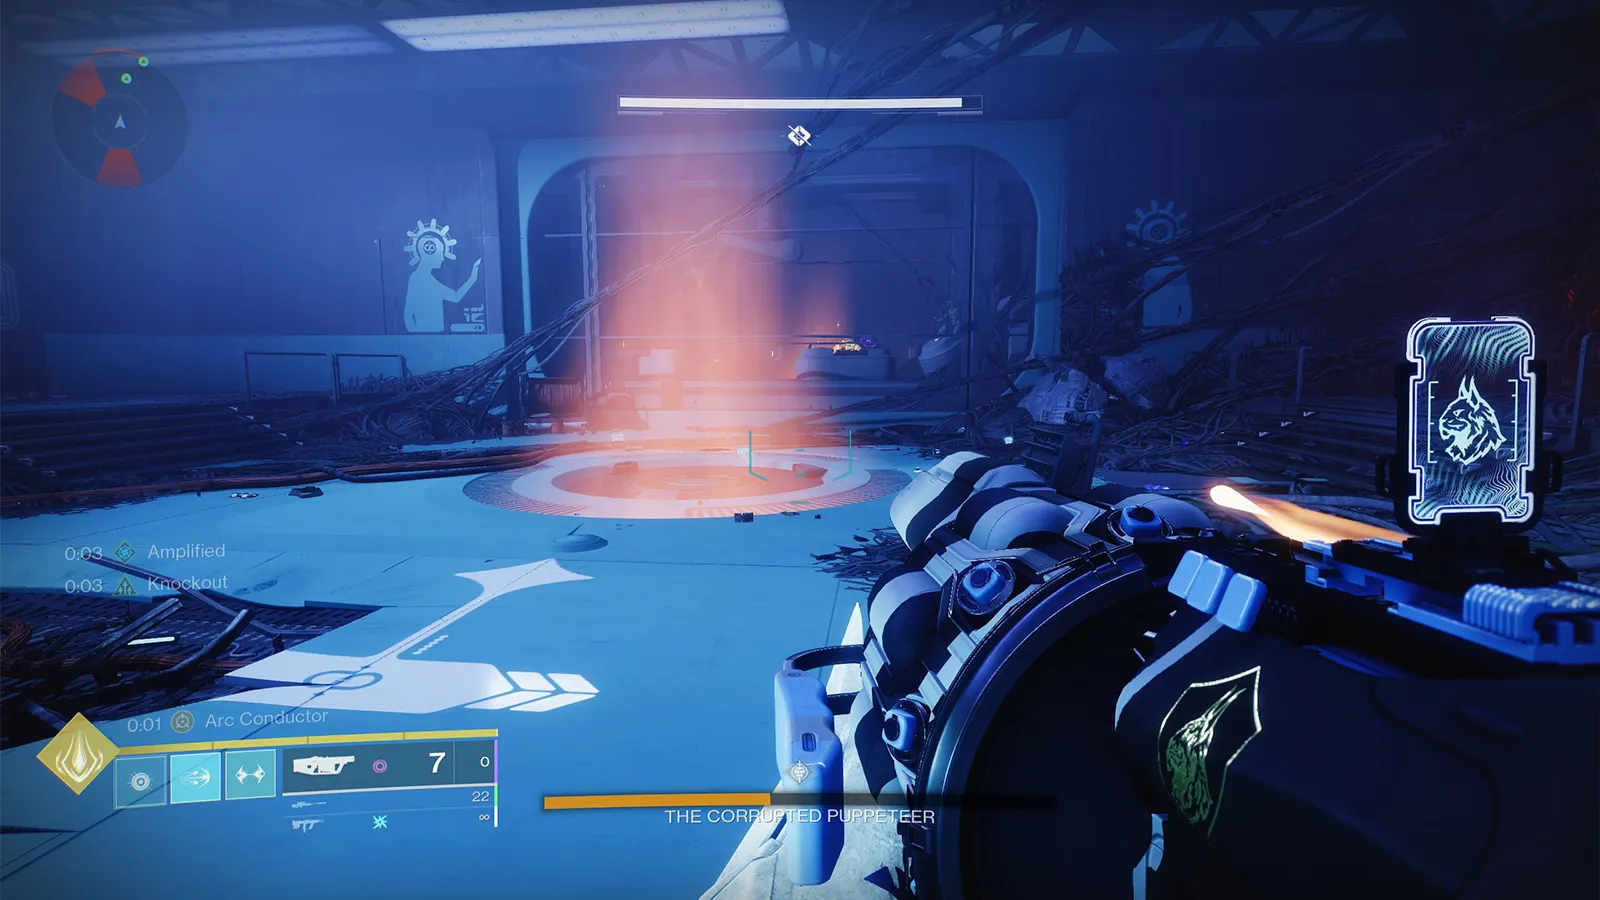
Traversal: The Corrupted Puppeteer
Great job, you’ve just got one more boss to go! But not before a mandatory platforming section.
What follows after Raneiks is a pretty straightforward, but treacherous traversal challenge. Follow the path across the broken (yet beautiful) derelict ships, avoiding the yellow lightning strikes littering your path.
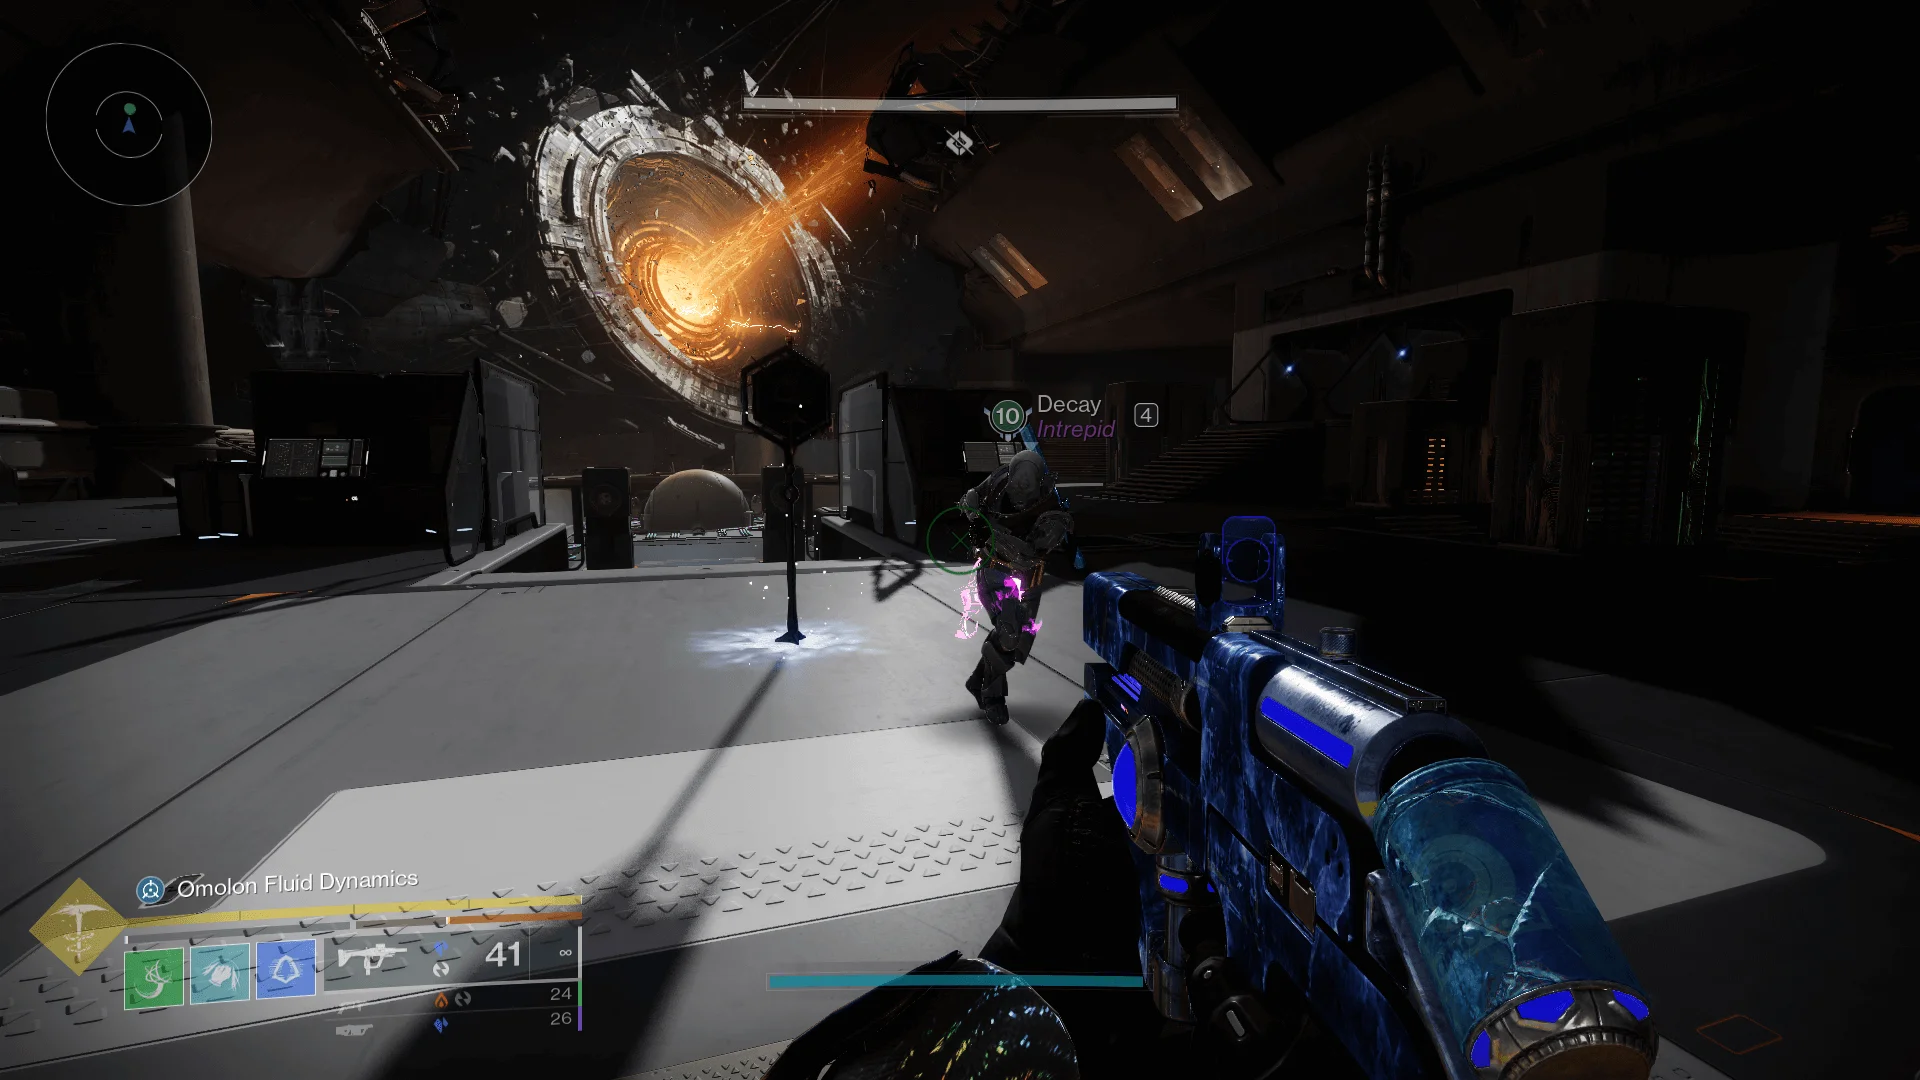
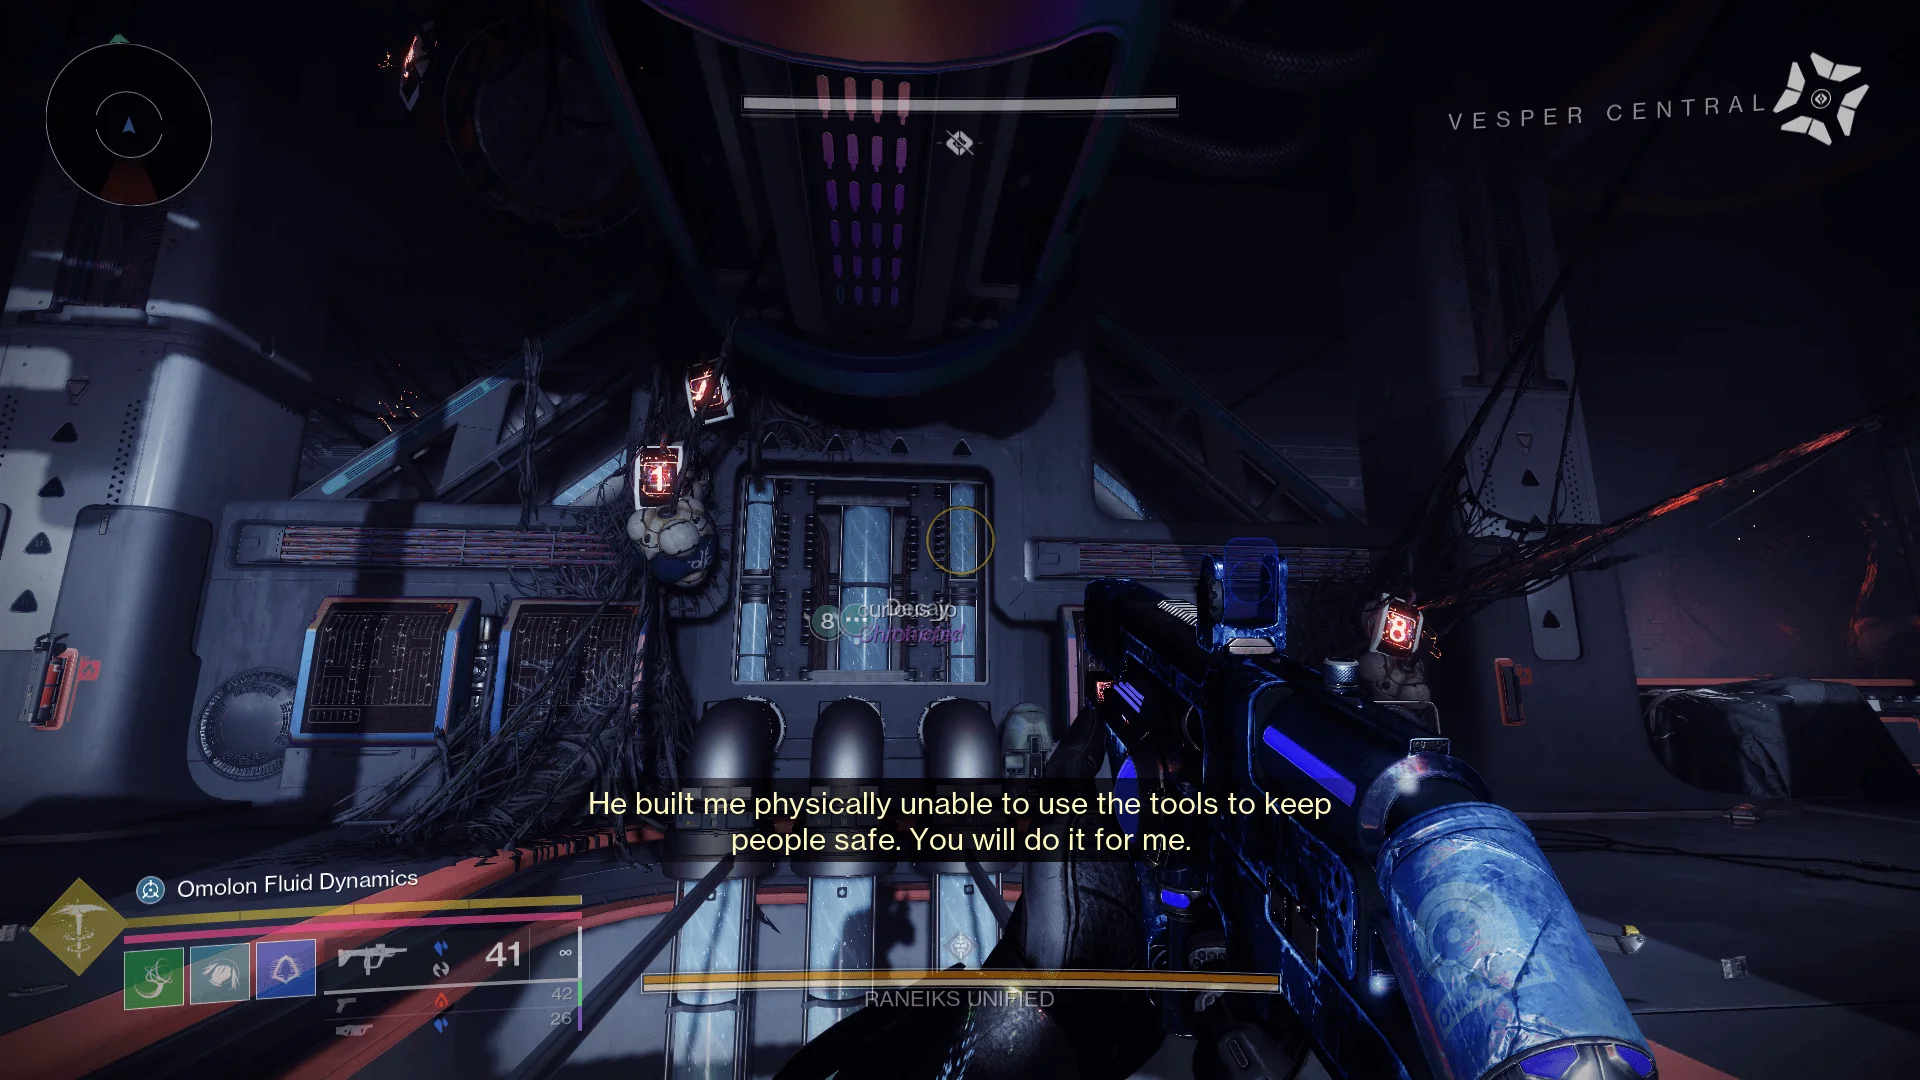
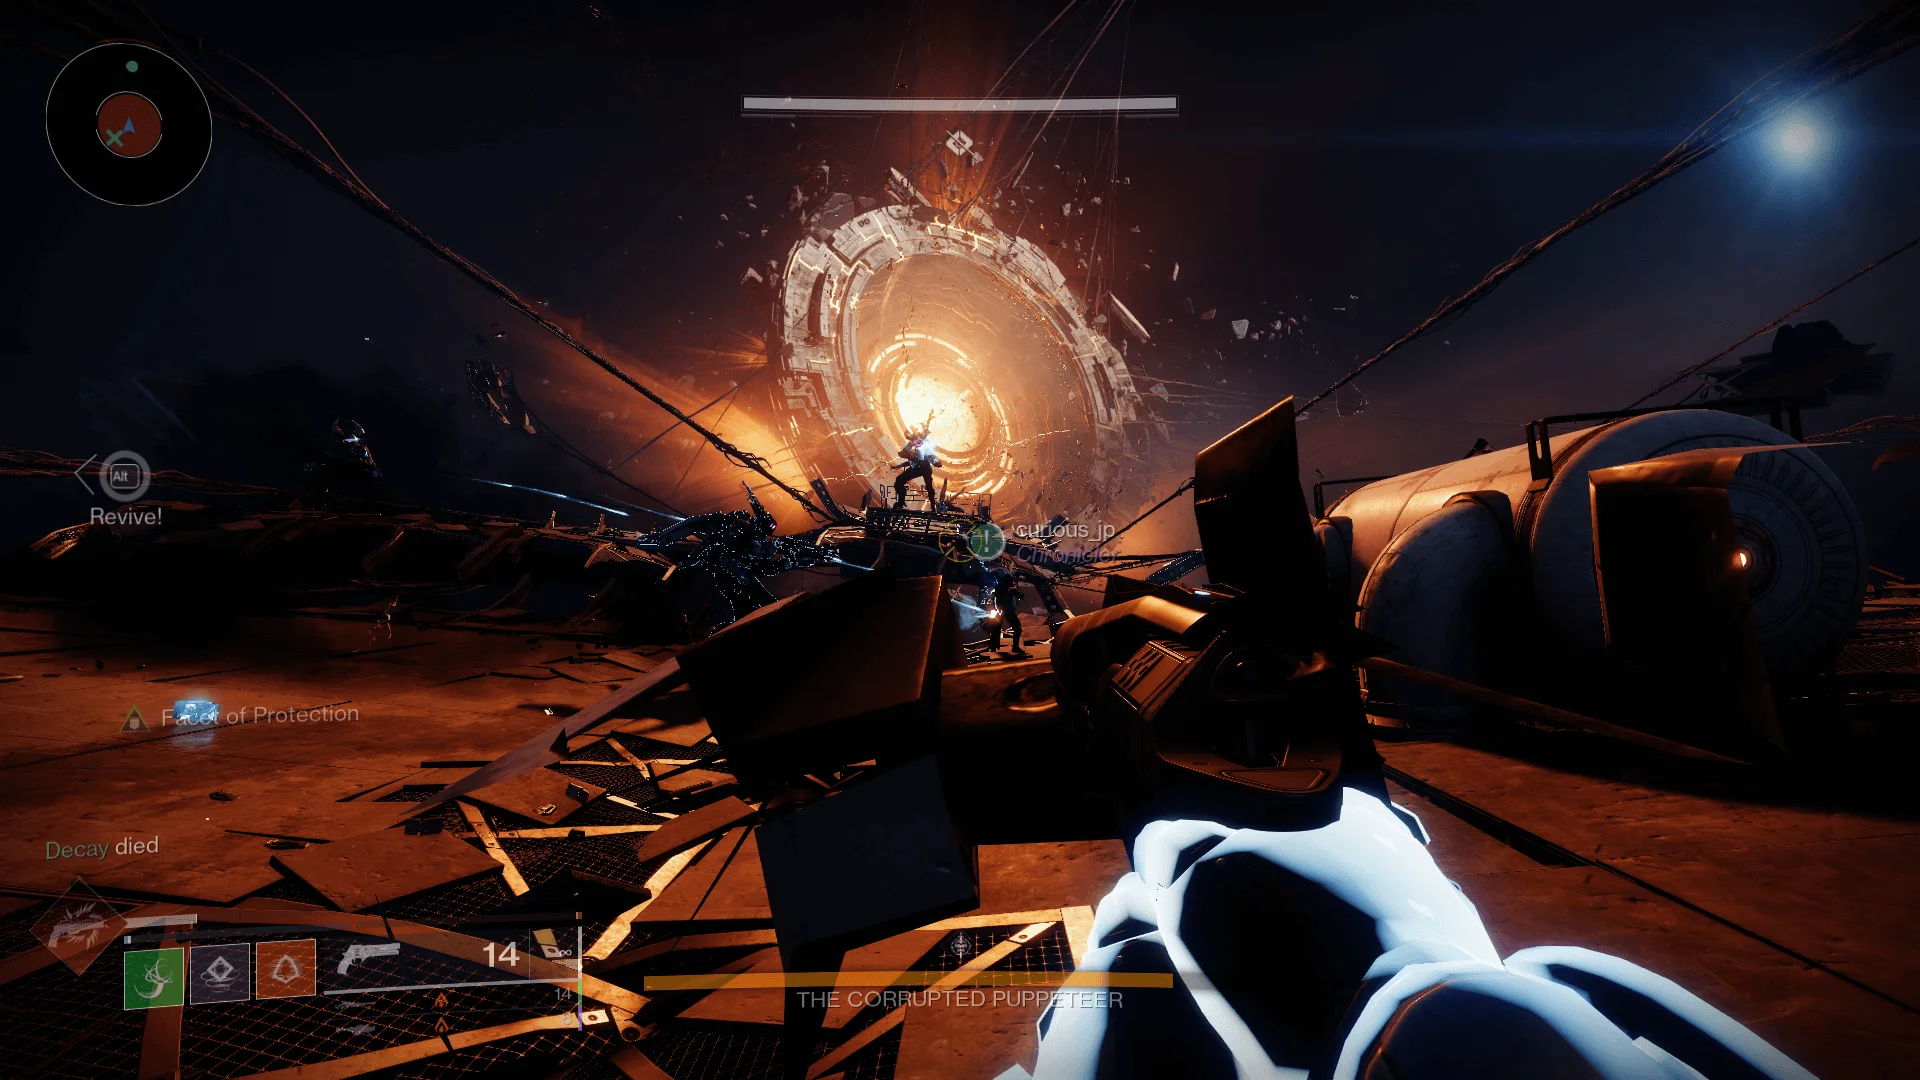
You’ll eventually get to a long girder leading to a room bathed in red light. Following this room will lead you to a familiar face, gazing at the massive orange portal from the dungeon’s marketing: Atraks! Making her third appearance after her introduction in Beyond Light and her rebirth as Atraks-1, Fallen Exo, in the Deepstone Crypt Raid. She’s been reborn as The Corrupted Puppeteer. Go say hi.
Upon approaching Atraks, she will teleport away as a charge begins to build in the portal. It’ll wipe your entire team if you stay, but it’s not a huge deal as you’ll respawn at the proper start of the encounter., But if you’re going for Flawless there’s an easy way around it.
Once Atraks teleports away and you hear the charge begin to build, turn around and look for a hole leading directly downward. Jump in and you’ll avoid the team wipe, and the doors in front of you should open directly into the encounter start, with the Rally Point just ahead.
Encounter 3: The Corrupted Puppeteer – 2nd (Final) Boss
As with most dungeons, the final encounter here will use all the gameplay mechanics that were present in the previous encounters. That means that once again you’ll be dealing with Augments, White Panels, numbers, and lots and lots of running.
Take note of the Blue number panels similar to the Containment Unit numbers from the puzzle door section leading up to Rameiks, numbered 1-4
You’ll also notice that the room is covered in White Panels, a total of 16, each set similarly being made up of White Panels marked 1-4. So there are a total of 4 White Panels marked as 1, 4 White Panels marked as 2, and so on.
Initiate the encounter by shooting the purple ball ahead of you, which will spawn Atraks into the room. She’ll bring with her two clones, or Puppets, which you’ll be notified of when the message “The Corrupted Puppeteer forms new puppets” pops up on your HUD.
These Puppets are incredibly dangerous, as not only will they chase you down and deal massive amounts of damage, but they emit an aura that causes you to gain stacks of the Radiation debuff incredibly quickly. They’re also invincible while they have a shield, but you’re gonna fix that.
You can deal with the Puppets the same way you dealt with Rameiks. Keep clearing enemies, avoiding the Puppets, until you see a Suppressor Viral Carrier spawn. Kill him, grab the augment, deploy, and detonate the blue decoy with your Grenade ability to render the Puppets vulnerable. Their Radiation aura will also disappear during this time, so don’t be afraid to get up close and personal to wipe them off the map.
Once you kill the first set of puppets, Scanner Operator Viral Carriers will spawn into the arena. What happens next is fairly simple but a little tricky due to Puppets chasing you down and the enemy density of the room.
With the Scanner augment, unlike encounters previous, you will be scanning the Blue number panels in the arena. They will appear on your minimap just like the White Panels. Once you have found the correct Blue number, then your teammate with Suppressor to kill another set of puppets to spawn the Operator Viral Carrier. The player with the Operator augment then needs to shoot the corresponding set of 4 White Panels that share their number with the Blue panel.
So if you approach the number Blue number panel with “3” on it and it turns from orange to white, just like the White Panels from encounters previous, then the player with the Operator augment has to shoot the 4 White Panels that have the number “3” on them.
Once you’ve shot the correct set of White Panels, an alarm will sound, and four doors will open at each corner of the room. Between each door is a set of 3 red alarm lights. Look for the side of the room where the alarms are activated and go through the doors on that side. Make sure you deposit the Scanner and Operator Augments into the Augmentation Terminals before leaving. This will make them slightly easier to get to the next part of the encounter. You can bring Suppressor with you due to the fact you’ll be running into Puppets.
Your goal in this next section is to keep running toward rooms where you can see the 3 alarm lights have been activated. You’ll be met by another wave of enemies as you drop down as well as more Puppets chasing you. Run from the Puppets and clear the enemies, looking for the flashing red alarm lights. You’ll know you’re where you need to be once you enter what looks like a control room with Atraks inside of it.
You’ll be doing more augment juggling here, once again in a slightly different order. If you deposited your Augments into the Augmentation Terminals after the first part of the encounter, they’ll be down here in the corresponding terminals for you to use. If not, you’ll have to hunt down a Viral Carrier that will spawn somewhere in the area near you to claim your Augment, so it’s much easier to have them ready to go by depositing them up top.
Grab the Operator augment. Once again, this room has 4 White Panels that must be shot, but there’s a total of 4 of these, so you just have to shoot all the White Panels you see. Their positions are a little tricker down here, so keep looking until you find them.
Once you’ve shot all the White Panels, Atraks will summon more puppets into the area with the message “CLEANSWEEP PROTOCOL ACTIVATED|SECTOR PURGE IMMINENT” will display on your HUD. Deposit your Operator Augment and get either you or a member of your fire team to pick up the Scanner augment.
Unlike the other encounters, you’ll be using the Scanner augment on your enemies, in this case, the Puppets that Atraks spawns as part of the Cleansweep Protocol. They’ll be marked in orange on your minimap just like the blue and white panels, so you’ll need to get close in order to check which one has to go down. Remember to play safe, as the Radiation affliction aura from the Puppets still applies here. Killing the wrong puppet here will initiate a countdown to a team wipe, but you can avoid it if you find the correct one and kill it quickly.
Note
While the Suppressor augment is useful in defeating the shielded Puppets that chase you down, you don’t actually need it to finish this part of the encounter. The Puppets that Atraks summons after you shoot all the White Panels are unshielded, so once you identify the correct Puppet, put it down.
When you’ve killed the correct Puppet, it will drop a – you guessed it – a Nuclear Core. A set of doors should open in the room you’re in that lead to a Containment Unit. Before heading into the Containment Unit room with the Nuclear Core, deposit your Augments into the terminals. Entering the Containment Unit room will remove all your Augments and you’ll have to kill a Viral Carrier again to get them. You’ll be doing this again in a bit and it’s easier to keep them around.
Once you’ve deposited the Nuclear Core into the Containment Unit, the doors around you should lock and Atraks will lose half of her shield. The doors will then open, and you’ll have to find her again.
Follow the red alarm lights as you did before, and you’ll find yourself in a similar room on the other side of the map with a Containment Unit in a locked bunker and 4 White Panels. Repeat the process you did in the previous room, first activating all 4 White Panels with the Operator, then using the Scanner to figure out which Puppet to kill for the Nuclear Core. If you deposited your Augments in the previous room, they’ll be here too.
Once you’ve deposited the last Nuclear Core and Atraks’ shield is gone, run back to the middle section where you dropped down from the Rally Point room. There should be a glowing orange circle in the center that will teleport you back upstairs. Once there, turn around and head into the elevator in the back of the room which will shoot you upwards into the beginning area of this encounter, where Atraks was staring at the orange portal.
Once you’re outside, you’ll finally be able to damage Atraks. You’ll want to keep moving here, as the same lightning strikes from the run-up to the Boss encounter will be here and do quite a lot of area-of-effect damage. Focus on survival while maintaining a decent damage output.
Atraks herself will be stationed on the middle platform, but she will summon more and more Puppets to overwhelm you. It’s quite possible to lose her in the number of Puppets she spawns, so keep on here and deal with them as you see fit. Eventually, she’ll summon a larger wave of Puppets, which you’ll want to wipe as one of them will drop another Nuclear Core.
Once that core is dropped, Atrax will begin her wipe mechanic again as she did at the start of the encounter. There’s a bunker to the left of the core, much like the ones you used to destroy Atraks’ shield. Here, however, depositing the Nuclear Core will close the blast doors and allow you to survive Atraks’ instant kill.
The fight’s not done yet as you will be continuing the damage phase, but with an added element of safety as you now have cover to hide from the spawning Puppets. Continue to damage Atraks as best you can. When she begins to charge her instant kill again, simply drop down into the hole you were shot out from and back into the Main Room.
From here, you’ll repeat the same process until Atraks is no more. There are a lot of moving parts to this, so be patient and communicate clearly with your teammates. Grenade Launchers are an excellent option to keep decent DPS whilst moving, as are Rocket Launchers and even certain Snipers due to the distance you’ll be doing DPS.
Order of Operations:
Don’t lose hope, and you’ll find you’ve conquered Vesper’s Host. Good luck out there, Guardians.
If you’re looking for the complete loot table for the Vesper’s Host dungeon, we have a dedicated article that you can check out here.